'Do not Disturb' is a feature that helps you manage all types of incoming notifications and how you would like to receive them. Updating your device to the new iOS version (including iOS 16/15/14/13) might cause this feature not work. If this happens to you, this article will provide you with all the fixes you need to solve this issue.
1. At First, Try Some Basic Troubleshooting
Before making huge changes to your iPhone, the first step you need to take if the 'Do Not Disturb' feature fails to work on your device after updating to iOS 16/15/14/13 is to do some basic troubleshooting. You can start with the following:
- Make Sure Do Not Disturb is Turned On
To turn on the Do Not Disturb feature, go to Settings > Do Not Disturb and then enable Do Not Disturb.
- Restart Your Device
Turn off your iPhone and then turn it on the back again and see whether the feature Do Not Disturb works.
- Reset All Settings on Device
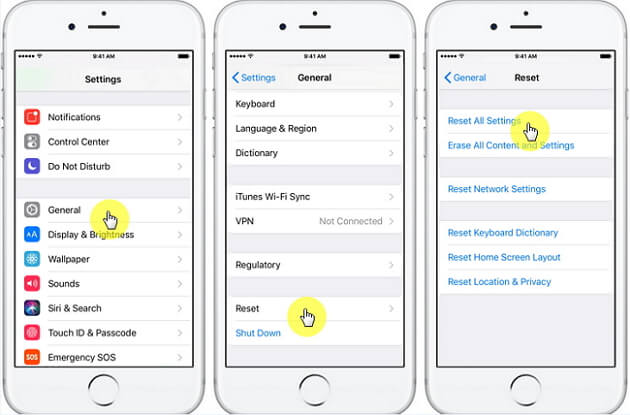
To reset your iPhone's settings, go to Settings > General > Reset > Reset All Settings.
2. Solve Do Not Disturb Not Working on iPhone by Fixing iOS
The Do Not Disturb feature might not work on your iPhone because of operating system issues. Many iPhone users complain about iOS problems like system corruption, iPhone stuck, iPhone data disappear, and black screen of death after updating their devices to iOS 16/15/14/13.
The best way to fix such a problem is to use iOS repair software such as iMyFone Fixppo. This tool fixes many iOS system errors, including Do Not Disturb Not Working of course, in just a few steps. Available for both Windows and Mac, the iOS repair tool has three different modes to fix various issues and support all iOS Devices.
- Simple to use-Fix the issue only with a few clicks
- Highest recovery rate-100% works for all kinds of iOS issues
- Full compatibility-Allow you to fix iOS/tvOS without Data Loss
- Worthy of Trust - Recommended by many individuals and websites, such as Macworld, Cult of Mac, and so on.

How to Fix Do Not Disturb Not Working by Repairing iOS?
To repair your device's iOS using iMyFone Fixppo, you can use its standard mode to fix your iPhone without any data loss. Follow these simple steps:
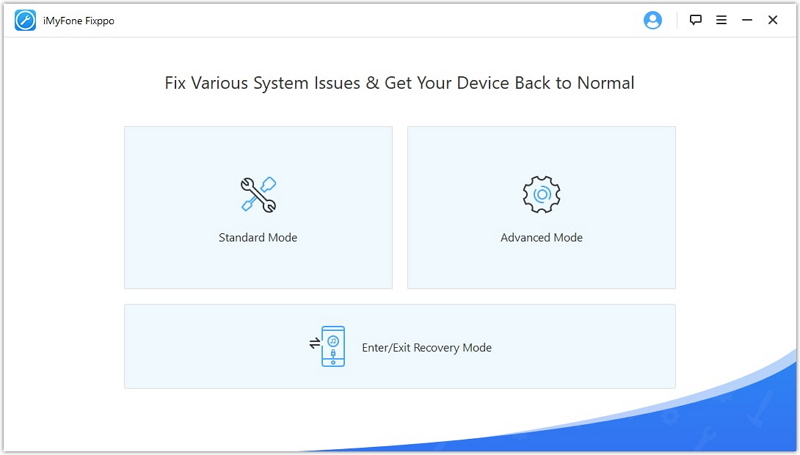
- Install and launch iMyFone Fixppo on your computer. Connect your iPhone to your computer and choose Standard Mode.
- Set your device to DFU (Device Firmware Update) mode. For iPhone 8 or later models to do this, press and hold the Home and Sleep/Wake buttons for 8-10 seconds. Release the Sleep/Wake button but continue holding the Home button for around 5 seconds.
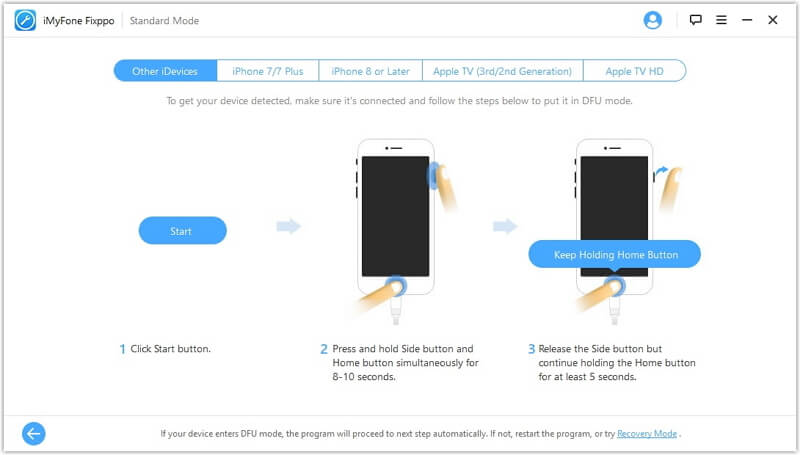
- If your iPhone fails to enter the DFU mode, you can set it to Recovery Mode instead. To do this, press and hold Home and Sleep/Wake buttons simultaneously until you see Connect to iTunes on your device.
- Once your iPhone is in Recovery Mode or DFU Mode, the next thing you have to do is download the firmware for your iPhone. This will happen automatically after you click the Download button.
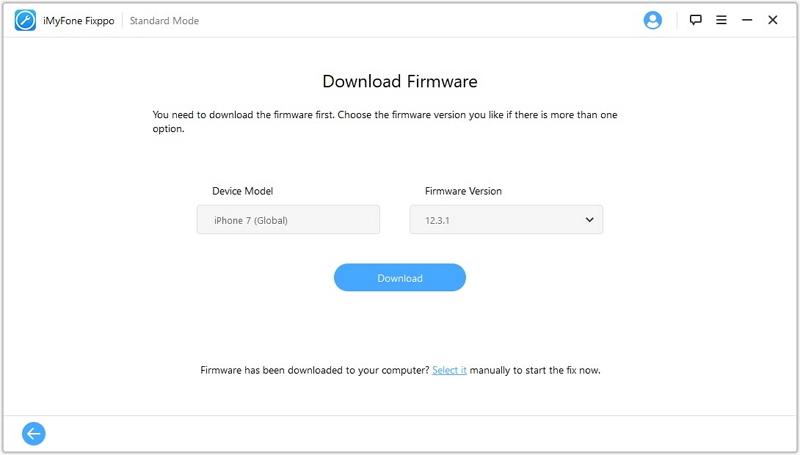
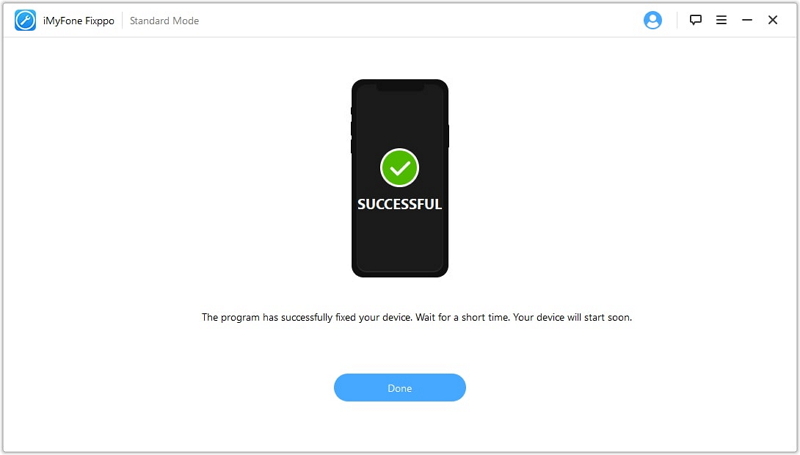
- When done installing, click on 'Start to Fix' and the software will repair your iPhone automatically.
3. Reset Restriction Settings to Fix Do Not Disturb Grayed Out
If the Do Not Disturb feature is grayed out and you cannot enable or disable it, you need to check your Restriction Settings to see whether the feature is restricted or not. Follow these simple steps to change these settings:
- Go to Settings > General.
- Go to Restrictions and then Enter Passcode.
- Scroll down to Do Not Disturb While Driving and tap on Allow Changes.
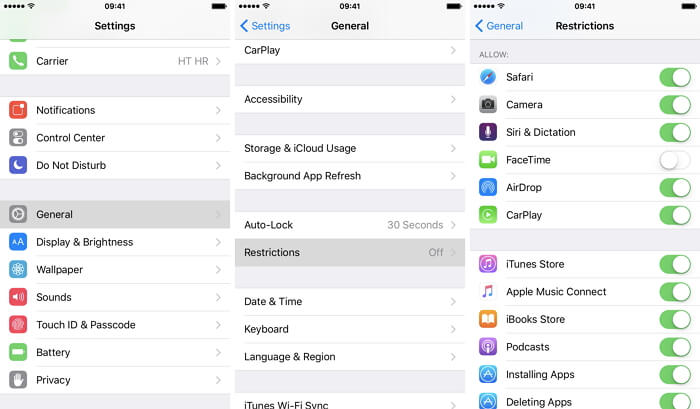
Doing this should activate the Do Not Disturb feature, allowing you to control how you would like to receive notifications.
4. The Last Recommended Way – Factory Reset Your iPhone
If the stated techniques fail to fix the problem, consider doing a Factory Reset on your iPhone. Although this process might see you lose data if you do not back up, it is still a good way to fix iOS issues. This part of the article will provide you with information on how to reset an iPhone to factory settings to solve the Do Not Disturb not working after updating to iOS 16/15/14/13. Here are the steps to go about it:
- Before resetting your iPhone
- to factory reset, back up your iPhone so that you can still have your data.
- After backing up, reset your iPhone by going to Settings > General > Reset > Erase All Content and Settings.
- Enter your passcode and Apple ID password to confirm the action.
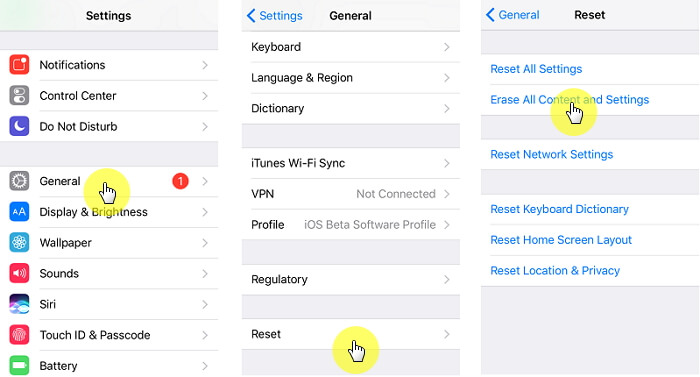
Your iPhone will delete everything, fixing the Do Not Disturb not working issue. BTW, you can restore the backup to your iPhone and your data will be back.
The Do Not Disturb feature is supposed to help you eliminate distractions when you are trying to concentrate on a task. However, updating your iPhone to iOS 16/15/14/13 could cause the feature not to work correctly. If this happens, use the aforementioned tips and they should help fix the issue.


 February 8, 2023
