Not being able to add bookmarks to your browser could be a very bad situation. One of the main purposes of bookmarks is getting to your favorite pages when you want them or being able to store important websites with long strings of URL that you may not be able to commit to memory. The uses of the bookmark are indeed endless. A bookmark is simply a browser tool that allows you to save links to webpages. There are indeed many web links on the internet that sweeping through them to the one you really want to go to could be quite a task. It is in this way that bookmarks are tools a constant surfer of the internet cannot do without. Over the years, some browser features and add-ons like Saved Web Pages and History have tried replacing the bookmark function in our web browser, but most have often failed at doing that basic simple thing bookmarks do for us.
You could face these embarrassing situations if you are not able to bookmark on your iPhone/iPad safari browser: you may lose track of your collection of important web pages; not being able to reach a particular page for info in the case of an emergency because you can’t remember the direct address; failed deadlines because you couldn’t reach the website that has all the information you need for that presentation. The list of the embarrassing situations that one could face goes on and on.
But do not fret. Here are the tips and fixes for the problem.
Prerequisite of The Fixes
Please remember that before you apply the fixes to your iDevice, make sure to make a full backup of your iPhone or iPad. That is exactly the reason why iMyFone D-Port Pro comes in. It is the best platform to perform a backup and restore function. One of the features of iMyFone D-Port Pro is that you can selectively back up what you want, instead of backing up unnecessary files and folders. iMyFone D-Port Pro really gives the users the best autonomy at selectively backing up and restoring files. Also with iMyFone D-Port Pro you can extract more than 20 different types of data from your iOS devices.
Fully Back up Your Device Before Fixing
D-Port Pro always makes your data secure. Backing up with D-Port Pro is the very first thing you are supposed to do before fixing.
Step 1: Please know that before you begin the backup function, you must have installed this program on your computer, as it would help in the processes you will have to follow in doing a stress-free and complete backup.
Step 2: From the launch user interface, choose the button marked Make a Full Backup.
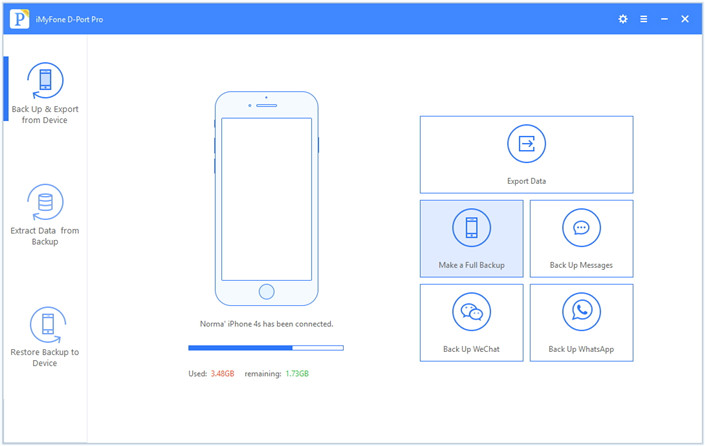
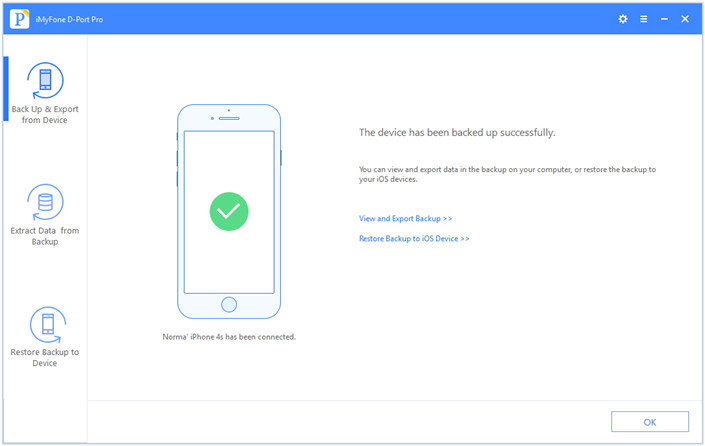
Step 3: After you’ve confirmed to continue, the backup process will move on automatically. Once it completes, you are allowed to view or restore your backup.
Only Back up Important Data (Messages/WhatsApp/WeChat) before Fixing
If you do not want to make a full backup, you can only choose the very important data to back up for future use. Doing this will prevent the situation where you select all files and thereby slowing down the process unnecessarily. Below are the steps to backing up WeChat data:
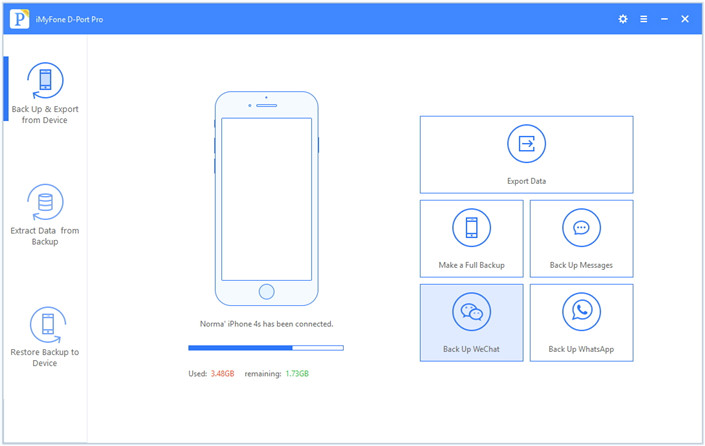
Step 1: Click on the button with the name Back Up & Export from Device from the left panel, then click Back Up WeChat.
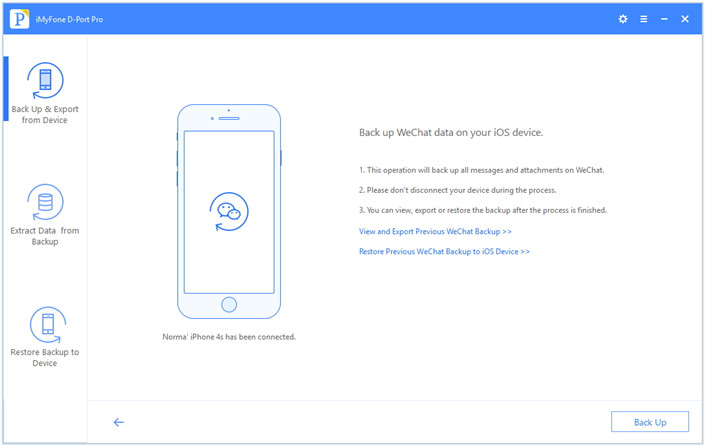
Step 2: The previous step should take you to the next screen. On the screen, click Back Up then proceed. After this, the backup process will begin. Please ensure your device is connected all through this process.
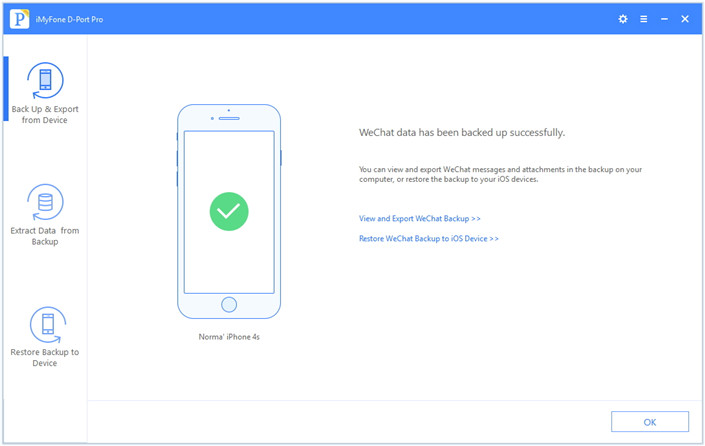
Step 3: Immediately the process is completed, you will receive a notification which shows the WeChat backup was successful.
Fix 1: Clear Safari Browser Cookies on iPad/iPhone
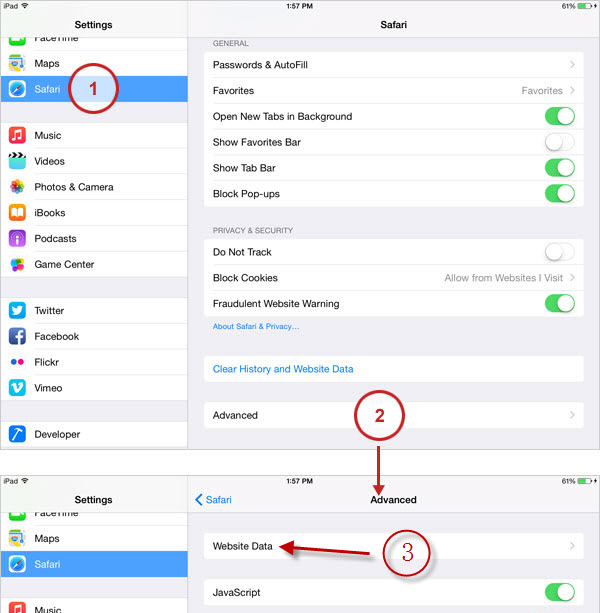
Step 1: Open your iPhone settings and go to the left side of the menu to choose Safari.
Step 2: Now that you are in the Safari settings, scroll to the Advanced option of the browser and click on it.
Step 3: On the page, click on Website Data. On the Website Data page, you have the option of clearing cookies of a particular website or of all websites. Click All Website Data since we are wiping out all the browser’s cookies. After you’ve done this, your Safari browser should be free of all cookies and after this, reboot your iPhone/iPad.
Fix 2: Wipe All Safari Browser History on iPad/iPhone
If fix one doesn’t work for you, don’t fret, here is another fix you can apply.
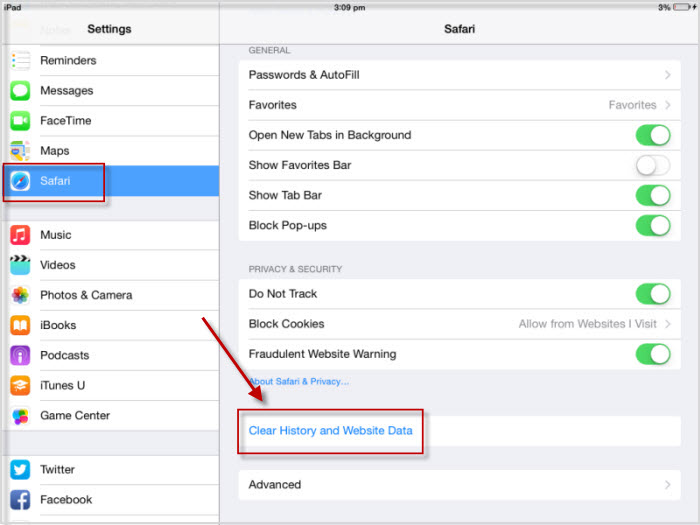
Step 1: From Safari setting, click on Clear History and Website Data. This button should be right below the Privacy setting button.
Step 2: On clicking on Clear History, an authentication box will pop to confirm your choice, click on Clear. Wiping out your Safari Browser History is a more thorough cleaning than clearing your browser’s cookies out.
Fix 3: Restore Safari Browser iPad/iPhone Safari Browser
Please turn off your iCloud first before we go into the processes.
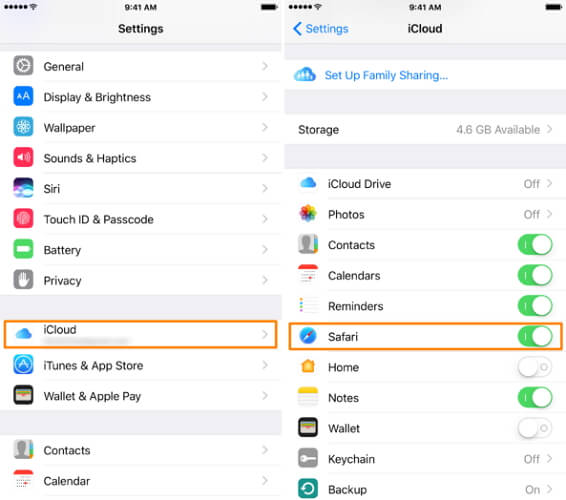
Step 1: Go into your iPad/iPhone setting.
Step 2: Now on the left-side menu, scroll to where you have the iCloud setting and click on it.
Step 3: Now in the iCloud setting, go to where there is Safari. If it is turned on, turn it off.
Step 4: After all that is done, reboot your device. When the bookmark is fixed, you can turn iCloud on again.
Applying fixes 1, 2 and 3 might make you lose your Safari browser history and data, but don’t worry, iMyFone D-Port Pro has you covered. Please note, before applying any of the fixes, you firstly must back up your data. iMyFone D-Port Pro will restore your backup files to your device after the fixes. Although for now, you cannot only back up and restore Safari bookmark, this will be supported soon.
Tips after Fixing Cannot Add Bookmark to Safari History
Restore Full Backup to Your Device
This doesn’t take long to do. You will be amazed at how the process goes through.
Step 1: On the panel, choose Restore Full Backup. But before you do this, make sure your device is connected to your computer.
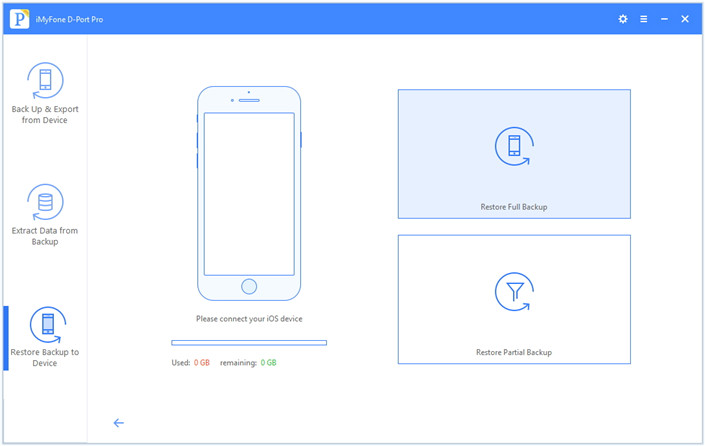
Step 2: The next page will show that your device is fully connected. Then click on the Next button to begin the process.
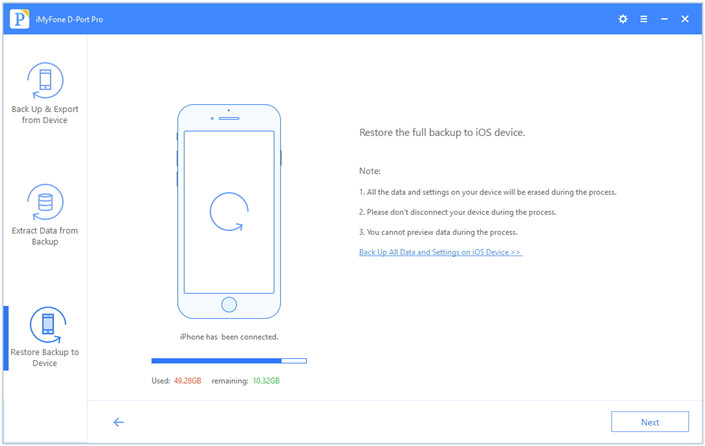
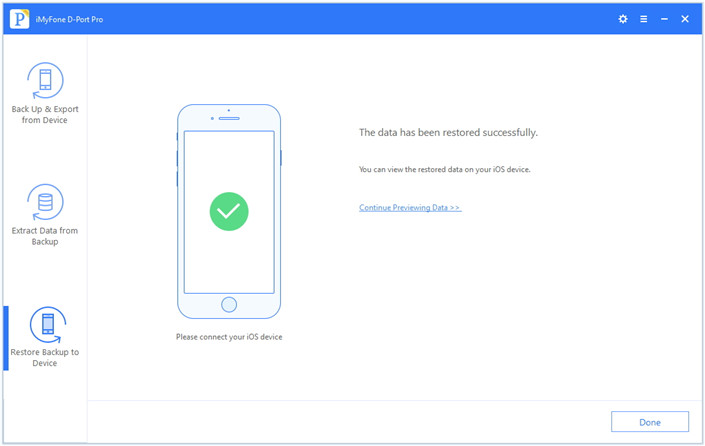
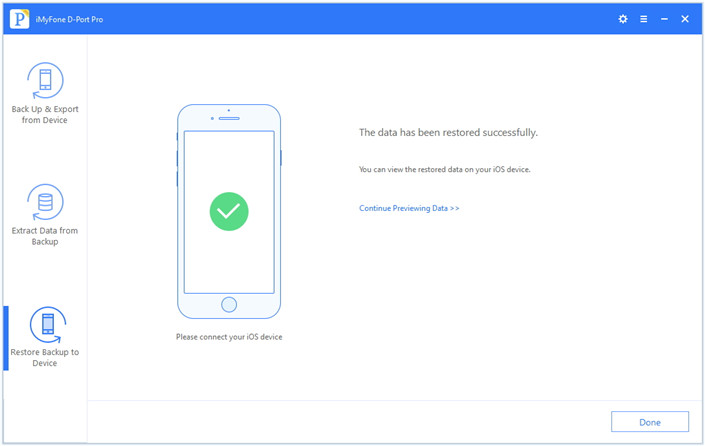
Step 3: The restore process will take a while, so when the process is on, ensure your device is connected. In minutes, the restore should be done for you to view on your iOS.
Download Your iCloud Backup to Your Device
This wouldn’t be a hassle. Just follow the easy steps below if you have an iCloud backup:
Step 1: Before restoring your backup from iCloud, you need to make sure your account is logged in. When filling your log in details on the software’s panel, you do not need to worry about iMyFone D-Port Pro keeping your login details. We do not do that because we value your privacy really much.
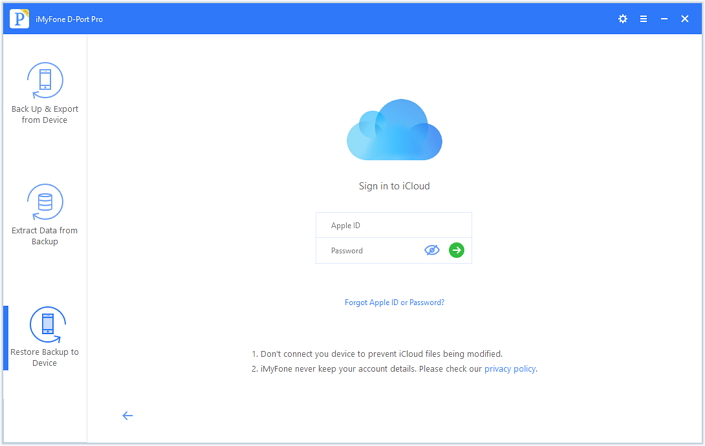
Step 2: In your iCloud backup, choose the type of file you want to restore. A scanning will be done after this and then you can choose the specific data to download.
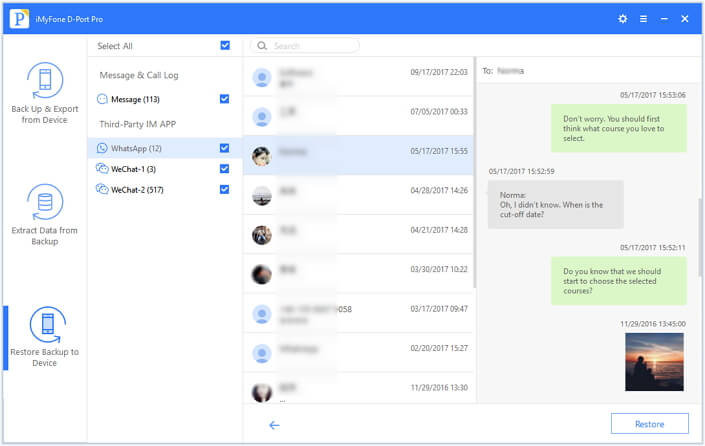
Step 3: Click the Restore button and the restoration process will initiate.
Conclusion
Please be reminded again to backup your data before applying any of the fixes and just trust iMyFone D-Port Pro to help you. Though iMyFone D-Port Pro does not support a backup for Safari history only, we are working on making the feature available soon.


 June 21, 2021