


 March 29, 2023
If you have a thing for capturing memories and saving them on your camera, we are sure you’ve hundreds and thousands of pictures, and losing the NEF files due to device loss and corruption can be a challenging time. This is because NEF contains the image information that’s captured by the sensor of the camera and is saved on the SD card in an uncompressed format.
So, if you’ve lost the NEF file, it simply means that you cannot view the photos, so let’s see how to recover deleted NEF files.


Part 1: How to Recover Deleted NEF Files
Knowing how to recover deleted NEF files is one thing, but it’s essential to understand that NEF files are essential for protecting information about the picture, and providing better control over the pictures and offering editing. You can easily adjust the effects and filters without compromising on the real image. This is why losing these files can be hard.
1.1. What Is a NEF File?
For the longest time, photographers have been using SD cards to extend the storage of the camera, but it doesn’t happen to improve the quality of pictures. On the contrary, NEF is the Nikon Electronic Format, and it’s the RAW file format of Nikon, which holds the image information that’s captured by the sensor of the camera. The file format is exclusive to the Nikon camera and is formulated to store information in the uncompressed form on the SD card.
1.2. Recover Deleted/Corrupted NEF Files from SD Card with Advanced Program
It doesn’t matter if you want to recover NEF files from SD card or recover corrupted NEF files; nothing will work better than the iMyFone D-Back. This is one of the best recovery software that has the capacity to recover data from SD cards with utmost ease. There are various other features of this software, including;
- It can recover data from USB drives, hard drives, cameras, SSDs, and of course, the SD cards.
- It supports more than one thousand types of files, including archives, pictures, videos, and office documents
- You can preview the recoverable data before recovering them.
- It has an advanced algorithm for quicker scanning.
- The filter feature is perfect for helping you locate the lost files by typing the file name.
Now that you know the iMyFone D-Back is the best option when you want to recover the NEF files, we are sharing the steps you can follow to recover the files.
Step 1: You need to start the recovery process by downloading iMyFone D-Back on the computer system and installing it once the file download.
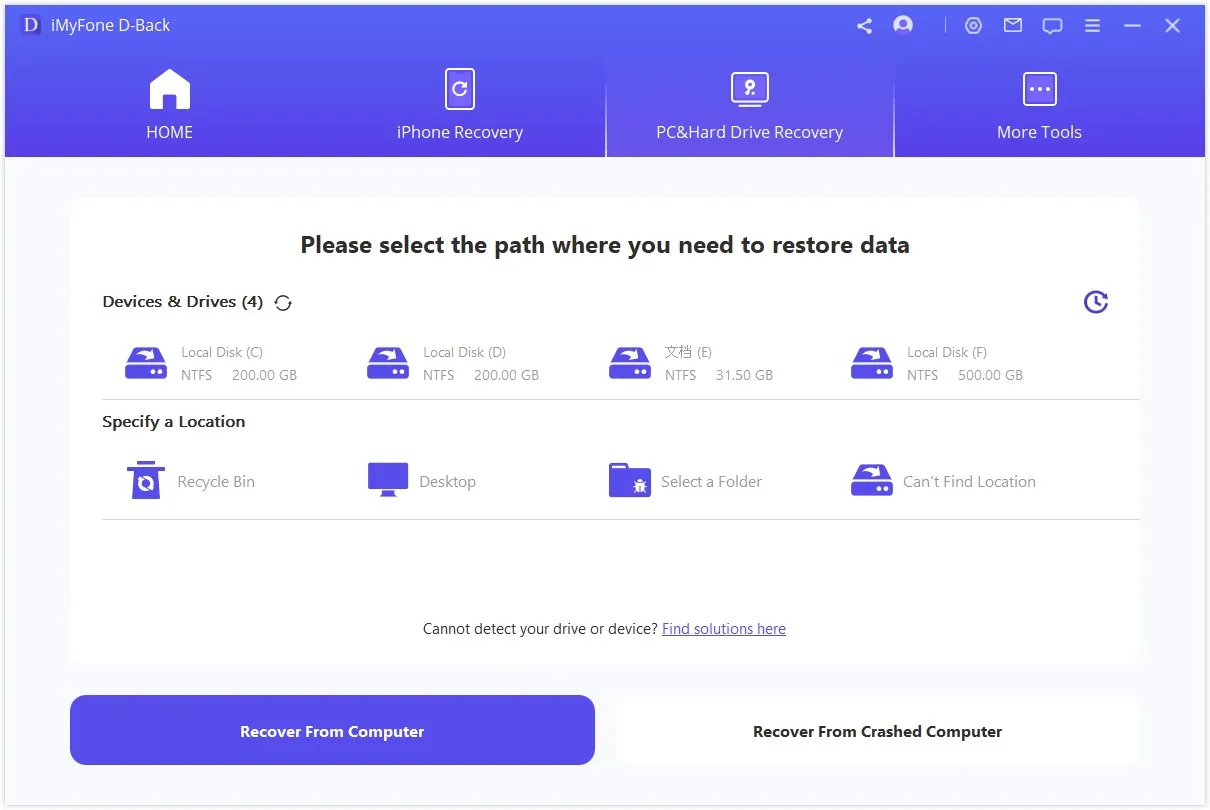
Step 2: When you are done installing the recovery software, connect the card reader to the computer with the SD card inside, and open the SD card on the computer. Now, you need to select the disk where you had saved the NEF files.
Step 3: Once the location is selected, iMyFone D-Back will initiate the scan, and the progress can be seen on your screen’s top.

In addition, you can always stop or pause the scanning with the help of a pause button.
Step 4: Once the scanning process is complete, you can check out the files that were saved on the SD card. In fact, the iMyFone D-Back allows you to search for NEF files according to name and date.

Lastly, all you’ve to do is to tap on the recovery button, and you will have the NEF files back on the card.
1.3. Recover Corrupted NEF Files with Built-In PC Tool
In the majority of cases, NEF files are corrupted because of a bad sector on the SD card. For this purpose, you can use the CHKDSK tool available on Windows because it can identify and show the bad sections and fix issues. So, let’s check out the instructions;
- First of all, you need to open the command prompt on the PC and choose “Run as administrator” from the top-right corner.
- In the command box, you have to write chkdsk X: /f and make sure you write the drive’s letter in place of X; the drive where the files were corrupted. You can also use the chkdsk X: /f /r command, if you want to repair the files as well.
- Now, this built-in tool will start scanning the SD card and repair the issues. As far as the duration is concerned, it depends on the SD card’s size and the amount of data it has.


When the process is completed, just reboot the Windows before taking out the SD card and putting it into the camera.
Part 2. Pro Tip about Reasons of NEF Files Deletion/Corruption
There are different reasons behind the corruption of NEF files and results in inaccessibility of the files, such as;
- Malware and virus attacks on the SD card
- Broken or corrupted header of NEF images
- Mistyped file name
- Broken master boot record
- Outdated SD card
- Bad sectors on the SD card
Keep in mind that these issues are pretty common with the SD cards, so use the antivirus software on the computer (the computer you use for connecting with the camera) and keep the systems updated. In addition, the SD cards must be updated.
Part 3. FAQs about NEF Files
01 How to Recover Permanently Deleted NEF File for Free?
iMyFone D-Back is your best bet if you want to recover the deleted NEF files without paying any hefty charges.
02 How to Open NEF Files On Mac/Windows?
The NEF files are opened on MAC and Windows when you connect the card reader with the respective SD card to the computer system.
03 How To Open NEF Files On iPhone?
To use the NEF files on iPhone, you can choose Adobe Photoshop as this app supports the NEF file formats. In addition, these files can work on Android smartphones as well.
04 Where Are Nikon NEF Files?
The NEF files that are saved on the media card (SD card that’s added to the camera) as well as in the camera are known as the Nikon NEF Files.
Conclusion
Losing your pictures can be a difficult experience, but the iMyFone D-Back is a perfect solution to recover deleted NEF files without compromising the integrity of the files. In addition, the free version is enough to restore the files, so you can go ahead with editing and adding effects as you like.