


 May 6, 2023
When a USB drive failure occurs, it could easily block you from accessing the saved data and could be a big issue. I mean, imagine there are crucial files that you need to access from the USB through your Windows 10/11 computer, only for them to be inaccessible because of an "Access Denied"error! It can be frustrating, right? Well, if you are in this situation, relax, as, in this article, we will give you a few quick fixes and a few methods to resolve this issue once and for all. So, keep reading:

Part 1. USB Drive Access Denied On Windows 10/11
1.1 How to recover data from an Access Denied USB drive?

As we have already mentioned, when a USB access denied error occurs, many files in the USB drive are rendered inaccessible, and since you would like to recover them, we strongly suggest that you try iMyFone D-Back Windows data recovery software. This software will help you recover deleted and restore any corrupted or formatted files on your storage device with just a few clicks. Here is a step-by-step process on how to recover your files;
Step one – the first step is to download and install the software into your Windows 10/11 device. Then, connect the USB drive to your computer, and then launch the D-Back data recovery software. On the interface, you will see the USB as an external drive, which you can also identify based on the name you have given to the drive.

Step two –scan the drive, where the software will thoroughly scan the entire drive and display all the results on your screen. This process might take longer, but it is thorough. Let the scanning process complete to ensure that it recovers every file.
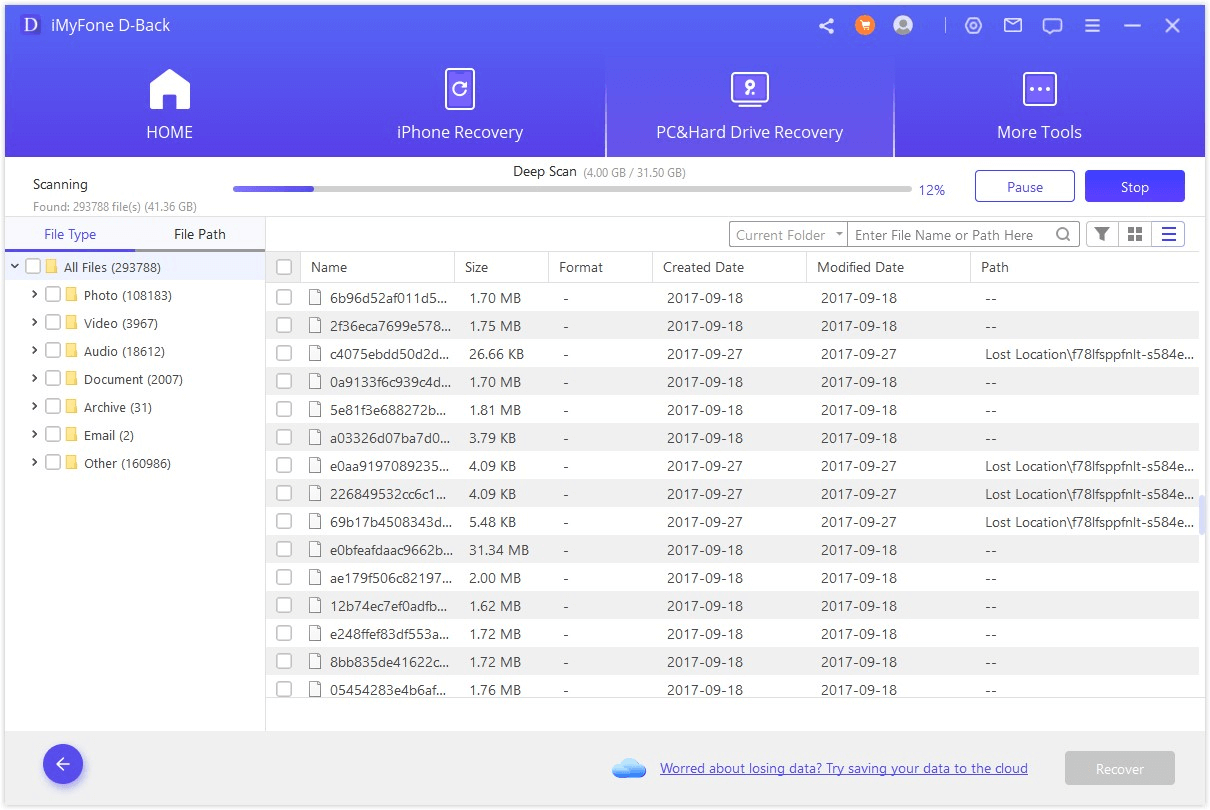
Step three – go to the displayed file results, and either recover all the files there or find the files you were looking for, preview them, and then click Recover to restore all the files. Ensure they are safe in a secure location this time.
1.2 Why Is "USB Access Denied"?
Identifying the actual problem with the drive is a bit difficult, however, here are the most common problems that could be resulting in the message you are seeing right now on your computer;
-
A ruined or damaged cable used for USB connection
-
Improper USD connection
-
Corrupted or damaged USB or file system
-
Activation of the BitLocker encryption system on the hard disk
-
Or, lack of permission to access the drive itself
Part 2. How to fix USB drive access denied on windows 10/11? [8 Ways]
2.1 Gain Permissions to Access Denied USB Drive
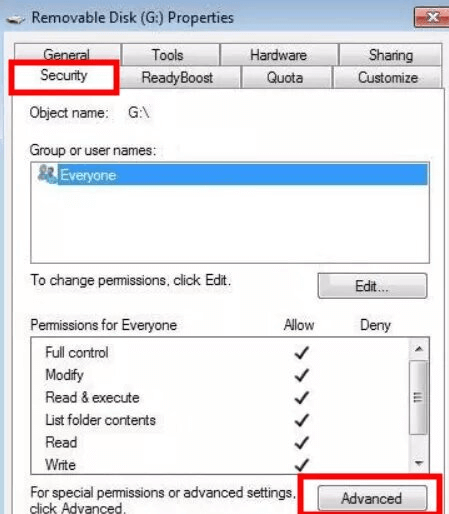
First, go to your File Explorer and navigate to the inaccessible USB drive. Then, right click on the USB > Properties > Security > and then Advanced.
You will be directed to the Owner tab, then click Edit. Try to look for your name, and click on it, then tick Full Control, and Apply. Finish by tapping OK.
2.2 Edit windows local group policy
Using the Windows button, open your start screen. Then go to the Search bar and type "Gpedit. msc" > then click Edit Group Policy. Select Administrative Templates > expand the System folder > open the Removable Storage Access folder.
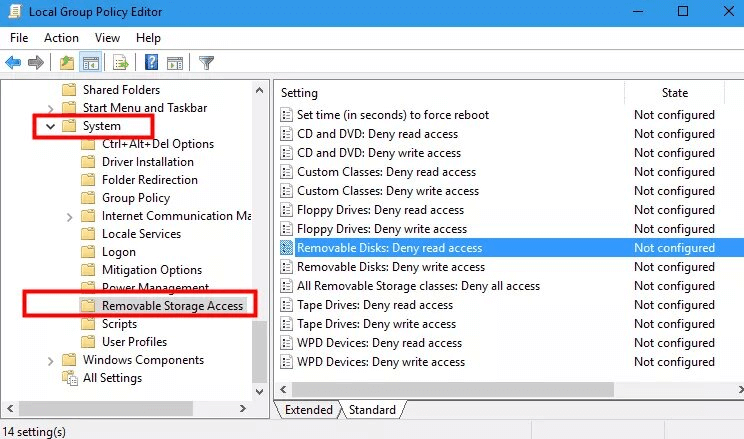
Lastly, you will see three options; Removable Disks: Deny execute access, Removable Disks: Deny read access, and Removable Disks: Deny write access, where you open each of these options and click Disable. This will remove any restrictions from the drive.
2.3 Change Drive Letter with Disk Management
Press R + Windows to open the Run Dialogue. Then type the following “diskmgmt. msc” > then OK/Enter to open your OS Disk Management.
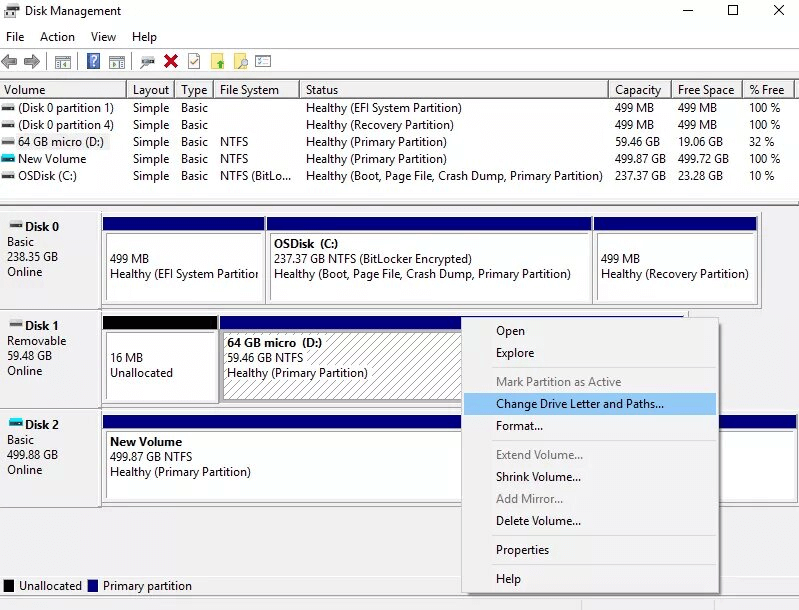
Look for the inaccessible drive and then right-click on the partition at the bottom of the page select Change Drive Letter and Path > Change > select the new drive letter and hit OK.
2.4 Run Chkdsk to check and fix the USB drive
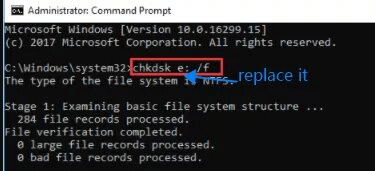
Open your device’s CMD by typing cmd on the search bar > Run as administrator. Locate the User Account Control prompt and click Yes. Then type chkdsk g:/f and press Enter. Look for the drive’s letter and confirm it has the letter g.
2.5 Format the Device to Fix the Denied Access Error
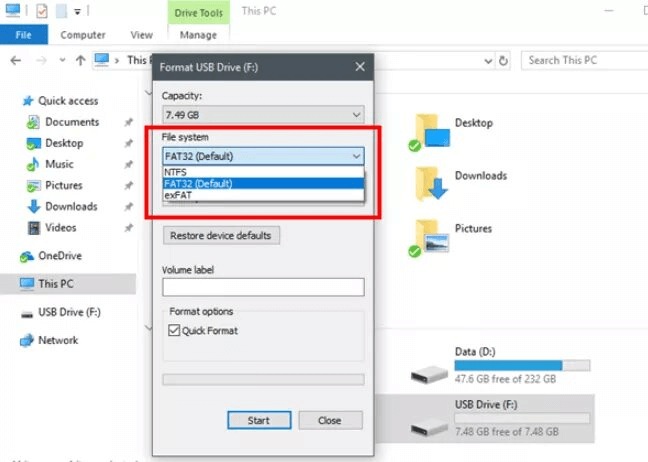
Connect the USB to your computer. Open File Explorer > This PC and go to the inaccessible USB drive > right-click on the device and select Format. On the format window, select FAT32 under File System then OK. The format process will start and after it’s done, close the windows and then eject the drive.
2.6 Disable “User Account Control
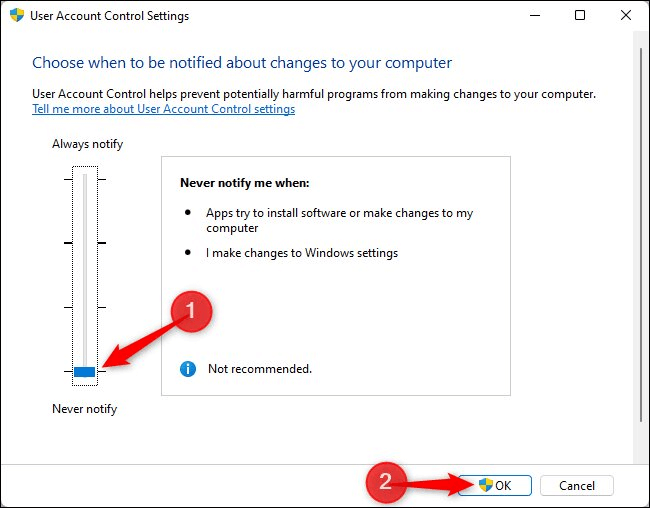
Open Control Panel > User Accounts > Change user account control settings > move the slider to the bottom setting > then click OK.
2.7 Reinstall USB drive
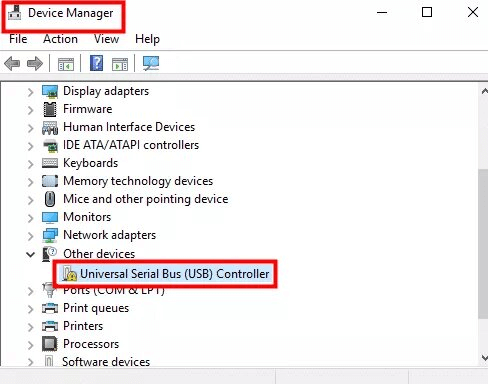
Open your device manager by typing “devmgmt. Msc” on the search box. Then find Universal Serial Bus Controllers and right-click on it, select a controller for each of the USB ports, and then on each of these controllers right-click > then uninstall.
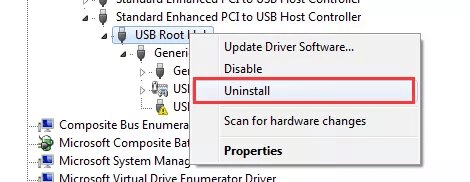
Reboot your device after this.
2.8 Use Error Checking Tool
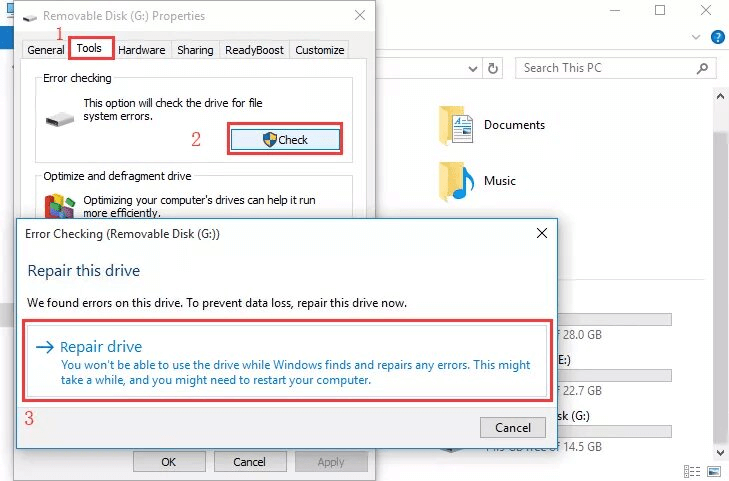
File Explorer > the inaccessible USB > right-click > Properties > Tool Bar > Check under Error Checking > then Repair Drive.
Part 3. Troubleshooting about USB drive access denied
3.1. You have been denied permission to access this folder USB [4 Methods]
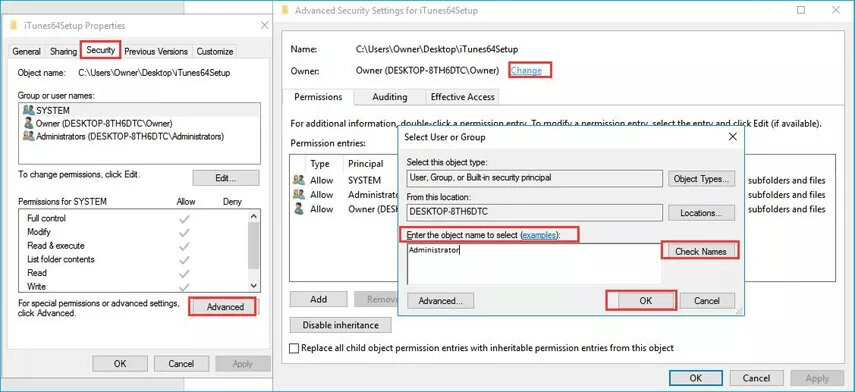
Method 1: Change the ownership of the folder – Right-click the inaccessible folder > choose properties > go to the Security tab, click Advanced.
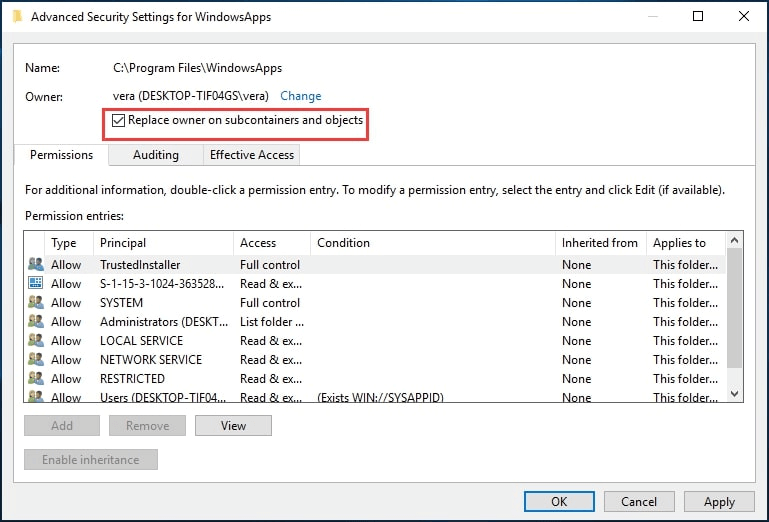
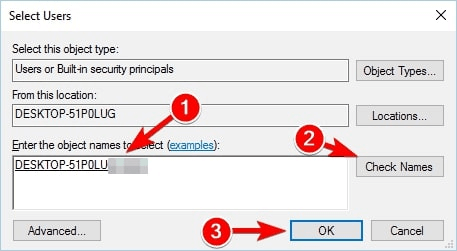
Then next to Owner, click Change > type object name > click Check Names > OK. You will see ‘Replace owner on sub-containers and objects – make sure you tick the box therein > Apply > OK.
Method 2: Modify your windows 10 registry – get the Take Ownership zip file, extract the files therein, then run the file named Install Take Ownership. reg. You will need to confirm a few things, then right-click on the inaccessible file and choose ‘Take Ownership.’
Method 3: Close Shared Folder Sessions – press Windows + X > Computer Management > System tools > Shared Folder > Session. All the available sessions will appear.
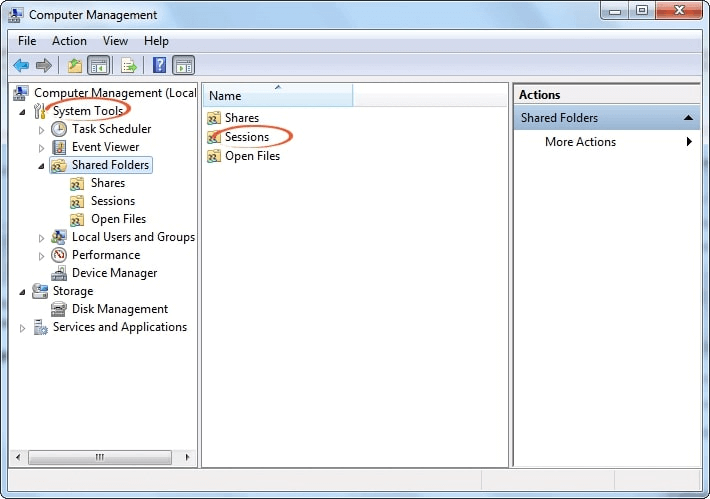
You will need to right-click on each one and select Close Session. Then close Computer Management and see whether the problem has been fixed.
Method 4: Create a new group and add your user account to it – press Windows + R keys > type “lusrmgr. msc” then click OK > Local users and groups windows > Groups > right click > new group.
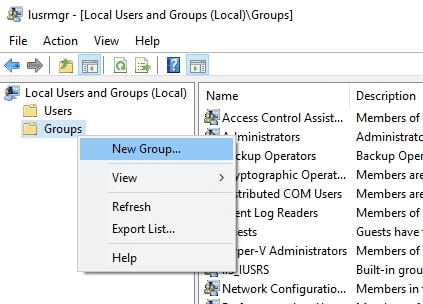
A new window will appear named New group, fill the empty boxes and then click Add. Enter name > click Check Names > ok > create.
After creating the new group, you might need to make a few changes regarding the ownership settings of the said folder.
3.2 Location is not available to access is denied USB [3 Options]
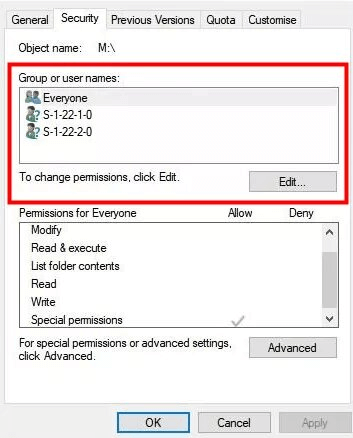
Option1. Reset Permissions Manually – right-click on the blocked folder > Properties > security > Group of Usernames > go to Administrators should be your-UserorPC-Name\Administrators> then Edit > select the Administrators again > then Apply
Option2. Reset Permissions Using the Reset Utility – if the steps above prove difficult, you can try resetting using the reset utility. So, first, download the Utility, then open and run it. A small window will pop up.
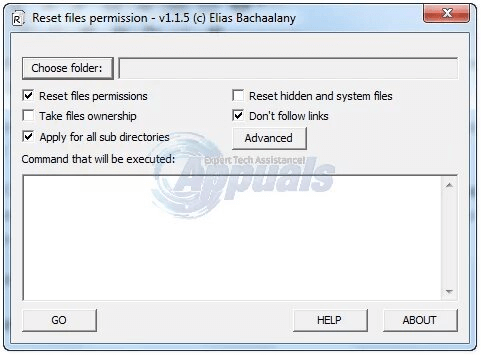
The password should be “lallouslab.” Then, select the drive, or the folder, click Go, and try to see if the drive opens. If not, run the utility again but this time, make sure the Take files ownership option is checked.
Option3.Reset Permissions via Command Prompt – if you are trying to access the folder or drive on a shared network, you will need to disable the sharing. Then, press the Windows + X keys and select Command Prompt. Then go to the inaccessible folder and type “icacls Pictures /reset /t /q.”
3.3 Destination folder access denied USB [4 options]
Solution 1: Disable User Account Control
Step one – on the Windows search bar, search UAC
Step two – then click Change User Access Control Settings

Step three – take the slider to the ‘Never Notify’ side and then click OK
Step four – click Yes, and then restart your
Solution 2: Change ownership for the file/folder
Step one – select the inaccessible folder and right-click on it, go to Properties
Step two – then go to Security > Advanced > Owner > the click on Change on the new window
Step three – key in the username > then Check Names. You can enter your username on the new window and then click OK.
Step four – go to ‘Replace owner on sub containers and object’ then click Apply then OK to save changes.
Solution 3: Set permission for Access Denied hard drive/USB drive
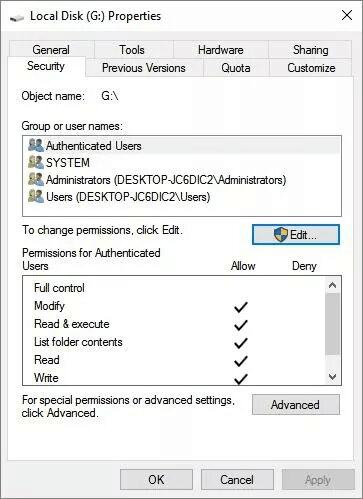
Right-click on the inaccessible USB drive > go to Properties > select your username under Group or Usernames > then Edit > allow the permissions > then OK. Then click Apply to gain access.
Solution 4: Turn on network discovery and file and printer sharing
Step one – on the search bar, search Network and Sharing Centre
Step two – then click Change Advanced Sharing Settings
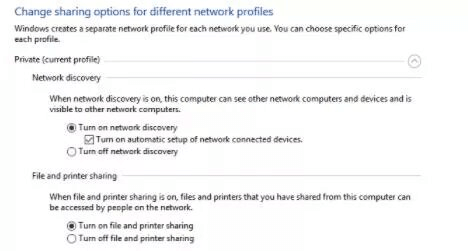
Step three – click on Home and Work, then turn on Network Discovery and File and Printer sharing.
Part 4.FAQs about USB drive access denied on windows
4.1 What causes Rufus's USB access denied?
This error occurs when you enable Microsoft Defender's Controlled Folder Access option and block Rufus from taking but excluding the drive's write access. And if you don't have the Microsoft program, check out your other antivirus programs.
4.2 How to Fix BitLocker USB Drive Access Denied?
Press Win+R keys > then type ‘services. msc > then OK. Go to the right pane of the services window and double-click on the BitLocker drive encryption service. Go to start-up type > select Automatic > then OK to save changes. After that, you will see the ‘Restart the service’ option, so click on it.
4.3 How to bypass USB access denied?
One way you can bypass an access denied error is by using the iMyFone D-Back data recovery tool to recover the data that has been rendered inaccessible. You see, with the software, you just need to scan and restore all the files in the USB drive without having to fix the error itself.
Final thought
As you can see, a USB access denied error can be frustrating, but it is easy to fix. You can either choose to fix the problem so that your drive is good and the data therein is accessible, or you can recover the data using iMyFone D-back recovery software from the USB without having to go through all the trouble of fixing it. The software is easy to use and capable of recovering lost data in any format. Download and install it on your device today!