

















 Shop
Shop
Lost Data After iOS 27 Update? Try These 5 Methods
Category: iOS Data Recovery

7 mins read
If photos, messages, contacts, notes, or files disappeared after an iOS 27 update, do not erase the iPhone or immediately restore an older backup. Missing content may still be syncing, remain in Recently Deleted, or exist in an iCloud or computer backup. Use the five methods below in order, starting with the least disruptive option.


Quick Answer
First, preserve the current device state. Check iCloud syncing and Recently Deleted. If you have a known-good backup, use Apple's official iCloud or computer restore options. If no usable backup exists, scan the iPhone before making destructive changes.
In this article:
1 What to Do Immediately After Data Disappears
The first priority is to avoid replacing potentially recoverable information or a newer device state. Before trying any recovery method:
- Reduce unnecessary iPhone use. Avoid taking new photos, recording videos, or downloading large files.
- Do not erase or reset the iPhone. A reset can change the current device state before you identify where the missing data is stored.
- Do not restore an older backup blindly. A full restore can replace newer local data.
- Keep the iPhone on Wi-Fi and power. Large iCloud libraries may need additional time to synchronize after an update.
- Record available backup dates. Check iCloud, Finder, Apple Devices, or iTunes without starting a restore.

Important
Choose a method based on where the data may exist. Sync checks and Recently Deleted do not replace the current iPhone state. Full backup restores can, so they should come later.
2 Why Data May Appear Missing After iOS 27
Missing data after an update does not always mean permanent deletion. The right method depends on whether the content is delayed, hidden, recently deleted, stored in a backup, or no longer available through Apple's built-in recovery paths.
- iCloud synchronization is incomplete: Photos, Messages, Contacts, Notes, or iCloud Drive may still be downloading.
- The Apple Account changed: The device may be signed in to a different account from the one that stores the missing content.
- The library or album view changed: Hidden items or Shared Library settings can make photos appear missing.
- The item was recently deleted: Several Apple apps keep deleted content for a limited recovery period.
- The backup excludes separately synced content: iCloud Photos and other synchronized categories may not be stored inside the device backup.
3 4 Methods If You Have a Backup: Use Official Apple Recovery
This section covers four Apple-based recovery methods. Methods 1 and 2 check content connected to the Apple Account or Recently Deleted without replacing the current iPhone state. Methods 3 and 4 use full backups, so protect newer data and confirm the backup date before restoring.
Method 1: Check iCloud Syncing and the Apple Account
Confirm that the iPhone uses the same Apple Account as before the update. Connect it to stable Wi-Fi and power, then check the sync status of the affected service.
- Open Settings > [your name] > iCloud.
- Select the relevant service, such as Photos, Messages, Contacts, Notes, or iCloud Drive.
- Confirm that syncing is enabled and allow time for the content to download.
- For photos, check Hidden and the Personal/Shared Library view.
- Sign in to iCloud.com and verify whether the missing content exists there.
Apple's guide to missing photos and videos recommends checking account, sync, Hidden, and library settings. For more scenarios, browse iMyFone's iOS data recovery guides.
Method 2: Recover from Recently Deleted
Apple provides recovery windows for several data types. Check the relevant app before using a backup or recovery program.
| Data type | Location | Typical recovery window |
|---|---|---|
| Photos and videos | Photos > Collections > Recently Deleted | 30 days |
| Text messages | Messages > Filters > Recently Deleted | Up to 30 days |
| Files | Files > Browse > Recently Deleted | 30 days |
| iCloud notes | Notes or iCloud.com > Recently Deleted | Up to 30 days |
For photos, follow Apple's deleted-photo recovery guide or see how to recover deleted photos or videos on iPhone. For messages, see Apple's guide to recovering deleted messages on iPhone.

Before Restore
Content synchronized separately through iCloud may not be inside the device backup. Apple's guide to missing information after an iCloud restore explains what restores from the backup and what downloads separately.
Method 3: Restore from iCloud Backup
An iPhone that is already set up normally must usually be erased before a full iCloud backup can be restored. After the Hello screen appears, choose From iCloud Backup, sign in, and select the appropriate backup by date and size.
Review Apple's current iPhone backup restore steps. If preserving the current setup matters, compare available approaches for restoring from iCloud backup without resetting first.
Method 4: Restore from a Finder, Apple Devices, or iTunes Backup
Connect the iPhone to the computer that contains the backup. Open Finder on a supported Mac or Apple Devices/iTunes on Windows, select the iPhone, choose the relevant backup, and enter its encryption password when required.
This is an all-device restore rather than a selective file extraction. If you only need one conversation, album, or note, previewing the backup with a compatible recovery tool may be less disruptive.
4 Recover Without a Backup: D-Back for iOS 27
If the files are not syncing, are no longer in Recently Deleted, and no usable backup exists, a direct device scan becomes the remaining non-backup option. For this situation, iMyFone D-Back is our recommended first choice. The current product page lists support for iOS 27, more than 38 data types, and four recovery modes.

Why D-Back is the preferred no-backup option:
- Supports iOS 27 and current iPhone recovery scenarios.
- Scans a connected iPhone when no usable iCloud, Finder, or iTunes backup is available.
- Previews available photos, messages, contacts, notes, and other supported data before recovery.
- Selectively exports needed files to a computer instead of forcing a complete backup restore.
- Can also inspect supported computer-backup and iCloud sources if one later becomes available.
Important
No recovery program can guarantee every missing file. Results depend on the device state and whether the relevant data remains accessible. Use the trial scan to confirm that the required files appear in the preview before purchasing.
Method 5: How to Recover Data with D-Back Without a Backup
Step 1. Connect the iPhone and choose what to recover
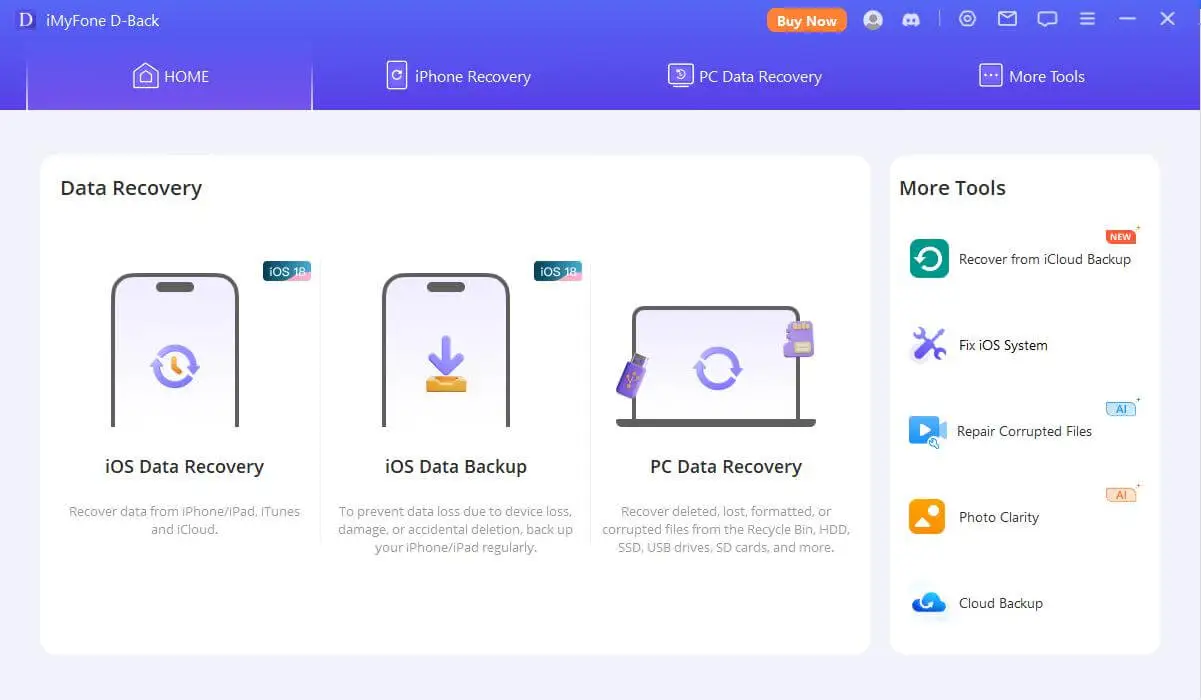
Download D-Back from the official iMyFone website and install it on a Windows PC or Mac. Open iPhone Recovery, choose Recover from iOS Device, and connect the iPhone. After D-Back detects it, select the data types you want to find.
Step 2. Scan the iPhone for lost data
Click Scan. D-Back searches only the selected categories, helping keep the scan focused. Keep the iPhone connected until the scan finishes.

Step 3. Preview and recover the selected files
When the scan is complete, filter the results and preview individual items. Select the files you need, click Recover, and save them to a folder on the computer first.

For current interface labels and supported data categories, follow the D-Back user guide.
VS Compare the 5 Recovery Methods
| Method | Best for | Backup required | Selective preview | Replaces device state |
|---|---|---|---|---|
| 1. iCloud sync check | Content still stored in iCloud | No | Yes | No |
| 2. Recently Deleted | Items deleted within Apple's recovery window | No | Yes | No |
| 3. iCloud Backup restore | Returning to a known backup state | Yes | No | Usually yes |
| 4. Computer backup restore | Restoring a complete Finder, Apple Devices, or iTunes backup | Yes | No | Yes |
| 5. D-Back device scan - Recommended without backup | Scanning, previewing, and selectively exporting available data | No for device scan | Yes | No when exporting to a computer |
Start with Methods 1 and 2 because they are free and do not replace the device state. Use Methods 3 or 4 when a known-good backup contains the missing data. When no usable backup exists, D-Back is the preferred product option because it supports iOS 27 device scanning, preview, and selective export.
5 Conclusion
Lost data after an iOS 27 update should be handled in a low-risk order: preserve the iPhone, check iCloud syncing, inspect Recently Deleted, and confirm what each backup contains. Restore a full backup only when its date and contents match the recovery need.
If no usable backup exists, run an iMyFone D-Back trial scan and review the preview before making broader changes to the iPhone. Additional troubleshooting is available in the iOS data recovery article collection.


(Click to rate this post)
Generally rated 5 (256 participated)

Rated successfully!

You have already rated this article, please do not repeat scoring!