


Testdisk You Will Have to Reboot Testdisk Analyse Cylinder Slow
Category: PC Data Recovery

4 mins read
It is difficult to reboot and recover files from a lost partition. Plus, TestDisk is not an easy tool that everyone can use. It needs special expertise and experience. However, in this article, we will discuss a few things about TestDisk and tell users why it is difficult. Later we will discuss an alternative, easier method to recover files from TestDisk partition has no found error.

In this article:
- Part 1. Something You Must Know about Using TestDisk
- 1.1 How to Repair Invalid FAT Boot Sector Using TestDisk
- 1.2 How to Fix "E: Unable to locate package TestDisk" When Installing TestDisk
- 1.3 How to Fix TestDisk Analyze Cylinder Slow
- Part 2. How to Use TestDisk to Recover Deleted Partitions/Files on Windows/Mac
- Bonus Tip: How to Recover Files from Lost Partition without TestDisk
- Part 3. FAQs
Part 1. Something You Must Know about Using TestDisk
1 How to Repair Invalid FAT Boot Sector Using TestDisk
It is important to have background knowledge of what we are going to discuss. FAT file system’s first sector is known as the boot sector. It has important file system properties and codes required to start a computer from this partition. If it is damaged, then the user cannot access the data. Sadly, Windows CMD Prompt’s “chkdsk” cannot fix this, which is why we are using TestDisk downloaded.
- Step 1. If you download TestDisk, open it. Choose the drive which contains the partition. Then confirm the partition table type.
- Step 2. Now, go to “Advanced Menu” and select the FAT partition. Select “Boot” and then “RebuildBS”. This will repair the boot sector. search button.
- Step 3. Then choose “List”, if you see your files in the list, quit the file listing and choose to “Write”.
- Step 4. After choosing “Write”, make sure to confirm your selection and then quit. Restart the computer, and your invalid FAT Boot Sector should be repaired.
2 How to Fix "E: Unable to locate package TestDisk" When Installing TestDisk
This error or problem usually arises in Ubuntu. It is basically a fault with repositories. The user needs to enter the correct repositories and update the system to fix this error. Here are the steps to fix this error when installing TestDisk.
- Step 1. Open Terminal on your Ubuntu and type “sudo apt-get install”. Then, enter the password to authorize the installation. Now, you will see an error: "E: Unable to locate package TestDisk“. Go to “System Settings > Software Updates”.
- Step 2. You will see an option of “Download from”. Click on the down arrow and choose “Other”. A window of “Choose a Download Server” will pop up. Click on “Select Best Server”. It will take some time to process and find the best server.
- Step 3. When it finds the server, click on “Choose Server” and enter the password to authenticate. Then close the tab.
- Step 4. Now, type “sudo apt-get update” in the terminal and enter. You will see it working and processing. After it finishes, type “sudo apt-get install” again. Press ‘Y’ if it asks to continue or not. TestDisk will be installed now.
3 How to Fix TestDisk Analyze Cylinder Slow
The reason why TestDisk is analyzing cylinder slowly is because of the PC specifications, including the type of port. If you are using a USB 2.0, then its speed is about 40 Mbps, and it will take several days to complete the analysis. The user can use a Seagate drive, increasing the speed up to 120 Mbps. Moreover, you can install a USB 3.0 to your ExpressCard slot and increase the speed. Laptops, in these cases, are much slower. Using a desktop PC will do the trick and speed up the analysis cylinder process.
Part 2. How to Use TestDisk to Recover Deleted Partitions/Files on Windows/Mac
The firm that created TestDisk releases it as an open-source application. This software has no data recovery restrictions, pro editions, advertisements, or marketing. Since TestDisk only functions in a command prompt/terminal window, it might be a tricky process for beginners to use testdisk to recover files. This software lacks the vibrant icons and entertaining animations that most users find helpful.
It appears to be a drawn-out and challenging procedure for TeskDisk data recovery. But before we start the process, let us look at the advantages and drawbacks of the program.
Pros
- TestDisk is open-source software that is free to use and modify.
- It supports a variety of Unix and Linux distributions in addition to Windows and Mac OS.
- TestDisk can recover various filesystems and partitioning layouts.
Cons
- TestDisk is only a command-line program without a friendly graphical user interface. Although the program is intended to be used by people with different levels of computer expertise, beginners may find it challenging for Testdisk data recovery.
Now, let's look at the steps on how to use TestDisk and begin the procedure to use this software to recover data:
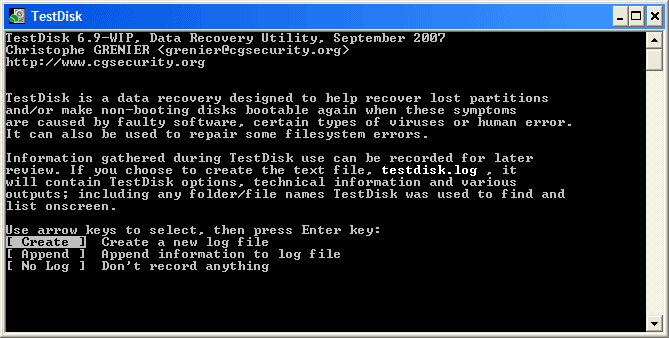
- Step 1. A new log file will be created as soon as the TestDisk downlaoded and launched. To generate a new log file, select Create. The TestDisk will read the disk location as it builds the log file.
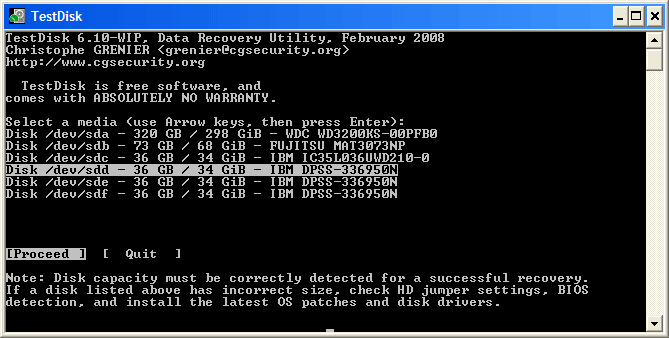
- Step 2. TestDisk will identify and list your hard disks. To choose the hard drive with the missing partitions, use the up/down arrow keys on your keyboard and then press Enter to continue.
- Step 3. You must now choose the partition table type. When TestDisk recognizes the kind of partition table, you can use the default value.
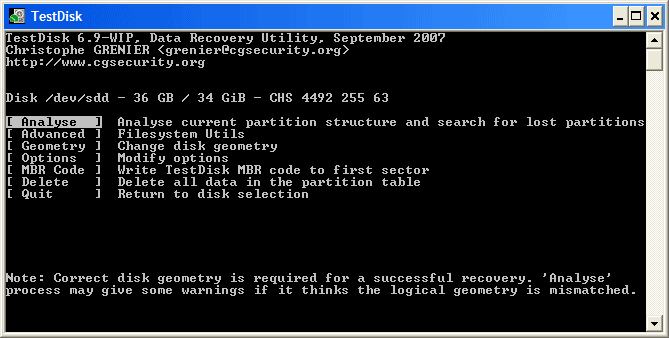
- Step 4. It will show the options for TestDisk Data Recovery. Select "Analyze" to evaluate the existing partition layout and look for missing partitions. Your disk structure is available for evaluation after the disk analysis is finished.
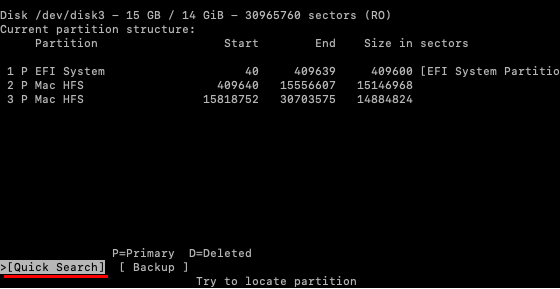
- Step 5. Now that the partition structure has been shown, you may review it for faults and missing pieces to ensure that your partition structure is proper. To go on, click Quick Search.
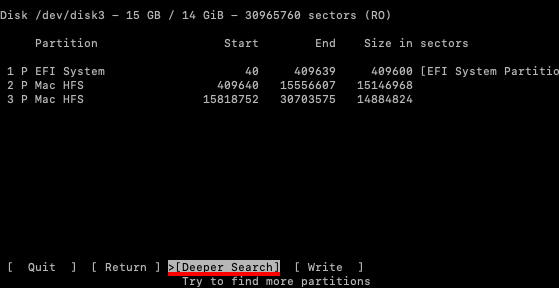
- Step 6. Follow the instructions to continue the recovery.
To locate the missing partition, proceed by selecting Deeper Search.
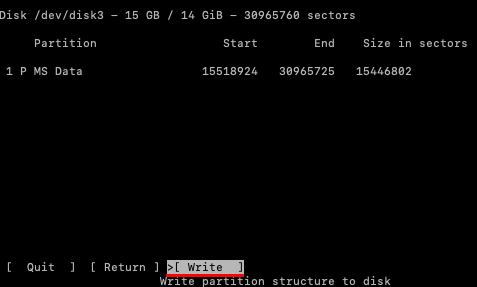
Press Write after choosing the recovering partition.
Bonus Tip: How to Recover Files from Lost Partition without TestDisk
TestDisk is a very complex tool. Due to this reason, we have found an alternative solution to recover files from a lost partition: the iMyFone D-Back. It is a modern and advanced data recovery tool that can recover data in minutes with a few clicks. It can recover data from lost partitions as well as from RAW partitions.
This program's top-notch feature is what sets it apart. Let us examine its features and compare it to TestDisk to determine the best alternative.
| iMyFone D-Back | TestDisk | |
|---|---|---|
| User-friendly graphic interface |  |  |
| Simple procedure | | |
| Compatible with Windows, Mac, Linux, etc. | | |
| Preview before recovery | | |
| Advanced algorithms | | |
| Pause and continue the scanning process as needed. | | |
| Filter function allows you to locate the missing file by type. | | |
| Cost | $59.95 | Free |
Here is how one can use this tool to recover files from lost partitions.
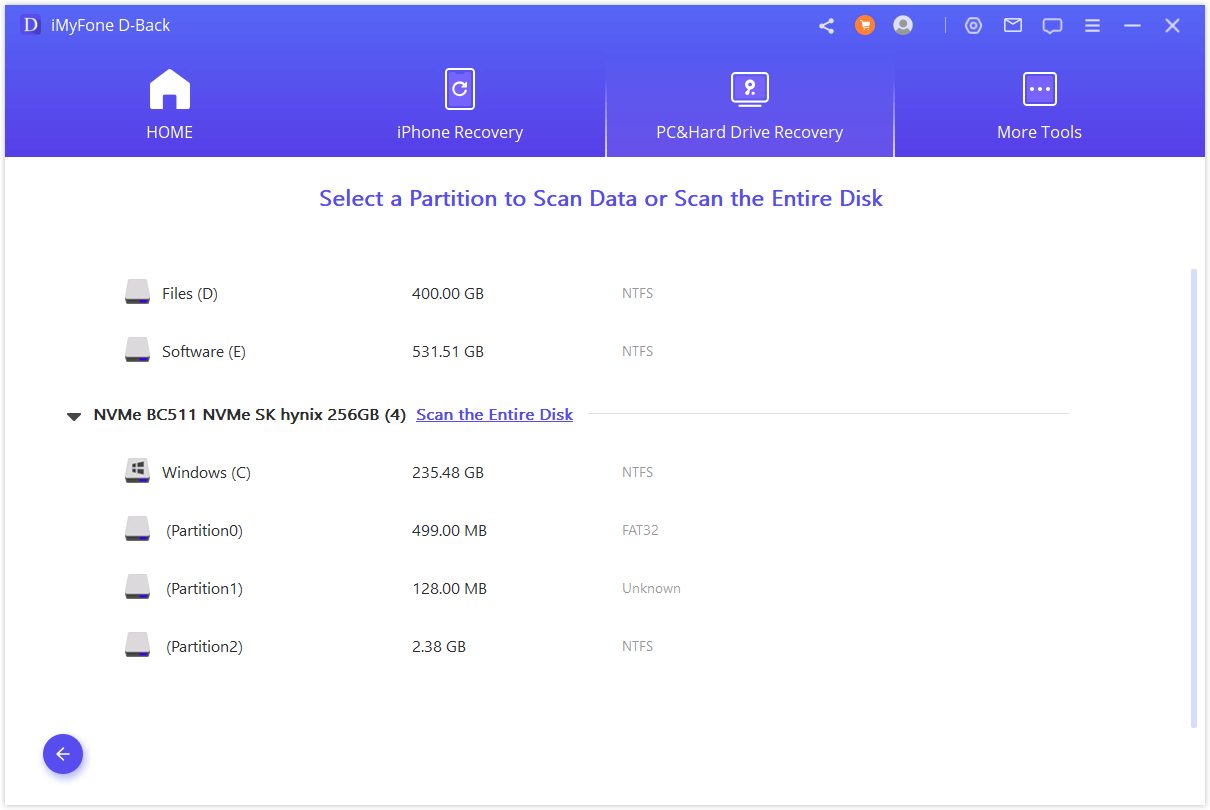
- Step 1. Download and install iMyFone D-Back. Open the tool. As you open it, you will see all the hard drives connected to the computer. Under the Advanced Options, click on Can’t Find Location.
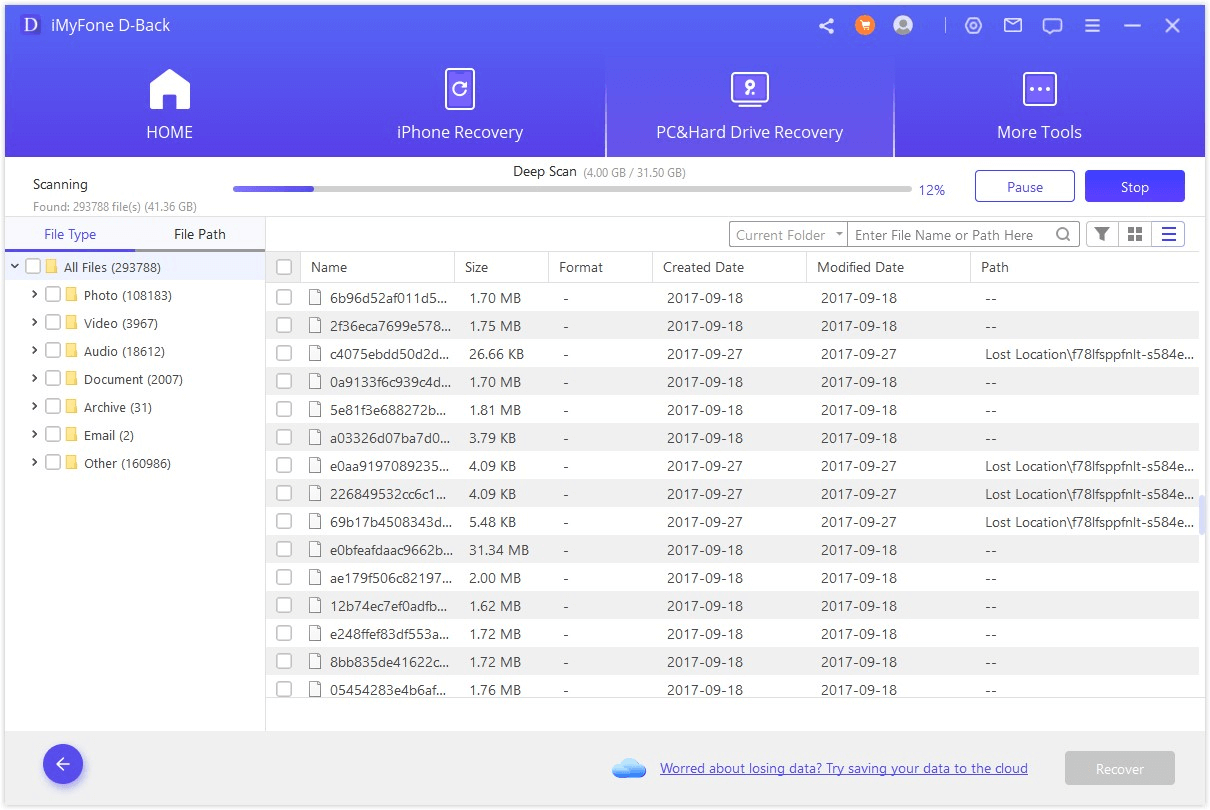
- Step 2. The tool will show all the partitions, including the lost partition. You will see a Scan button on every partition. Click on it to start the scan.
- Step 3. The software will start the scan, and it will find your files from lost partition one by one. You need to wait for the scan to complete.
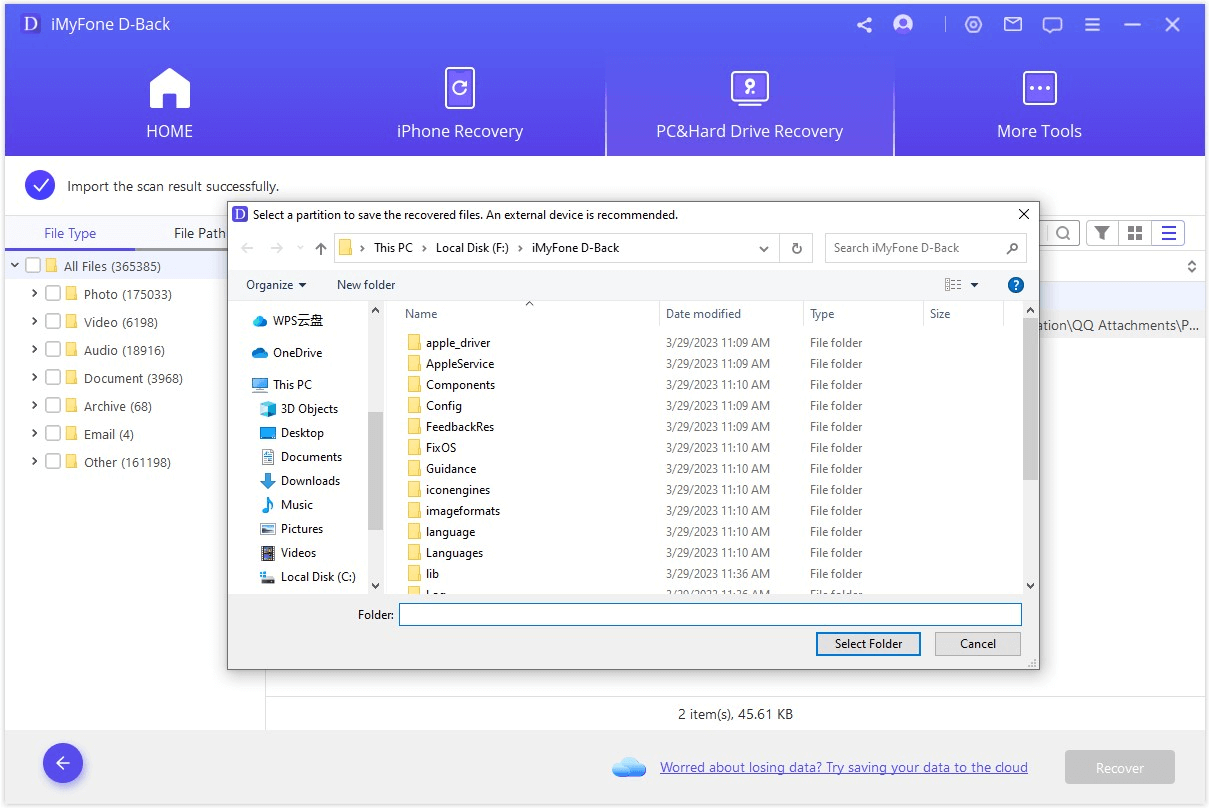
- Step 4. Choose the files from lost partitions you want to restore and click on “Recover”. Select the path where you want to save these files.

Part 3. FAQs
1 Can TestDisk Recover Deleted Files
Yes, the Testdisk can recover deleted files. All you have to do is follow the steps above in part 1. However, it would be better to use iMyfone D-back with easier steps if you can't open Testdisk system.
2 How to Recover Permanently Deleted Files in Ubuntu
You can retrieve the permanently deleted file in ubuntu with an effective data recovery software like iMyFone D-Back. It's a perfect solution for how to recovering deleted files from ubuntu. Further, it allows you to recover ubuntu files in just three simple steps, as highlighted above.
Conclusion
As we discussed, TestDisk is an extremely complex tool. It will be a bit difficult to use if one has no prior coding and TestDisk experience. But this is how people used to work back in the days. Today, iMyFone D-Back is here to help us all. It does not take time to recover files from lost partitions. This tool is paid but has a trial version that people can download for free.
(Click to rate this post)
Generally rated 4.9 (256 participated)
Rated successfully!
You have already rated this article, please do not repeat scoring!