My friend gave me an iPhone which he doesn’t remember the passcode of (And it’s now disabled because he failed too many times trying to unlock). I want to restore the device via iTunes, but I don’t have the passcode which means I can’t tap "trust" on the phone.
So I want to know is it possible that I can "trust" computer on this disabled iPhone? If so, how to do that?
First thing first, let me just throw the conclusion here: trusting a new computer on a locked iPhone/iPad is possible.
However, because Apple values security and privacy VERY much, getting into the disabled iPhone and trust computer might be a little bit tricky.
But still, it’s doable.
So today we are going to introduce a couple of solutions for you to easily get into the disabled iPhone and trust a new computer on it. Now, let's start from the very beginning.
Part 1: Do You Need to “Trust” Computer on Disabled iPhone?
As you may already know, once your iPhone gets disabled, you cannot even type in the passcode. The only way to get it out of the disabled mode is by connecting it to iTunes. But then here comes the problem, if you cannot get into the phone, you cannot "trust" computer, and therefore cannot connect to iTunes.
But here is the thing:
iPhone being disabled does not mean that you can't connect it to iTunes.
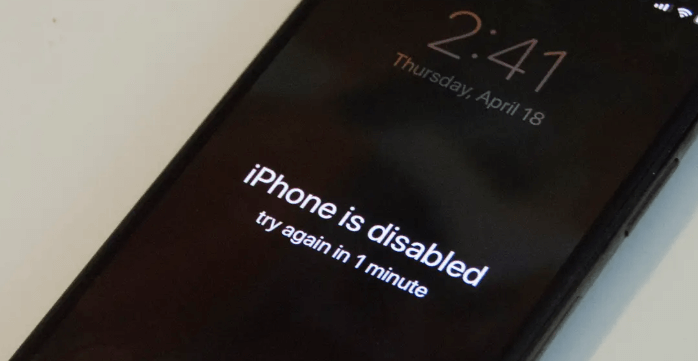
You see, the “trust computer” mechanism, in fact, only works for the computer that has never been connected to the device before. By design, if you connect your disabled device to an already trusted computer, you will not need to tap the “trust” button on your phone, and iTunes will directly recognize your device without any other permissions.
So, to put it in simple words, connect your device to a computer which has been connected to it before. If the iPhone previously belongs to your friend, ask him or her to connect the device to an old computer, erase the passcode, and then pass it down to you. That would solve most the problems.
But the more common situation is, you cannot find an already trusted computer, your iPhone gets disabled, and you need to trust the current computer to connect. Well, here are the solutions.
Part 2: Trust Computer on Disabled iPhone with iCloud.
The first solution to trust computer on disabled iPhone is by using iCloud. To be more specific, the “Find iPhone” feature. Using this feature will allow you to get the iPhone out of the disabled mode remotely, whithout even touching the device itself. Here are the requirements for this solution to work.
For this solution to work, you need to make sure:
- Your disabled iPhone has logged in with an Apple ID;
- You know the Apple ID on the disabled device and its password;
- You know the security questions of that Apple ID;
- Your disabled iPhone has the “Find My iPhone” feature turned on and is connected to the Internet.
Also, as you can imagine, this method will erase all data on your device.
Okay. If you thing this is doable for you, here is how it works. To trust computer on disabled iPhone or iPad with iCloud:
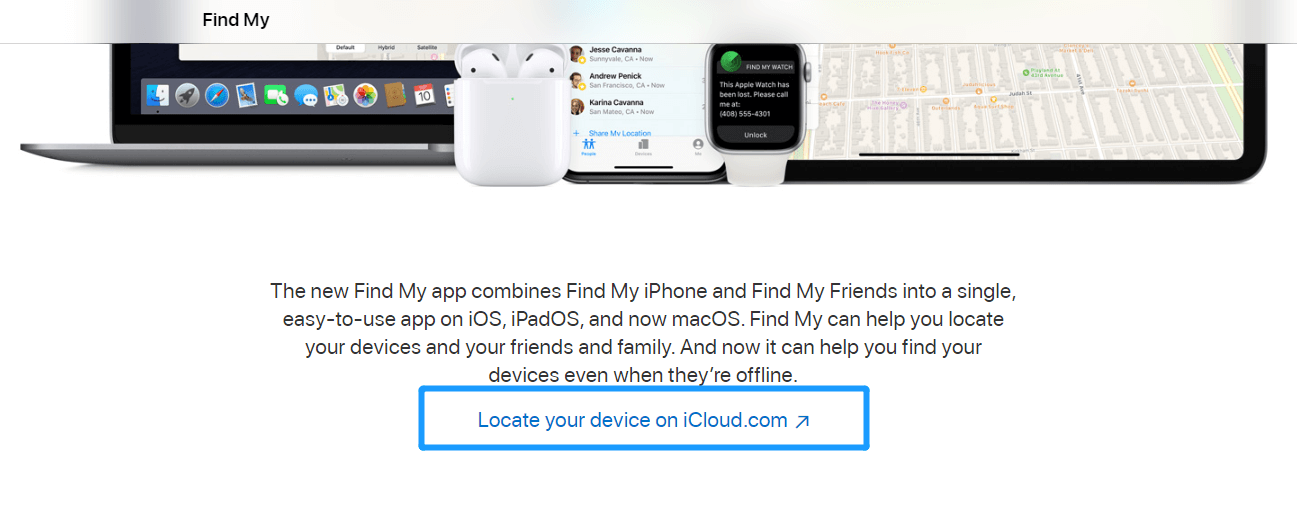
Step 1: Go to the “Find My” page of iCloud, scroll down and find the "Locate your device on iCloud.com" entrance. Click on it.
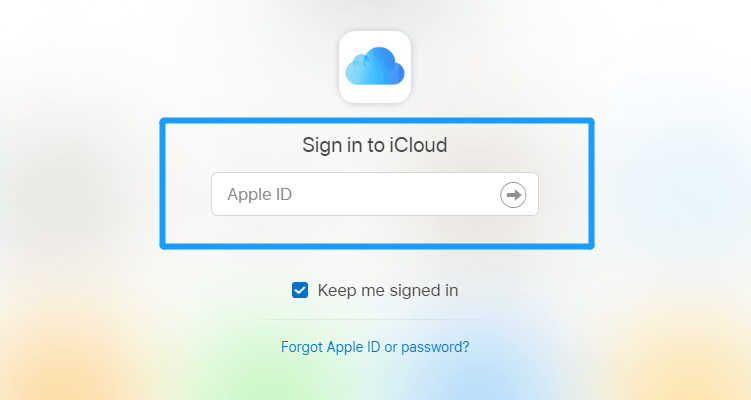
Step 2: Log in the same Apple ID as that on your device.
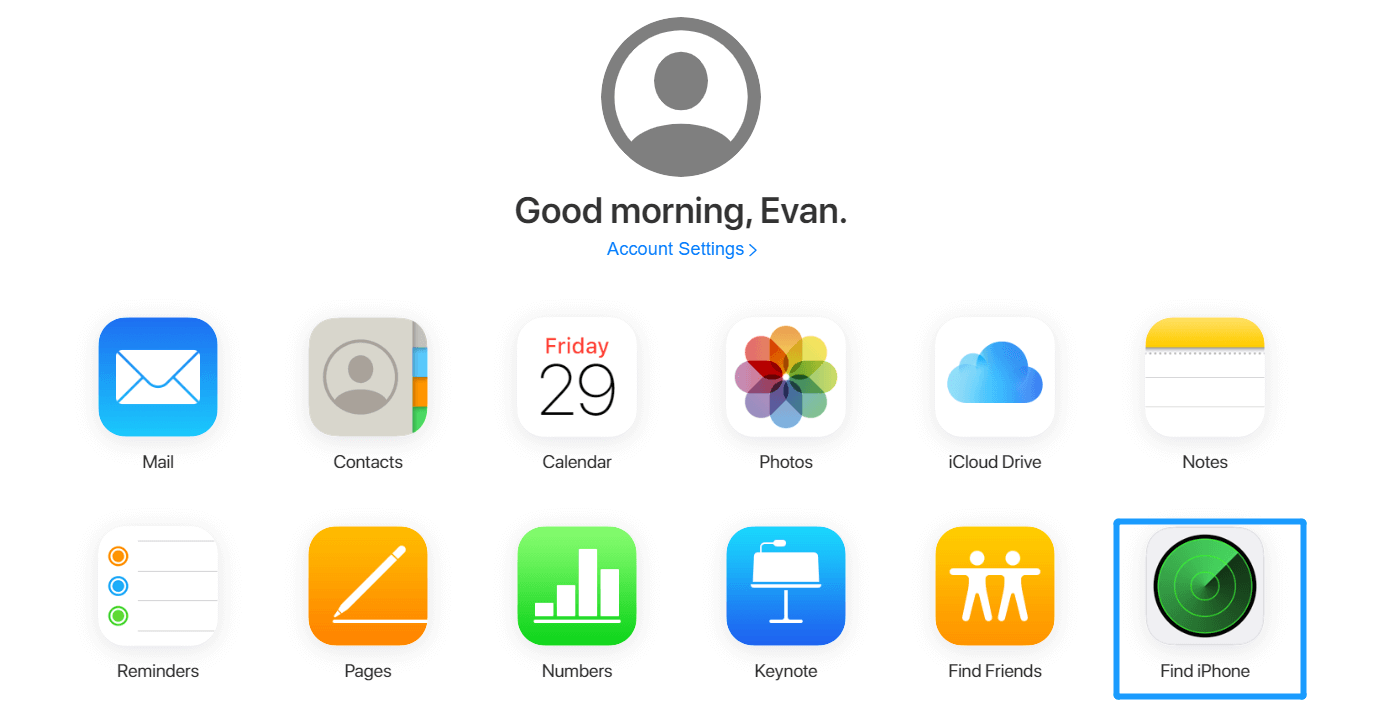
Step 3: Click on the “Find iPhone” button. The Find iPhone function can not only allow you to locate your device, whether it’s disabled or not, but also allow you to erase the iPhone and get it out of the disabled status.
Step 4: Click “Erase this iPhone” on your disabled device’s card. If you have multiple devices under this Apple ID, be sure you select the right device to erase.
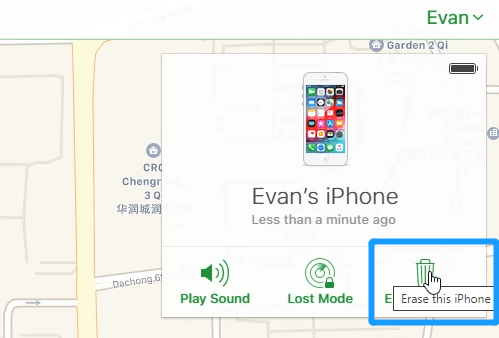
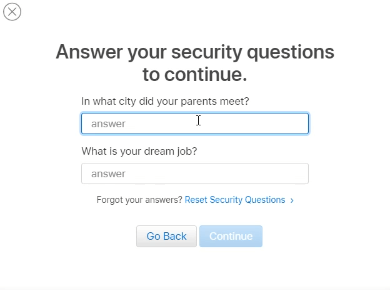
Step 5: After clicking “Erase”, there will be a window popped up, asking you to confirm the erase operation. Click “Erase”, and type in the password of the Apple ID again, along with the answer of the security questions, then your disabled device will start getting erased.
Step 6: iPhones getting erased with this method will be able to be setup as a new one. Now you can set a new passcode, and then trust computer when connect it to your computer.
Part 3: Trust Computer on Disabled iPhone with iMyFone LockWiper
iMyFone LockWiper helps you bypass deleting the passcode on a disabled iPhone to help you get into the device so you can trust the new computer once you're in it, and both disabled and unavailable iPhone can be unlocked and accessed without needing to click the trust button.
How can LockWiper help you get into the disabled iPhone and trust your computer? Well here are the steps:
Step 1: Download iMyFone LockWiper for free and install it on your computer.
Key Features:
- Enable your disabled iPhone in any scenario.
- Easily bypass 4-digit/6digit password as well as Face ID and Touch ID.
- Remove iCloud account from activated iOS devices with simple clicks.
- Unlock Screen Time passcode in without passcode.
- Have full access to all functions to your iOS device.
- Restore your device with no risk of bricking it.
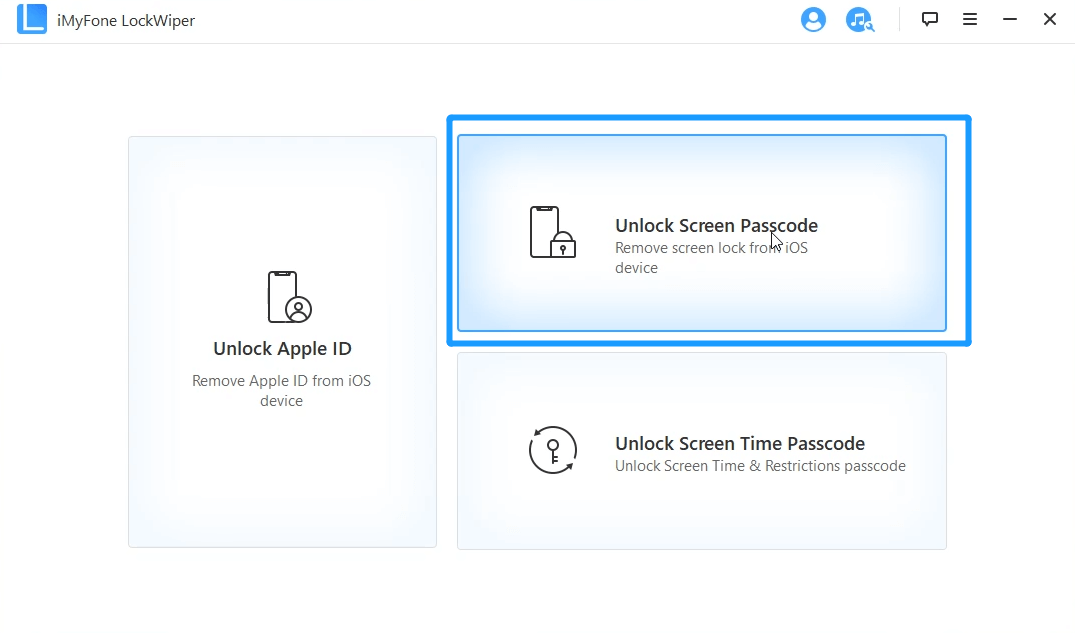
Step 2: Launch the program, and click “Unlock Screen Passcode”.
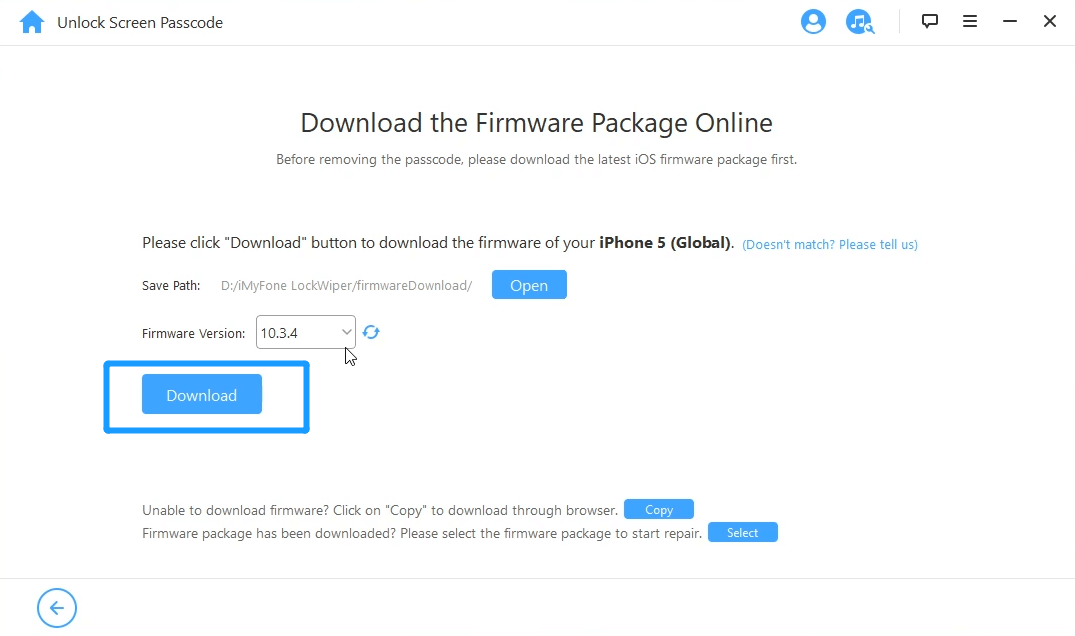
Step 3: Connect your disabled iPhone to the computer and follow the instruction to let the program download a firmware for your device. You don’t need to do anything else but clicking “Next” in the process.
Step 4: After the firmware is downloaded, Click “Start Unlock”. Meanwhile your disabled iPhone will start rebooting, and all you need to do is wait. Also, make sure the disabled iPhone stays connected to the computer in the entire process or it might get bricked.
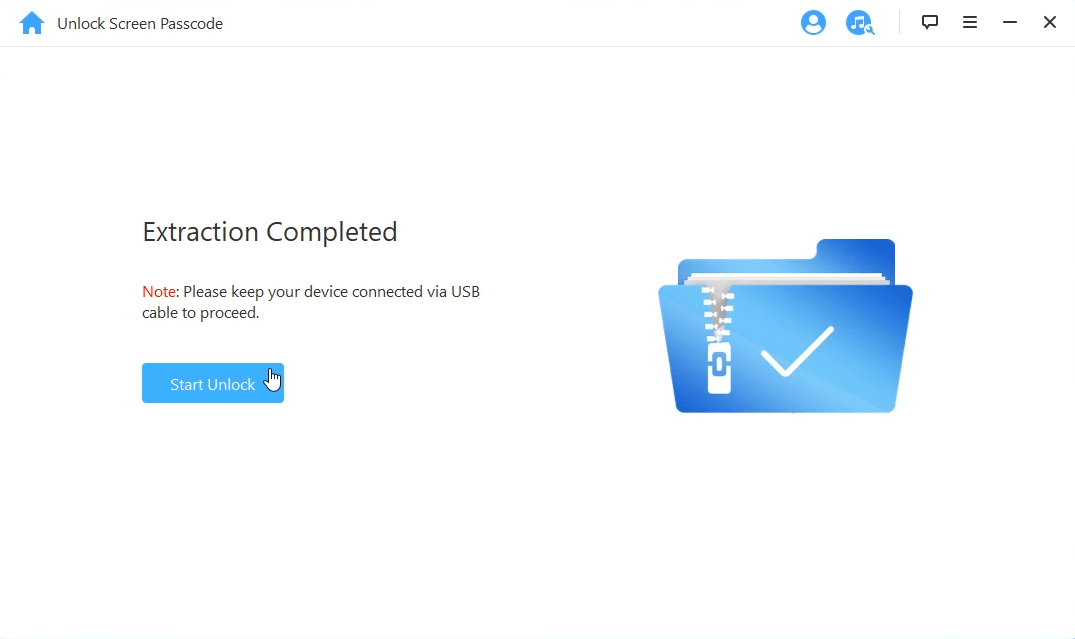
Finally, when you see this “Unlock is Complete” screen, it means the passcode on your device has been successfully removed.
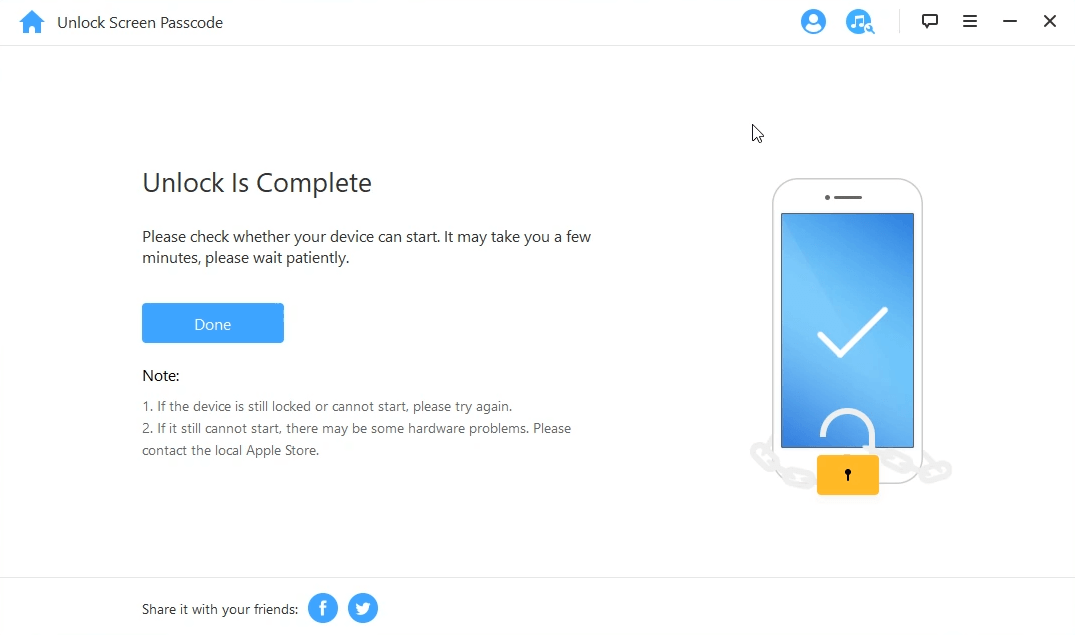
Once the process is done in 5 minutes, you can start setting a new passcode on your iPhone, then connect the device to iTunes and trust the computer without a problem.
You may also like
[Answered]Is There Free iMyFone LockWiper Official Registration Code?
[Solved] What is iPhone Demo Mode & How to Remove It?
[2025 Updated] 4 Ways to Find Apple ID Password
[Newest] 5 Ways to Reset Forgotten Screen Time Passcode after 10 Failed AttemptsPart 4: Trust Computer on Disabled iPhone with Recovery Mode
Finally we have this officially suggested solution for your disabled iPhone. If you get locked out of your iPhone and search for help on Apple’s official website, this is the solution you’ll get. It works for most devices, but will not keep any data on it. Here is what you need for this solution to work:
For this solution to work, you need:
- Functional physical buttons;
- And patience.
The steps are simple, but you might have to try it a couple of times until you successfully enter the recovery mode. Now here is how to do it:
Step 1: Connect your iPhone to your computer and open iTunes.
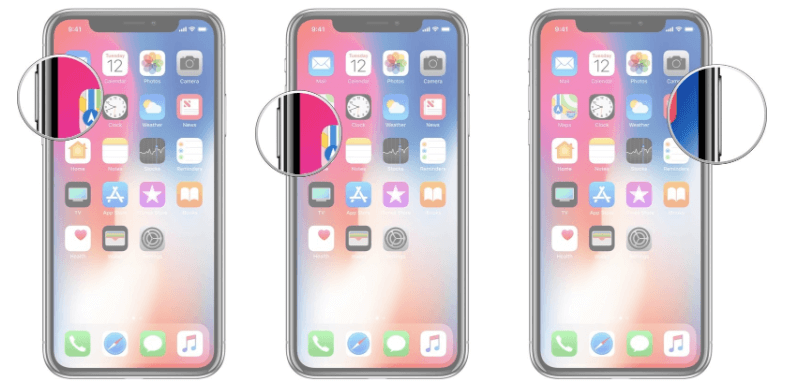
Step 2: While your iPhone is connected to iTunes, force restart:
On iPhone 8/8 Plus or iPhone X or Later: Press and release the Volume Up button, press and quickly release the Volume Down button, and press and hold the Side button until recovery mode appears.
On iPhone 7 or 7 Plus: Press and hold both the Side button and Volume Down at the same time until recovery mode screen appears.
On iPhone 6S Plus or Earlier: Press and hold both Home and Side buttons until recovery mode screen appears.
Step 3: Choose “Restore” and iTunes will wipe your iPhone and download the latest version of iOS on your iPhone. Wait for the process to complete before setting up your iPhone.
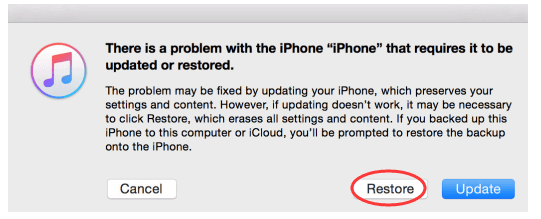
After restoring, you can then setup this disabled iPhone as new, and easily trust this computer when connected.
Part 5: Trust Computer on Disabled iPhone Related Q&As
Now you should have a clear idea on how to trust computer on disabld iPhone. If you still have some “trust computer” issues after getting into the iPhone, maybe you can find quick answers here.
Q What if the “Trust computer” window does not show up?
The “Trust computer” window on your iPhone will only show up when you connect it to a computer that it has never connected to before. But if it is a new computer and you still don’t see the “Trust computer” window, try update your iTunes by clicking “Help”, then “Check for Updates”.
Q What if the “Trust computer” keeps popping up every time I connect the iPhone to computer, even I have trusted it before?
Normally you only need to trust a computer at the first time you connect your iPhone to it. But if the “Trust computer” window keep showing up every time you connect your iPhone or iPad, try reset settings by going to “General”, “Reset”, then “Reset location & privacy”. After resetting, the “Trust computer” mechanism should be working properly.
QWhat if I accidentally chose “Don’t trust”?
Disconnect the device from computer, wait for a while, about 10 seconds, and then reconnect it, the “Trust computer” window should pop up again. You can also reset settings as suggested above to undo the “don’t trust” operation.
Q How to avoid iPhone getting disabled?
Well, to be simple, remember your passcode.
Besides intentionally input wrong passcode, you can sometimes accidentally type random passcode on your phone when it’s in your pocket and eventually causing the disable mode. To prevent this from happening, use Touch ID or Face ID instead if condition allows.


 April 1, 2025

