


 iMyFone UltraRepair
Unblur Photos & Videos, Repair Damaged Files & Audio
-
Repair any corrupted files, audio, photos, and videos.

-
Enhance blurry videos to high quality and restore video details.
-
Enhance image resolution and enlarge photos losslessly.
-
Instantly convert video and photo formats at no cost.

- AI-powered to naturally colorize black and white photos.
- Remove fog and noise to sharpen photos.
- Support the latest Windows 11/macOS 13.5.
Tell Us What You Think
Fix Corrupted Photos, Videos, Files & Audio
iMyFone UltraRepair gives you the best solution to repair your broken files including images, videos, documents and audio. Here are the formats that can fix by this brilliant yet efficient tool.


Repair Pixelated, Broken or Blurry Old Photos without Losing Quality
Repair Photos from Multiple Devices
No matter your pictures were taken by phones, cameras, or saved from the net, all can be repaired with ease.
Repair Photos in All Aspects
Broken and blurry images or even the red-eye photos in portrait mode can all back to normal by intelligent technology.
Repair Photos in Batches
Allows to add multiple corrupted photos and get them fixed at once. View the process at any time you want.
Fix & Enhance Corrupted and Low Pixelated Videos with Ease
Fix unplayable and broken videos recorded under all popular camera brands such as Canon, Nikon, Sony, GoPro, DJI, etc. Or videos filmed with mobile phones, digital handsets, and devices with lenses.
Fix and enhance videos in batches that are under different broken levels. Corrupted, low pixelated, low voiced, low saturation, or full 4D&8K videos can all get fixed in 3 simple steps.
Fix videos files at a high success rate. Advanced repairing technology is more competitive than other similar software on market. Offers you a cost-effective yet professional way to repair videos.


00:55
01:15
PDF files versions of 1.2, 1.3, 1.4, 1.5, 1.6, and 1.7.
Microsoft Word 2019, 2016, 2013, 2010, 2007, and earlier.
Microsoft Excel 2019, 2016, 2013, 2010, 2007.
PowerPoint files of 2019, 2016, 2013, 2010 and 2007.
Restore Broken & Inaccessible PDF, Word, Excel & Powerpoint Files
Perfectly repair corrupted PDF, Word, Excel, and PowerPoint files in three simple steps of all kinds of circumstances with iMyFone UltraRepair.Restore and repair broken, unreadable, inaccessible, incompatible, unrecognizable, or garbled files.
Fix text, images, tables, charts, hyperlinks, forms, headers, footers, graphs, watermark, etc from the file without modifying the original file.
Safely and quickly repair multiple document files in a single process. Only need 3 clicks to finish the process.
Rescue Damaged & Corrupted Audio to Bring Them Back to Life
Repair distorted audio types including those with clipping, noise, popping, rumble, humming and sibilance.
Available to repair audio files from different sources, such as voice recording devices, downloaded content and shooting equipment.
3 steps to restore audio files used for different occasions in the proper way with great accuracy, while without overcorrection.

Best AI Image Enhancer to Upscale Image without Losing Quality
Just with one click, iMyFone Ultrarepair can easily improve your photos or images in any situations.


Repair Corrupted Files with Just 3 Simple Steps
With this File Repair Tool - iMyFone UltraRepair, any damaged/corrupted images, videos, documents and audio can be back to normal!

1. Add Corrupted Files

2. Start to Repair
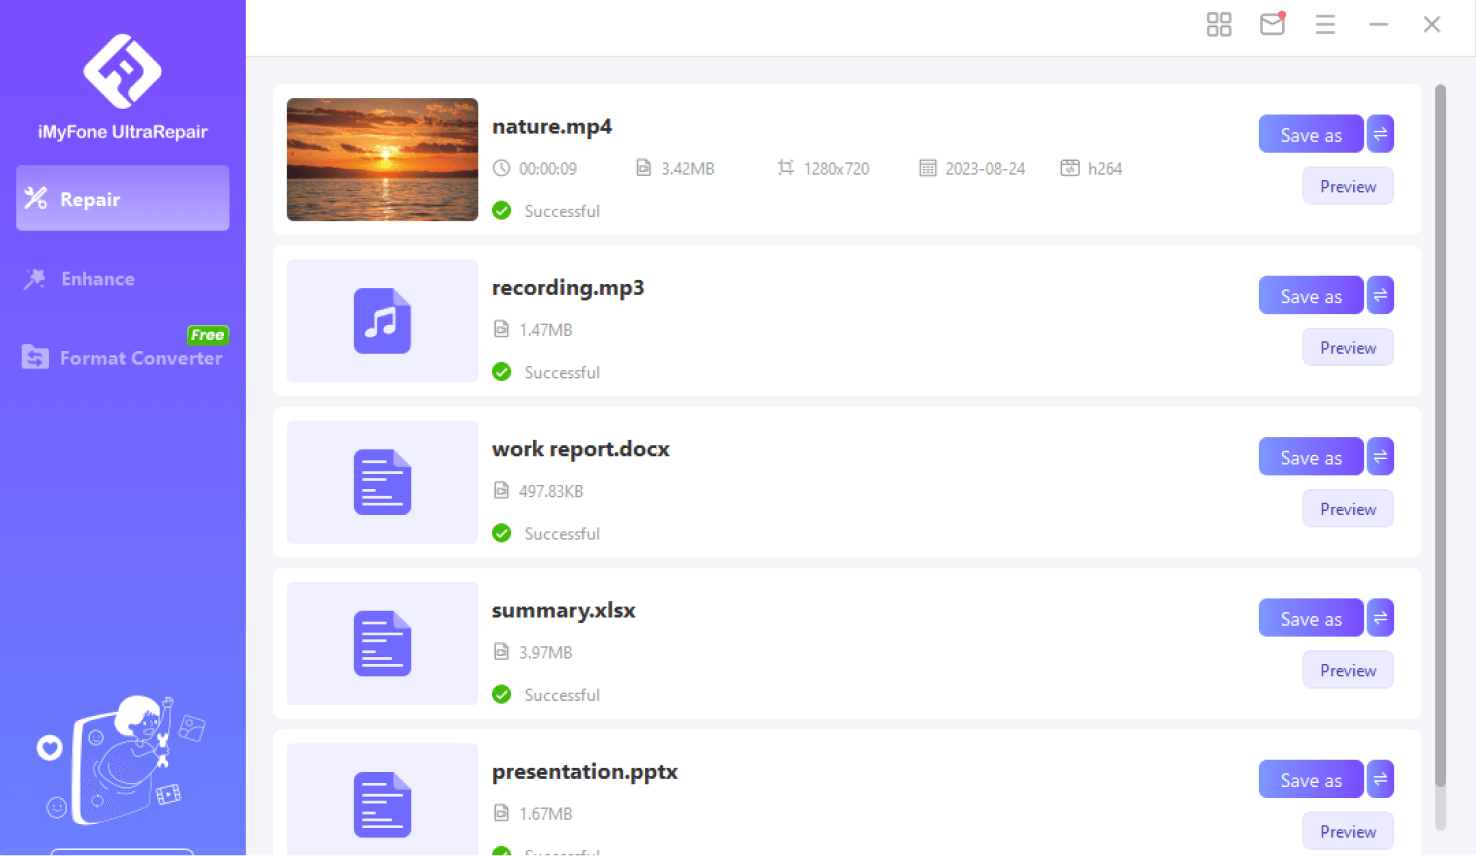
3. Repair Files Successfully
Thanks to Our Users,
Your Trust Make UltraRepair Better
Adam
I thought I lost all my videos when they suddenly wouldn't play. My friends told me they got corrupted. I tried this tool and I fixed all the videos at once. All were restored very fast! The quality of the video remains unchanged. Thanks again.
Katherine
I need to repair photos stored on my phone that are too damaged to open. Is the malware or something causing this problem. I found this file repair tool from YouTube and successfully got my photos back! This is very impressive. I will continue to use it.
Sheldon
This UltraRepair really saved my time! How can you unblur my photos and videos in such a short time? I've tried many software and they turned out without a satisfying result. I've never expected this one to be successful, but it did and my files are clear with details now, thank you so much!
Freely Repair with More Benefits
| Features | Free Trial $0 |
VIP Version $39.99 |
|---|---|---|
| Download and upgrade the software | ||
| Convert video and photo formats | ||
| Repair damaged photos, videos, documents and audio | ||
| Increase the resolution of blurry photos and videos | ||
| Colorize black and white photos naturally | ||
| Enlarge and defog photos without losing quality | ||
| 24/7 customer support | ||
VIP Version VS. Optional Versions

| VIP Version | for Photos | for Videos | for Files | for Audio | |
|---|---|---|---|---|---|
| Repair Photos | |||||
| Repair Videos | |||||
| Repair Files | |||||
| Repair Audio | |||||

New Release Sept 25, 2023
- Support to enhance the resolution and quality of blurry videos.
- Improved the feature of image quality enhancement.
- Added 4 formats for repairable images (PNG、RAW、TIFF、CRW).
System Requirements

Windows Windows 11/10/8/Vista/7

Mac macOS 10.1~macOS 13.5

Hard Disk Space Minimum 700MB of space
Files Supported

Image Format JPEG, JPG, PNG,GIF, CR3, CR2, NEF, NRW, RAF, DNG, ARW, GPR, TIF, TIFF, CRW, RAW

Video Format MP4, MOV, FLV, M2TS, MKV, MTS, MXF, 3GP, AVI, INSV, M4V

File Format PDF /. DOCX /. PPTX /. XLSX
Audio Format MP3、WAV、FLAC
FAQs and Hot Topics
FAQs About iMyFone UltraRepair
Tips & Tricks for File Repairing
- Fix Blurry Videos Sent to Me on iPhone and Android
- How to Fix No Sound on MP4
- 3 Methods to Repair Corrupted MP4 Video
- 6 Pratical Ways to Fix Corrupt JPG Image
- 9 Ultimate Ways to Optimize and Enhance GIF Quality
- Top 9 Solutions to Fix Excel Running Slow
- 7 Top Old Photo Enhancers to Restore Old Photos
- How to Fix Unsupported File Format Error