


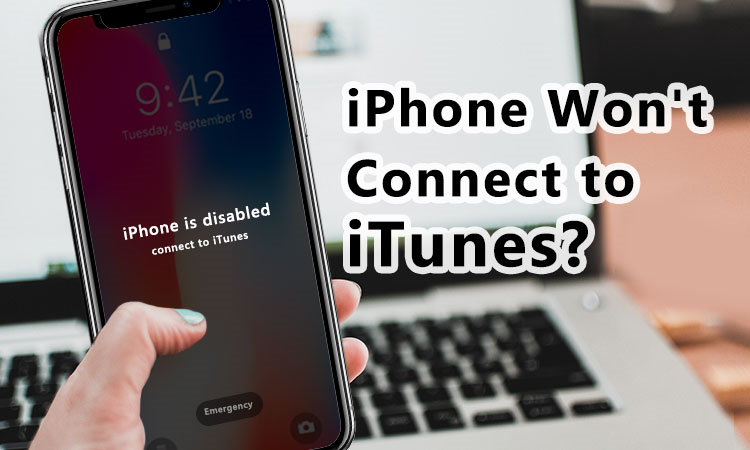
Have you ever encountered the frustrating message on your iPhone screen that says, "iPhone is disabled, connect to iTunes"? It's a common issue that can happen for various reasons, leaving you locked out of your device. In this article, we'll explore why this message appears and provide four reliable methods to resolve it. Whether you're a tech-savvy individual or not, these solutions are designed to help you regain access to your iPhone.
In this article:
- Why happen “iPhone is disabled connect to iTunes” ?
- Solution 1: Using iTunes to fix disabled iPhone
- Solution 2: Using iCloud to fix iPhone locked by screen
- Solution 3: Using recovery mode to enable a disabled iPhone
- Solution 4: Using LockWiper to unlock your disabled iPhone
- FAQ on iPhone is disabled
- In conclusion
Why happen “iPhone is disabled connect to iTunes”
Understanding the root cause is crucial in dealing with any issue, and the "iPhone is disabled connect to iTunes" message is no exception. This message typically surfaces when your iPhone has been locked due to entering multiple incorrect passcode in a row. It serves as an Apple protective measure to safeguard your data from unauthorized access.
Usually, the more times you try to enter the wrong password, the longer you have to wait before the next attempt. This is shown:
- wrong passcode 6 times in a row: iPhone is disabled. try again in 1 minute.
- wrong passcode 7 times in a row: iPhone is disabled. try again in 5 minute.
- wrong passcode 8 times in a row: iPhone is disabled. try again in 15 minute.
- wrong passcode 9 times in a row: iPhone is disabled. try again in 60 minute.
- wrong passcode 10 times in a row: iPhone is disabled. connect to iTunes.
Solution 1: Using iTunes to Fix a Disabled iPhone
iTunes offers a time-tested method to restore your disabled iPhone. You can follow these steps to regain access to your device:
1. Connect your iPhone to your computer: Begin by connecting your disabled iPhone to your computer using a USB cable.
2. Open iTunes: Ensure you have the latest version of iTunes installed on your computer and launch the application. Note: If iTunes asks you to enter passcode or indicates that it's unable to interface with your iPhone, you could skip to the Recovery Mode solution.
3. Click iPhone icon: This icon can be found in the upper-left corner of the iTunes window.
-
4. Cick the Restore iPhone button: To initiate the process, click on "Restore iPhone" located in the upper-right section of the page. If your iPhone has the Find My iPhone feature enabled, you will receive a prompt to deactivate it before proceeding. Since disabling Find My isn't possible when your iPhone is already disabled, consider using LockWiper to erase your iPhone as an alternative method.
5. Click Restore when prompted. Click the restore button to begin restoring to factory settings. and then wait for some minutes to finish the restore process.
6. Restore a backup if needed.


Solution 2: Using iCloud to fix iPhone locked by screen
This method has a prerequisite: the Find My iPhone feature must be turned on. If your Find My iPhone is off, you could use other 3 methods.
Following is the specific steps to using iCloud to fix disabled iPhone:
- 1. Go to the iCloud website and log in with your Apple ID.
- 2. Click on "All Devices" and select your disabled iPhone.
- 3. Click "Erase iPhone" to wipe your device and remove the passcode.
- 4. Set up your iPhone as a new device or restore from a backup.


Solution 3: Using recovery mode to enable a disabled iPhone
If you haven't synced your iPhone with iTunes or set up Find My iPhone, you can use Recovery Mode to unlock your device:
- 1. Connect your iPhone to your computer and open iTunes.
- 2. Put your iPhone into Recovery Mode:
- >>. For iPhone 8 and later: Quickly press and release the Volume Up button, then the Volume Down button, and press and hold the Side button until you see the recovery mode screen.
- >>. For iPhone 7 and 7 Plus: Press and hold the Volume Down and Sleep/Wake (Top) buttons simultaneously until the recovery mode screen appears.
- >>. For iPhone 6s and earlier: Press and hold the Home and Sleep/Wake (Top) buttons simultaneously until the recovery mode screen appears.
- 3. In iTunes, click "Restore" to erase your device and install the latest iOS version. Follow the on-screen instructions to complete the process.
Solution 4: Using LockWiper to unlock your disabled iPhone
If the above methods didn't work for you, a third-party tool like LockWiper can be a reliable solution. It's designed to unlock disabled iPhones quickly and efficiently.
iMyFone LockWiper is a professional iOS unlock tool that can unlock your screen lock, Touch ID, Face ID, and remove Apple ID in no password situation. When dealing with a disabled iPhone, LockWiper can get the device out of the disabled mode by deleting the screen lock and giving you full access to your device.
iMyFone LockWiper
- Reset your iPhone or iPad without Apple ID password, whether "Find My iPhone” is on is on or off.
- Reset iPhone/iPad without passcode when your iPhone is disabled or broken.
- It won’t be tracked or blocked by the previous Apple ID.
- Access all features after resetting iPhone without Apple ID or password.
- Support all iOS verisons and models, including iOS 17.
Here's how to use LockWiper to unlock your disabled iPhone:
Video about How to Bypass Any iPhone Passcode
Step 1: Download the LockWiper to your computer, and install it on your PC. Once installed, launch it.
Step 2: Select the Unlock Screen Lock mode to help you bypass the iPhone demo mode.

Step 3: Using a working USB cable, connect your iDevice to your PC and make sure the device is recognized.

Step 4: Download the firmware package and unpack it to move to the next step.

Step 5: Follow the on-screen instructions and select "Start to Unlock." To begin the unlocking process, it takes a few seconds to do this.

As you can see, the iMyFone LockWiper unlock tool can help you unlock iPhone demo mode within several steps. You deserve this powerful tool. Trial version is available for you to have a check. Just download the program and let it do the job for you.
FAQ on iPhone is disabled
Q1: What if I don't have a backup?
If you find yourself in a situation where you don't have a backup, you may face data loss when restoring your iPhone using iTunes or iCloud. In such cases, it's advisable to consider a professional tool like LockWiper, which can unlock your device without the loss of data.
Q2: How can I prevent my iPhone from being disabled in the future?
To ensure you don't encounter the "iPhone is Disabled Connect to iTunes" issue in the future, it's essential to remember your passcode. Additionally, using features like Touch ID or Face ID can help streamline the unlocking process. Regularly backing up your device is another key practice to protect your data.
Q3: Can I use someone else's computer with iTunes?
For the iTunes method, it's crucial to use a trusted computer that you've previously synced with your iPhone. If you don't have access to such a computer, you can consider using iCloud or the recovery mode method.
Conclusion
The "iPhone is Disabled Connect to iTunes" error can be exasperating, but with the right methods at your disposal, it's entirely manageable.
Whether you opt for iTunes, iCloud, recovery mode, or a specialized tool like LockWiper, you can regain access to your iPhone and safeguard your valuable data. Regularly backing up your device is a best practice that can prevent data loss in the future.
![]()
![]()
Melvin Cooper has over 10 years of experience in the technology industry and is an expert at providing tips and handy solutions to Apple and Android users. Dedicated to helping millions of users improve their experience with mobile devices, he has maintained an impressive record of solving problems.
-
[2025] How to Use iforgot.apple.com Unlock Apple ID?
iforgot.apple.com can unlock Apple ID and reset Apple ID password. Let's see how it works to help you regain control of your device.
3 mins read -
How to Use 3uTools MDM Bypass & Its Alternatives [ 2026 ]
How to use 3uTools MDM bypass tool? This article gives a full review of how to bypass MDM with 3uTools and its best alternatives as well.
3 mins read -
What Is iOS 18 iPhone Inactivity Reboot Feature? How Does It Work?
Do you know the feature of iPhone inactivity reboot after 3 days in iOS 18.1? What is it and how does it work? This article tells you all!
2 mins read -
Explore the Best Free iPad Unlock Software: Unlock with Ease
If you are looking for a real free iPad unlocker, you can't miss the free iPad unlock software this article has put together for you, you can choose the best.
4 mins read -
[2025] What Is iOS Account Manager & How to Remove It
What is iOS Account Manager? Can I remove it? This guide will explain what does iOS Account Manager mean and provide steps for you to remove it with ease.
3 mins read -
How to Fix This Apple ID Is Not Valid or Supported
This guide focuses on explaining and resolving why this apple id is not valid or not supported issues to help you fix Apple ID not working on iPhone problems.
3 mins read
Was this page helpful?
Thanks for your rating
Rated successfully!
You have already rated this article, please do not repeat scoring!