
Users often complain that when they are installing or updating their iTunes to the latest version, they get an error message “Apple mobile device service failed to start” or in some instances, “Windows could not start the Apple Mobile Device service on Local Computer. Error 1053: The service did not respond to the start or control request in a timely fashion.”
If you have been seeing this message, it means you have not been able to install or update your iTunes to the latest version. There are many ways that you can deal with this problem and resolve it permanently.
Part 2: Common Ways to Try on Windows 10/8/7 (50% Success Rate)
One-Click Fix “Apple Mobile Device Service Failed to Start”
This ways is strongly recommended by lots of Apple fans as it worked!
A lot of fixes that promise you a solution to this error would either require you to have more than elementary working knowledge about your PC and its OS or they would take large amounts of your time and stress you out.
The best fix that you can use to get rid of this problem without the attendant stress or knowledge is iMyFone TunesFix, a professional iTunes repair tool. Whenever you have a problem with iTunes, even if you don’t know what the problem is or if you have never seen it before, TunesFix can help you get rid for good.
Main Features:
- Easily get rid of “Apple Mobile Device Service failed to start” when updating or installing.
- Auto-detect your iTunes issues for free and give the corresponding fixing.
- Repairing iTunes won’t cause data to lost.
- Also repair 100+ more iTunes errors: iTunes connect/open/iOS restore/update/backup and other issues.
- Fully compatible with Windows 10/8.1/8/7; support iTunes 12.5.3.16 and later versions.
- Why choose it: safe, fast, easy and featured in high (95%+) success rate.
How to Fix “Apple Mobile Device Service Failed to Start”
Step 1: Launch TunesFix. As soon as you launch, it will automatically detect your iTunes and necessary components. In your case, it will show you some components are damaged. (You can click the question mark to learn more)
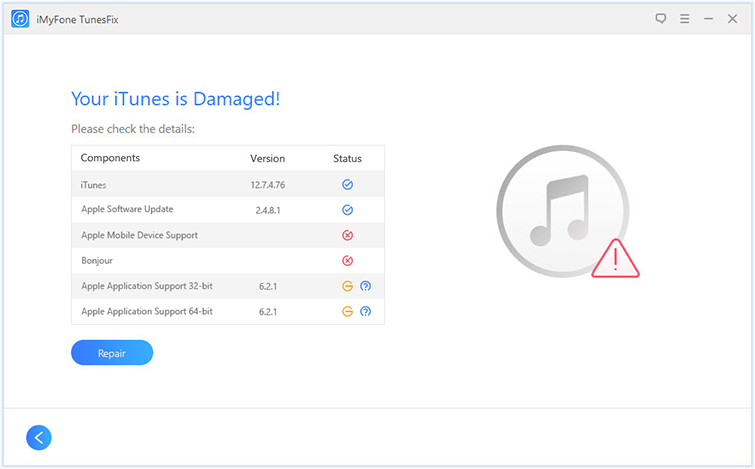
Step 2: Tap on “Repair” and it will start to install the repair driver for your specific iTunes. When it’s done, your iTunes will be successfully installed on your PC. That’s it.
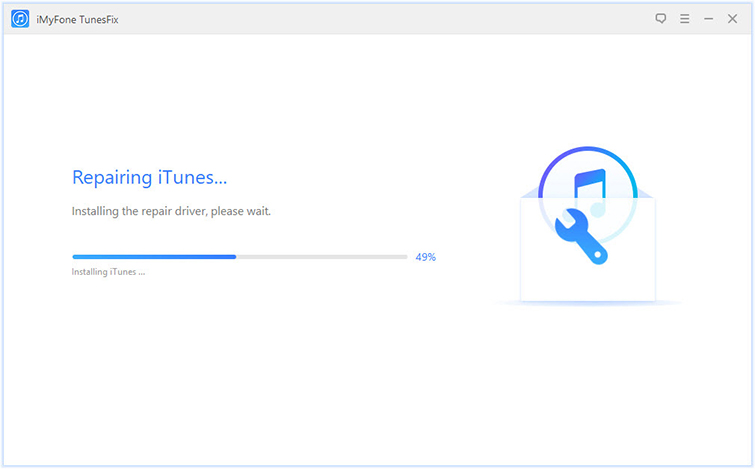
Note: If you are directed to its home interface after detecting, go to “Fix iTunes Install/Update Issues” and let it repair.
Other Significant Features of iMyFone TunesFix
- Thoroughly clean up your iTunes to free up space and boost its performance.
- Preview and select old iOS backups to delete from iTunes, including some hidden backups made by third-party software or tools.
- Tune up iTunes by cleaning useless files, like cache, cookies, logs, temporary downloads, corrupted files, etc.
- Also works an iTunes uninstall tool to remove iTunes and its related software in the right order.
Common Ways to Try on Windows 10/8/7 (50% Success Rate)
There are other ways to fix the “Apple Mobile device service failed to start” error. However, we cannot vouch for their success as a lot of them have just about 50% success rate. These fixes include the following:
Restart the Apple Mobile Device (AMD) Service
One fix you can try is restarting the Apple Mobile Device service. Just follow these steps.
Step 1: Click on the “Start” button and type “services.msc” in the search box. This will launch a service window.
Step 2: Look for “Apple Mobile Device Service” and right-click on it, then choose “Properties”.
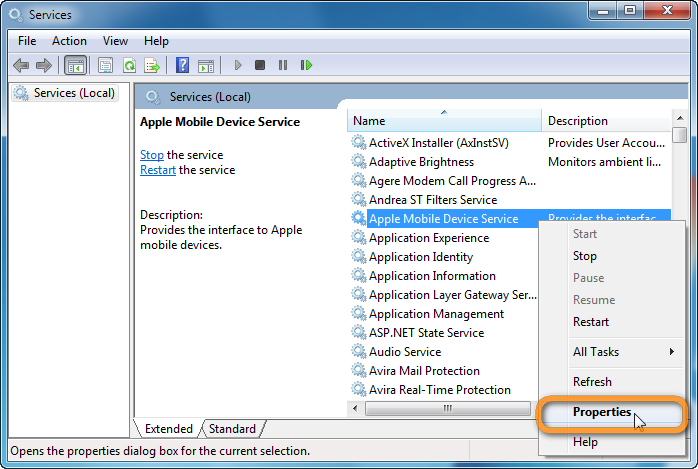
Step 3: You will see the status of the service. If it is running, click “Stop” then “Start”. If it is not running, click “Start”.
Step 4: If you received an error message telling you the service cannot be started, check that the “Startup Type” is set to “Automatic” then click “Apply”.
Step 5: Restart your PC then try reinstalling iTunes.
2 Ways to Reinstall All iTunes Components
Another fix you can try is to uninstall iTunes and all related components on your PC. There are two ways you can do this: either the manual or automatic way. Of course, doing it manually means you have to spend quite a bit of time tinkering with your PC.
Manual Way:
Step 1: Go to “Control Panel > Programs and Features”.
Step 2: Uninstall iTunes and related components in the following order:
- iTunes
- Apple Software Update
- Apple Mobile Device Support
- Bonjour
- Apple Application Support (32-bit)
- Apple Application Support (64-bit)
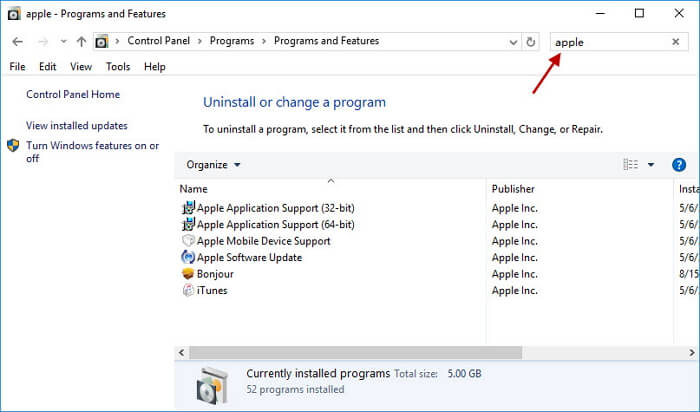
Step 3: Manually delete the following folders from your pc:
- C:Program FilesiTunes
- C:Program Files (x86)iTunes
- C:Program FilesCommon FilesApple
- C:Program Files (x86)Common FilesApple
Step 4: Restart your PC and reinstall iTunes
Automatic Way:
You could use iMyFone TunesFix’s fully automatic and stress free iTunes uninstall feature. It won’t cause any bad influence and no risk of damaging. All you have to do is follow these easy steps:
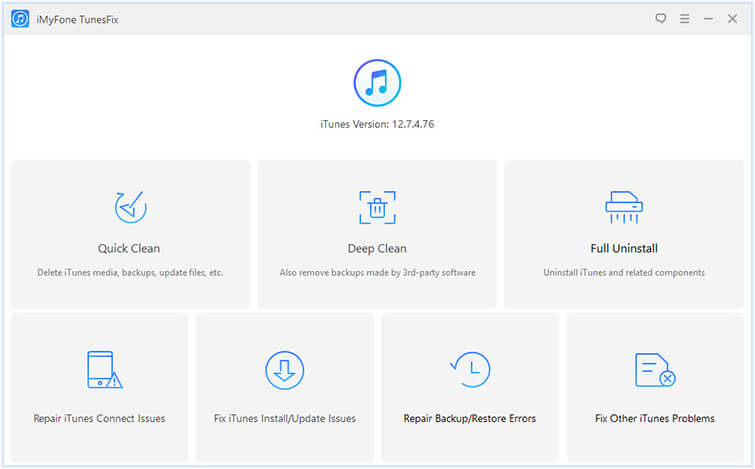
Step 1: Launch TunesFix. When you are in the home interface, click on “Full uninstall” to remove iTunes and related components. You will be guided to an uninstallation page.
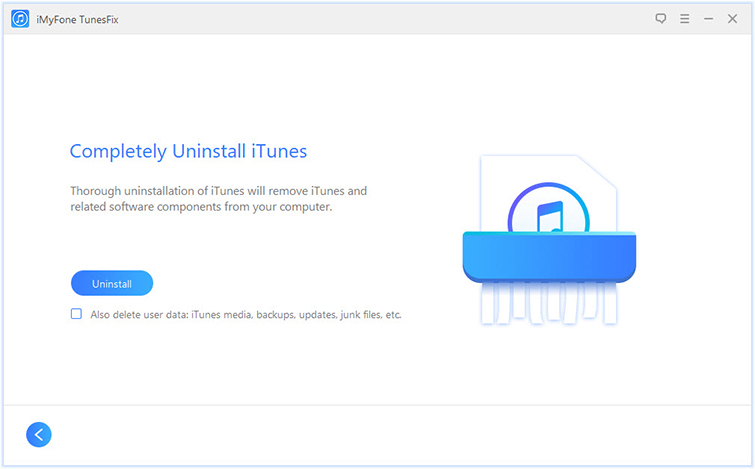
Step 2: Click “Uninstall” and TunesFix will start to remove iTunes and related components from your pc.
Note: To delete iTunes user data, check “Also delete user data” before you click on “Uninstall”.
Once the uninstallation is done, tap “click here” reinstall iTunes.


 June 21, 2021

