


Top 6 Ways to Solve Data Transfer to Any Phone
Category: Mobile Transfer

10 mins read
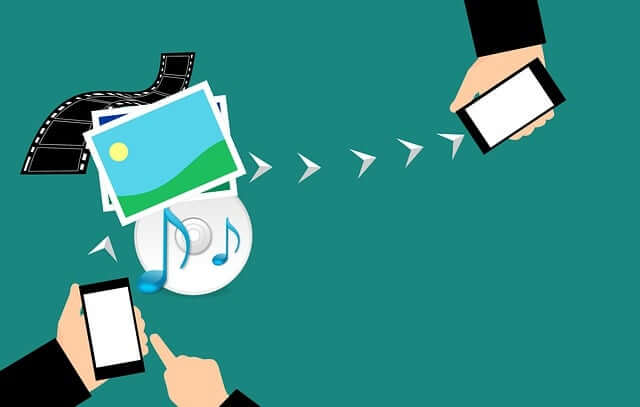
After the WWDC conference and the launch of iOS17, many people are looking forward to the new release of the iPhone15. Do you also want to use the latest model? Wait a minute! First of all, do you know how to seamlessly transfer data from old phones to new ones?
In order to better realize the functions brought by the new phone, and not to affect our life after replacing the phone, it is necessary to understand how to transfer the phone data.
No need to worry about how to transfer data in the replacement phone, this article contains the most complete phone transfer methods in 2023.
Top 6 Ways to Transfer Data to Any Phone
01 Smart Switch Software (for Samsung)
Numerous phone manufacturers offer their dedicated data transfer software, such as Samsung Smart Switch or Apple iTunes. These programs enable hassle-free transfer of data, applications, and settings between devices of the same brand. They often provide user-friendly, step-by-step instructions, simplifying the process.
However, this method may not work between different brands or operating systems.
- You may also interest: How to Transfer iPhone to iPhone?
Pros
- Seamless transfer of data, apps, and settings between devices of the same brand.
- User-friendly interface with step-by-step instructions.
- The transfer process encompasses a diverse array of data types, encompassing contacts, messages, photos, and various other forms of information.
- Some software can also perform backup and restore functions.
Cons
- Limited compatibility between different brands or operating systems.
- May not transfer all types of data or specific app data.
- Some software may have limitations or require specific settings to work correctly.
- Can be time-consuming for large amounts of data.
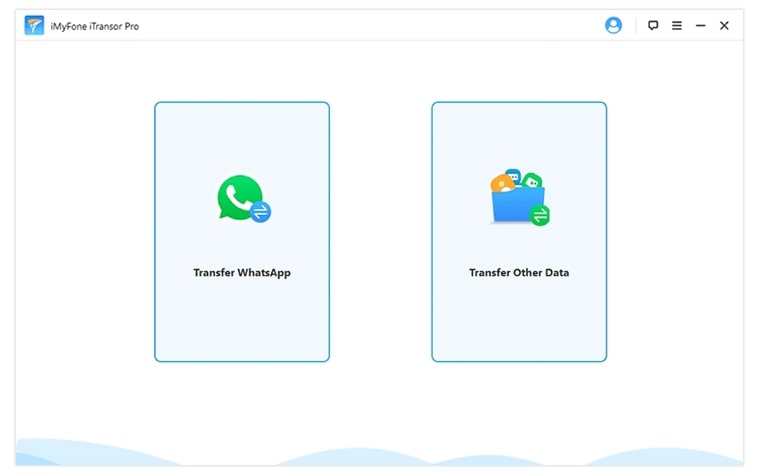
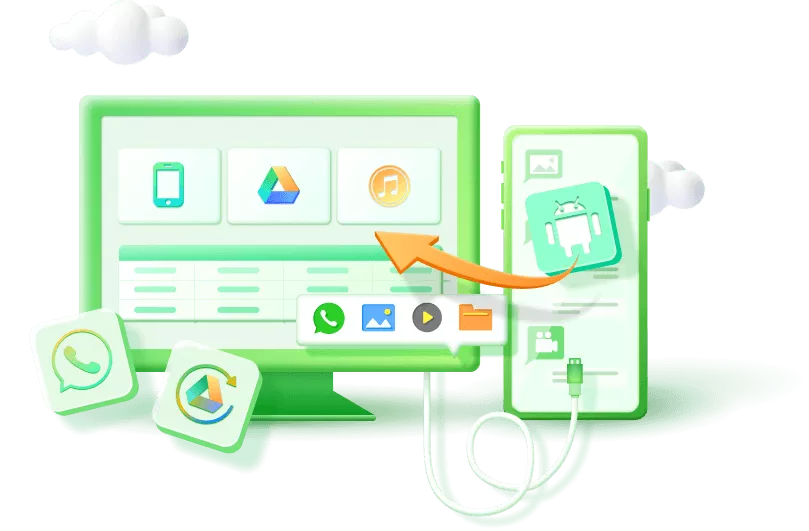
02 iTransor Pro - Phone Data Transfer Software
The third-party software - iTransor offers comprehensive data transfer solutions across different devices and platforms.
All in One, one for all phone data transfer app
iTransor pro supports a wide range of data types and provide additional features like backup and restore.
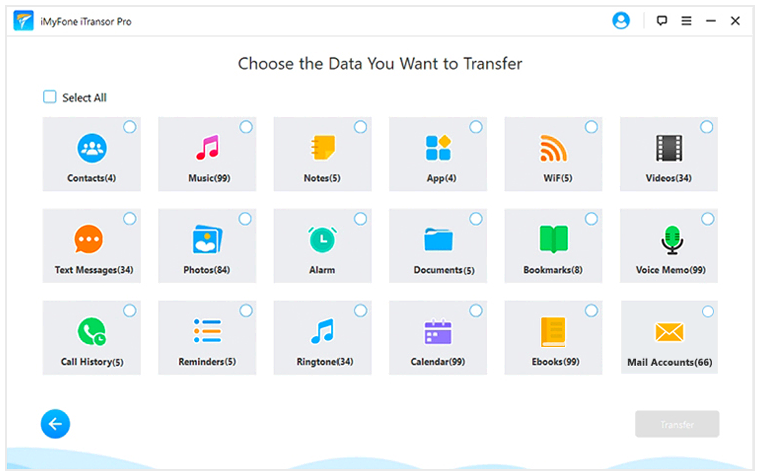
Which Types of Data Can Be Transferred?
- Contacts
- Text Messages
- Call History
- Photos & Video
- Voice Memo
- App
- Music
- Calendar
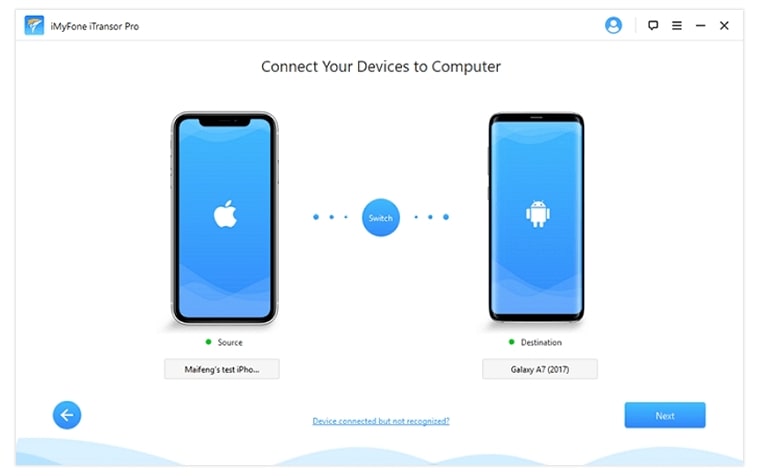
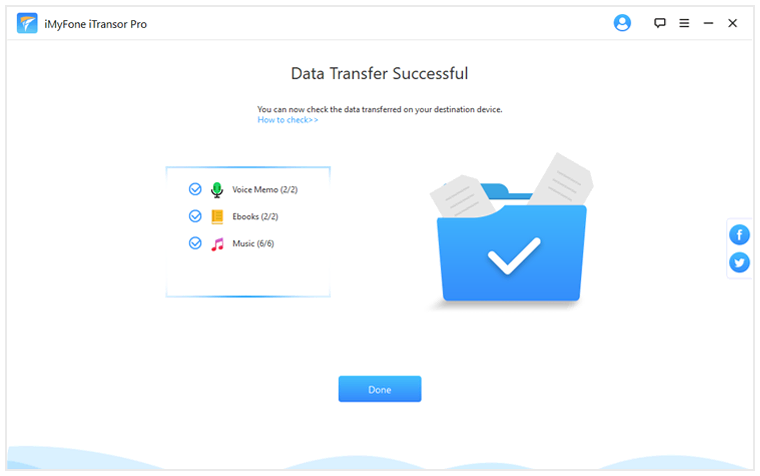
How to Transfer Data to a New Phone?
Step 1. Choose transfer other data
Step 2. Connect your devices to a computer
Step 3. Choose the data you want to transfer
Step 4. Complete phone transfer
iMyFone iTransor Pro
Transfer/Backup/Restore/Export iPhone/Android Easily and Quickly.
Pros
- Comprehensive data transfer solution for various devices and platforms.
- Supports a wide range of data types, including contacts, messages, photos, music, and more.
- Some software offers additional features like backup, restore, and data management.
- Can transfer data between different brands and operating systems.
Cons
- The software need to buy for its features.
- May encounter compatibility issues when using certain software with specific devices or operating system versions.
- Have the Limitations on the amount or types of data that can be transferred.
03 Cloud Storage
Utilizing cloud storage services allows you to upload your data to the cloud and access it from any device. This method is convenient and ensures data availability even if your phone is lost or damaged.
3.1 How to use Google Drive to Transfer My Phone Data?
To transfer your phone data using Google Drive, you can follow these steps:
Step 1. Install the Google Drive app
If you haven't already, download and install the Google Drive app from the Google Play Store (for Android) or the App Store (for iOS).
Step 2. Sign in to your Google account
Launch the Google Drive app and sign in using your Google account credentials.
Step 3. Upload data to Google Drive
Once you're signed in, tap the "+" icon or the "New" button to create a new folder or upload files. You can select the files or folders you want to transfer from your phone's storage and upload them to Google Drive. Make sure you have enough storage space available on your Google Drive account.
Step 4. Wait for the upload to complete
The time it takes to upload the data will depend on the file size and your internet connection speed. Ensure that your phone is connected to a stable Wi-Fi network to avoid interruptions during the upload process.
Step 5. Access data on another device
Once the upload is finished, you can access your data from any device with the Google Drive app installed. Simply sign in to your Google account on the other device and open the Google Drive app. Your uploaded files will be available for viewing and downloading.
Step 6. Download data to another device
To transfer the data to another device, open the Google Drive app on that device, sign in to the same Google account, and navigate to the files you uploaded. You can then download them to the device's local storage or directly access them from Google Drive.
Step 7. Organize files in Google Drive
If you want to keep your files organized in Google Drive, you can create folders, move files into specific folders, or use the built-in search feature to find specific files quickly.
Step 8. Delete uploaded files
Once you have transferred your data to Google Drive and verified that it's accessible on another device, you may choose to delete the files from your phone's storage to free up space. However, exercise caution and ensure you have backups of your important data before deleting anything.
- You may also interest: How to transfer WhatsApp backup from WhatsApp to iCloud?
3.2 How to Use iCloud to Sync My Phone Data?
To use iCloud to sync your phone data, follow these steps:
Make sure that iCloud is activated on your iPhone by navigating to the "Settings" menu, tapping on your name at the top, selecting "iCloud," and verifying that it is switched on. If prompted, sign in with your Apple ID or establish a new one if needed.
Step 1. Choose what data to sync
Within the iCloud settings, you will come across a range of data types including Contacts, Calendars, Photos, Notes, and more. Enable the synchronization of desired data across your devices by toggling on the respective options.
Step 2. Set up iCloud
iCloud offers the capability to store and access files across multiple devices. To activate this feature, navigate to the iCloud settings and toggle on the option for "iCloud." Additionally, you have the flexibility to select which apps can store data in iCloud Drive, providing you with greater control over your storage preferences.
iCloud offers the convenience of automated device backups. To activate iCloud Backup, follow these steps:
- Access the "Settings" menu on your device.
- Tap on your name in the settings menu.
- Choose "iCloud" from the available options.
- Select "iCloud Backup" from the menu.
- Enable the "iCloud Backup" option by toggling it on.
- Initiate an immediate backup by tapping on "Back Up Now."
It is advisable to keep iCloud Backup enabled to ensure regular backups of your device.
However, it requires a stable internet connection and may incur additional costs for larger storage capacities.
Pros
- Convenient access to data from any device with an internet connection.
- Data is securely backed up and safeguarded in the cloud, ensuring its protection and availability whenever needed.
- Can easily share files with others.
- Reduces the need for physical storage space on your phone.
Cons
- Requires a stable internet connection.
- Limited storage capacity for free plans.
- May incur additional costs for larger storage needs.
- Transferring large files can be time-consuming.
04 Google Account Sync
If you have an Android device, syncing your data with your Google Account can automatically transfer contacts, calendar events, and app data to a new device. This method is convenient, as it happens in the background, and your data remains accessible across multiple devices.
However, it may not transfer all types of data, and you need a Google Account.
Pros
- Automatically syncs contacts, calendar events, and app data to a new Android device.
- Data remains accessible across multiple devices.
- No additional software or cables required.
- Seamless background synchronization.
Cons
- May not transfer all types of data or specific app data.
- Requires a Google Account and internet connectivity.
- Limited to Android devices.
- Syncing large amounts of data can take time.
05 USB Cable Transfer
Connecting your phone to a computer via a USB cable allows you to transfer files directly. This method is simple, reliable, and supports high-speed data transfer. It also allows you to organize files on your computer easily.
How to use USB Cable to Transfer My Phone?
- Turn on the new phone.
- Select start.
- Connect to a Wi-Fi network.
- Choose which apps and data to copy.
- Plug in the cable between the two phones.
- Follow the on-screen prompts.
Which Files Can I Transfer by USB Transferring?
- Call history
- Contacts
- Text Messages
- Gallery (photos and videos)
- App data
However, it requires a USB cable and a computer with compatible software. Additionally, some devices may have limited support for file types or require specific drivers.
Pros
- Reliable and high-speed data transfer.
- Supports transferring large files and folders.
- No internet connection required.
- Easy to organize files on a computer.
Cons
- Need a USB cable that is compatible with your iPhone model and a computer equipped with suitable software for the transfer process.
- Certain devices may offer limited support for specific file types during the transfer process.
- May require specific drivers for certain devices.
- Physical connection between the phone and computer is necessary.
06 Wireless Transfer Apps
Applications like Shareit, Xender, or AirDroid enable wireless transfer of various data types between devices on the same Wi-Fi network. These apps provide a user-friendly interface and can transfer data quickly.
However, both devices need to have the app installed, and sometimes there can be compatibility issues between different operating systems.
Pros
- Allows wireless transfer of data between devices without the need for cables.
- Supports transferring various file types, including photos, videos, and documents.
- Can transfer data between different operating systems.
Cons
- Some apps may display ads or have in-app purchases.
- Transferring large files can be slower compared to other methods.
- Potential compatibility issues between different devices and operating systems.
Wrapping Up
With a clear understanding of the various data transfer options available to you, you will no longer find yourself wondering how to transfer all your data from your old phone to your new one. Embrace your new device and ensure online safety by utilizing iTransor Pro.
(Click to rate this post)
Generally rated 5 (256 participated)
Rated successfully!
You have already rated this article, please do not repeat scoring!