Apple will offer iCloud users fixed storage space depending on the plan they select. Your iCloud storage can become full and you may still have more important data that needs backing up. In such a case, you have two options. You can either delete some of the old and less important data or you can upgrade your storage plan. Upgrading will cost you money. Therefore, a better option is to delete your less crucial data.
Among the less important data you can delete to free up iCloud space, there is iCloud Music Library. If you have never deleted your iCloud music library before, this might seem to be complicated. However, in this article, we will make things uncomplicated for you. We will show you how to delete iCloud music library. If you prefer deleting individual songs, we will also show you how to delete songs from iCloud.
Part 1: How to Delete Songs from iCloud Music Library
Deleting the songs you have on iCloud music library can be done on your iPhone or iPad. If you prefer using a computer, you will be happy to know that you can still delete the songs using either a Windows PC or Mac. Below, we show you how to delete songs from iCloud using any of these devices.
On iPhone/iPad
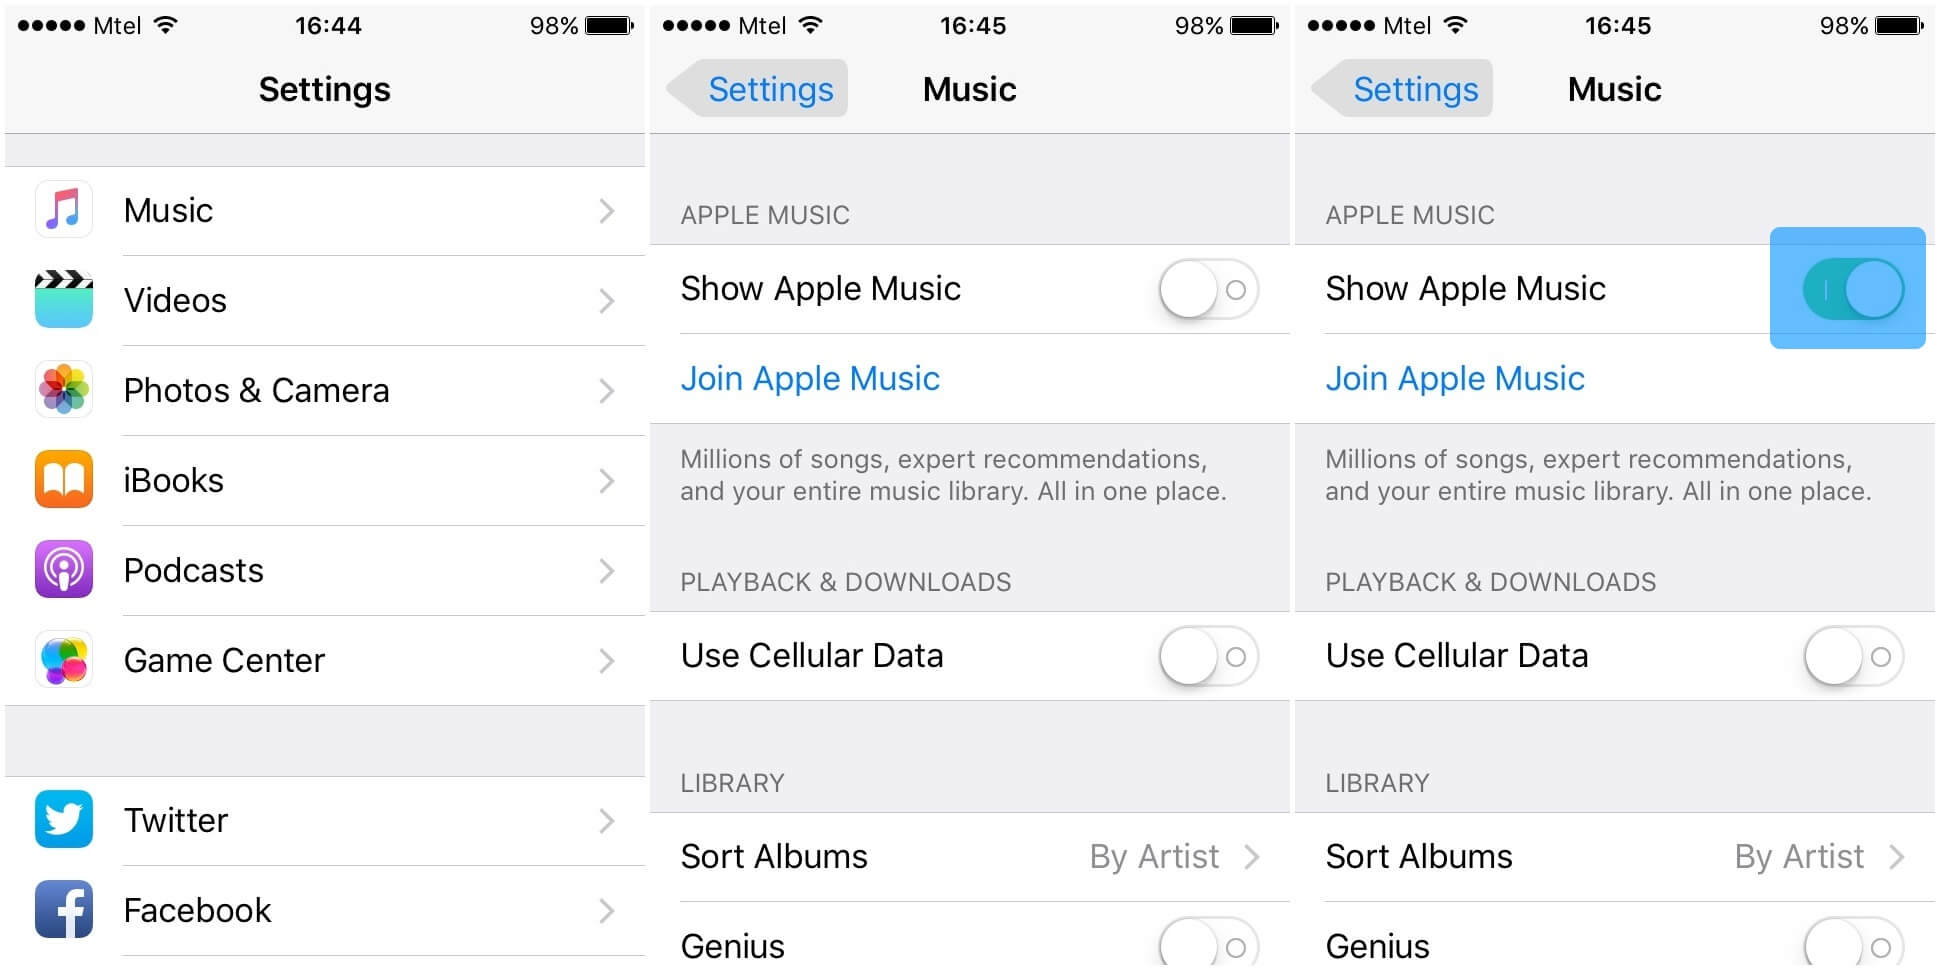
Before you can delete your songs from iCloud, you need to make sure that all songs including the ones on iCloud can be accessed on your iOS device in the music library. This means that you have to toggle on Show Apple Music. To turn on this feature, follow the steps below:
- Open your iPhone/iPad Settings and then tap Music.
- Toggle on Show Apple Music.
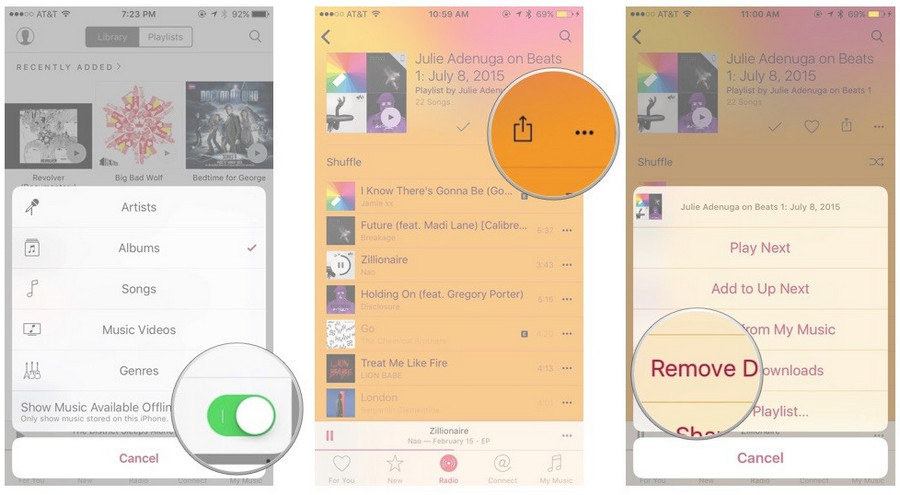
After turning on Show Apple Music, follow the steps below to delete songs from iCloud on your iPhone/iPad:
- Open the Music application. Next, locate the album, playlist, or song you wish to delete. Tap the “…” icon.
- A Menu should appear. Click Delete on this menu.
- From the confirmation popup that appears, click Delete from Library to delete the album, playlist, or song from iCloud. If you click Remove Downloads, you will succeed in removing the song on your iPhone only.
On PC/Mac
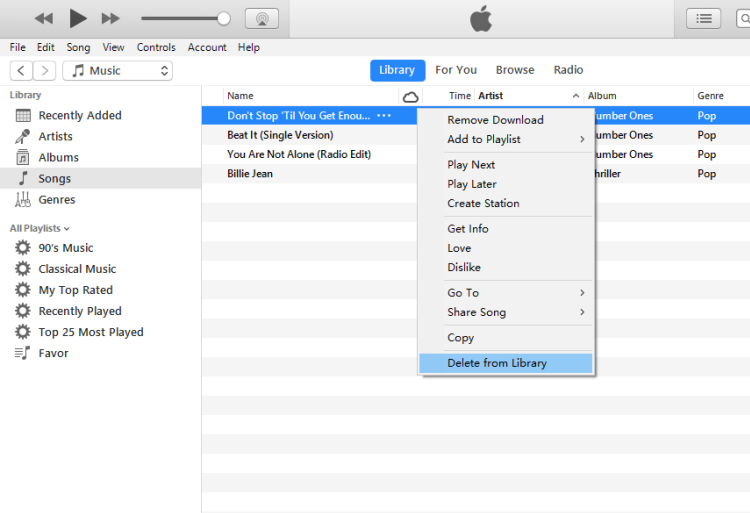
- Open iTunes on your Mac or PC. Locate the playlist, song, or album you would like to delete from iCloud.
- Right-click on the item.
- From the two options that appear, select Delete from Library to remove the song from your iCloud Music Library.
Part 2: How to Reset iCloud Music Library
If you want to delete all the songs you have on iCloud, deleting them one by one is time-consuming. A better option would be to reset your iCloud Music Library. This is not as complicated as it sounds. The steps we have outlined below should guide you on how to delete iCloud Music Library by resetting it:
- Open iTunes.
- From the drop-down available on your left, choose Music and then click Library. Tap Songs.
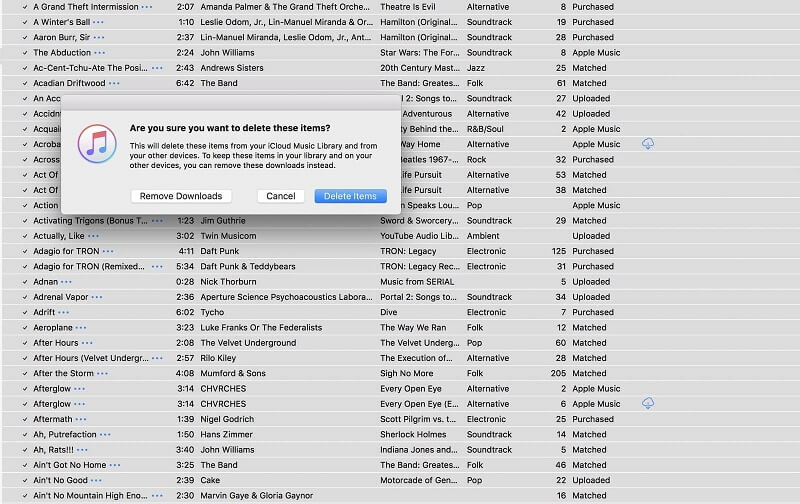
- On your Keyboard, select all your songs by pressing Command key and the letter A at the same time. If you are on a Windows PC, press Ctrl-A.
- Press your Delete Key.
- Tap Delete Items to delete the songs from iCloud. Don’t click Remove Downloads since this will delete your local music.
Part 3: Alternative Way to Back Up Music with TunesMate
Instead of letting your iCloud Music Library take all your iCloud storage space, you can use a third-party tool to back up your songs on your computer. The best third-party tool you can use is iMyFone TunesMate. This software is compatible with both Windows and Mac. The tool will work with all iOS devices. This includes the latest devices running iOS 11.3, iPhone 8/8 plus, and iPhone X. The features offered by iMyFone Tunesmate include:
Main features of iMyFone TunesMate:
Key Features:
- It will offer you a two-way transfer. You get to import and export your data freely.
- There are no limits to numbers of PCs or devices.
- You get to preview your data and hence you have the ability to selectively transfer this data.
- iMyFone Tunesmate will help you bypass iTunes.
- The tool will make sure that no data gets lost.
To use iMyFone TunesMate to back up your songs on your computer, follow the steps we have outlined below:
- Launch iMyFone TunesMate and then connect your iOS device to your computer using a USB cable.
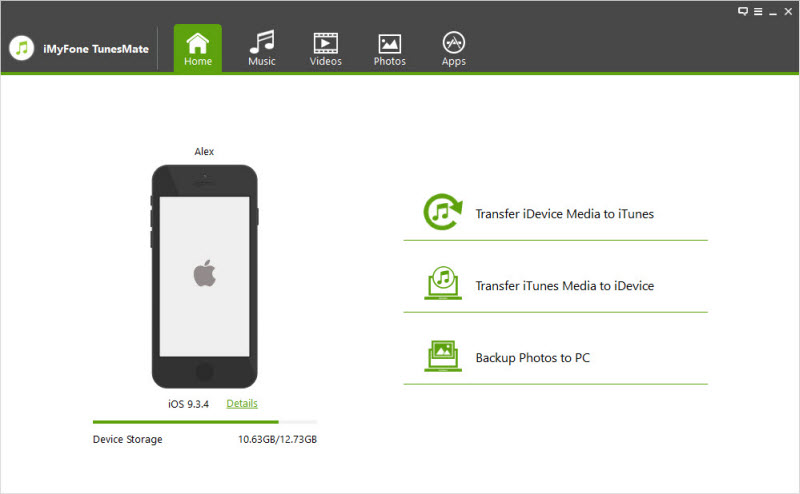
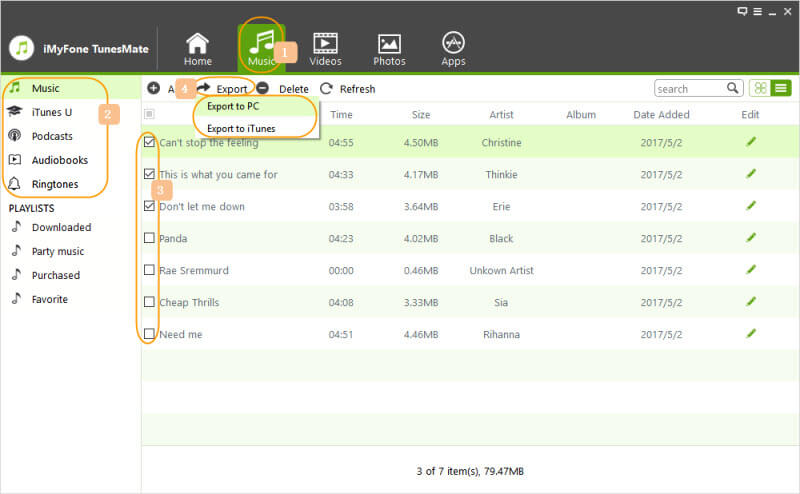
- On iMyFone TunesMate top bar, tap the music icon. This should take you to the music window. Here you should see all the music you have on your iOS device.
- Select all the songs you would like to export to your Mac or Windows PC, then Click Export to PC.
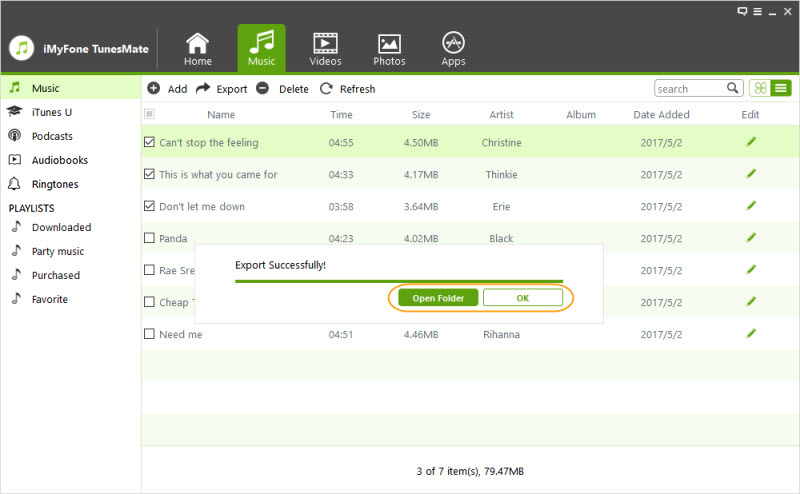
- A window should open that prompts you to select the folder you wish to export your music to. Browse and locate the folder you would like to save your songs to. Click OK for the export process to begin. Wait while your songs are being exported.
Your iCloud Music Library can take too much of your iCloud backup space. In such a case, you would want to delete the songs in the music library to save space for more important data. This article guides you on how to delete songs from iCloud. Also, we show you how to delete iCloud Music Library by resetting it. A better way to back up your music that does not count against your iCloud storage space is to use iMyFone TunesMate. This tool is available as a free trial and you can use it on both Mac and Windows PC.


 December 1, 2021
