After using the Facebook application on your iPhone for a long time, you will have a lot of data saved in your Facebook account. This data includes your contacts. If you have lost your contacts on your old iPhone or you just purchased a new one, you can sync Facebook contacts to iPhone in iOS 12/13. The question is, how can this be done? We answer this question below.
Sync Facebook Contacts to iPhone in iOS 12/13 Using Settings
Generally, Facebook will have a lot of your information including phone numbers, addresses, birthdays, etc. All you need to do to get this information from Facebook servers to your iPhone is sync them. This section will focus on helping you get contacts from Facebook.
Steps to Sync Facebook Contacts to iPhone (iOS12/13)
The simple steps we have outlined below will help you sync Facebook contacts to iPhone in iOS 12/13:
Step 1: If you have a new iPhone with no Facebook App, download it from the App Store and install it before proceeding.
Step 2: Launch the app and log in using your credentials.
Step 3: Launch Settings on the iPhone you wish to sync Facebook contacts to, scroll down and tap the Facebook App. You will be asked to sign in. use your FB email and password to sign in.
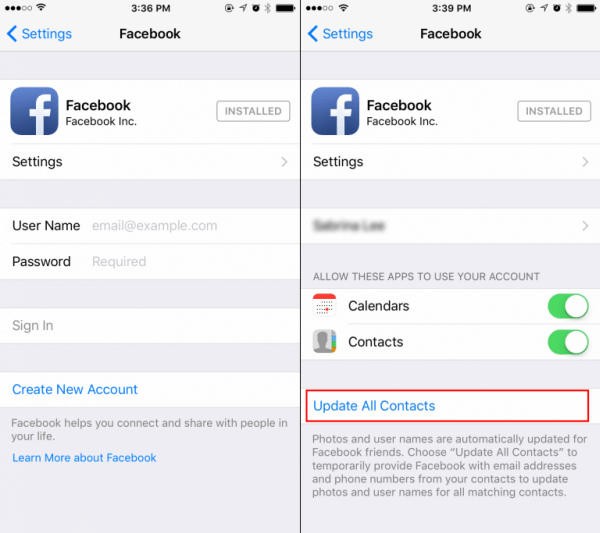
Step 4: After signing in, toggle on Contacts and Calendars in the Facebook screen.
Step 5: Below the Contacts and Calendars options, you will find the "Update All Contacts" option. Tap this option to sync Facebook contacts to iPhone.
Bonus: How to Sync Media Files To Your New iPhone?
It is not always that you will want to sync Facebook contacts to iPhone. Sometimes you may have media files on your PC/iTunes that you would like to sync to your iPhone. Apple made it extremely difficult to transfer files from your iTunes/computer to your iPhone. Also, using iTunes to sync the data will erase your old iPhone data. However, there is a tool you can use to make things much simpler. The tool is iMyFone TunesMate. The features this app has to offer include:
- Transfer all your files without the need to open iTunes.
- It transfers both non-purchased and purchased music.
- You can transfer all media types including audiobooks, music, photos, ringtones, playlists, podcasts, etc.
- The tool offers a two-way transfer: with a single click, you get to transfer all your media from your iOS device to iTunes/computer and vice verse.
- While using iMyFone TunesMate to sync your data, your previous data will not be overwritten. (When using iTunes to sync, your previous data will be overwritten by the synced data and hence erased completely.)
How to Sync Media from iTunes to iPhone without Erasing Current Data
iMyFone TunesMate is not complicated to use. Below, we show you how to sync the media you have on iTunes to your iOS device without erasing the current data you have on your iPhone/iPad/iPod Touch:
Step 1: Launch iMyFone TunesMate, then connect your iOS device to the PC using a USB cable.
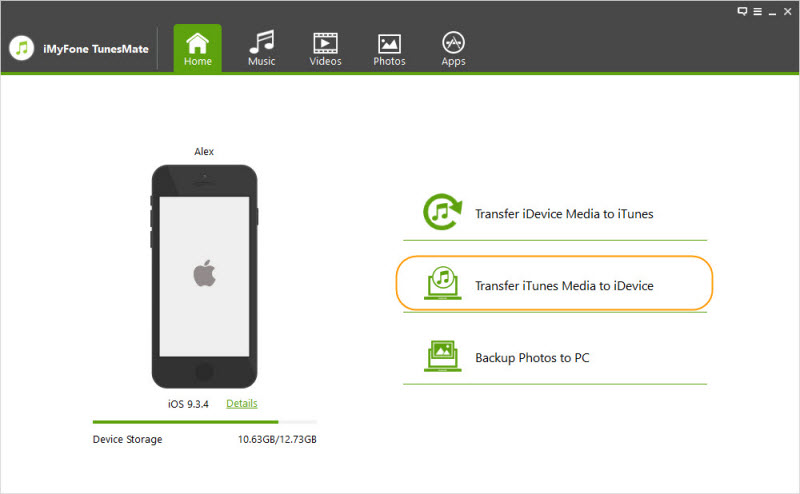
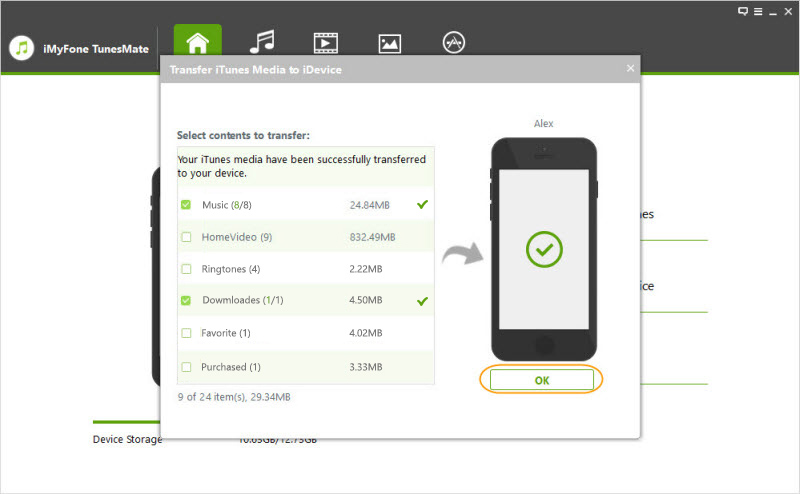
Step 2: Tap the “Transfer iTunes Media to iDevice” option. This is the second option on the TunesMate home interface. Tunesmate will scan the media files available in the iTunes Library and display them.
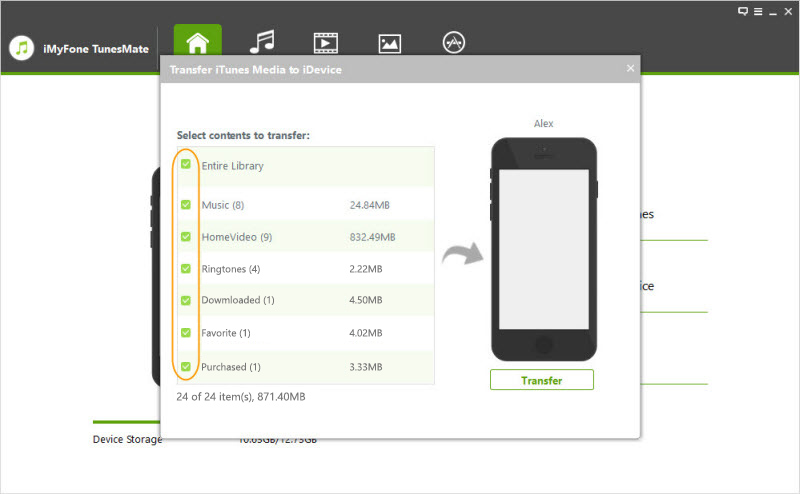
Step 3: If you wish to transfer all the Media files available on iTunes to the device, you can leave everything checked and just click Transfer. Also, you can check specific media files to transfer and then tap Transfer. Click OK to complete the transfer.


 June 21, 2021

