You may want to transfer videos from iPhone to iTunes to have a large video collection. Or you may downloaded a video online and you want to keep it permanently on iTunes or share with your other devices. Do you really know how to make it? Using iTunes? No! iTunes is not a friednly tool. Just follow to figure it out.
How to Transfer Videos from iPhone to iTunes
1 Transfer Videos from iPhone to iTunes Directly - 1-Click for Mac/PC
iMyFone TunesMate is a transfer software that makes transferring videos to and from your iPhone extremely easy. As a perfect iTunes alternative, it’s much easier than using iTunes, and a lot less restrictive.
- You can transfer all kinds of videos from iPhone to iTunes, including movies, home videos, music videos, TV shows, iTunes U, podcasts, etc.
- You can also transfer videos from iPhone Photos app.
- It supports purchased or non-purchased videos.
It's suggested to try its free trial and follow below to transfer video from iPhone to iTunes.
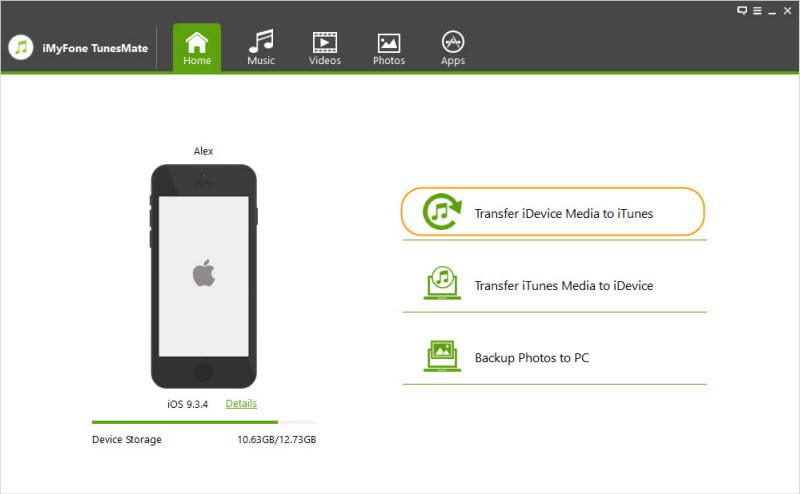
Step 1: Download iMyFone iTunesMate and run it. Plug your iPhone in via USB.
Step 2: On the “Home” tab, click on “Transfer iDevice Media to iTunes”. Click “Start” and it will start scanning for files.
Step 3: Make sure that the the video types you want to transfer are checked, then click “Start” again and it will transfer your videos. Finally, click “OK” when it’s done.

With this, all the videos on your iPhone will be transferred to iTunes.
Note
- If you want to selectively transfer iPhone videos to iTunes, just go to the "Videos" tab at the top and select videos to transfer.
- If you want to transfer video from iPhone Photos app, just go to "Photos" tab and find the "Video" album.
Apart from videos, you can also transfer music from iPhone to computer/iTunes, or sync computer/iTunes music to iPhone without erasing. You can even merge different iTunes libraries. TunesMate attempts to help you share the media you have with others.
2 Transfer iPhone Videos to iTunes with PC Default Tool
Of course, you can also use computer's default tool to transfer videos from iPhone to iTunes. But note that, it's only suitable for videos in your iPhone Photos app.
Step 1: Transfer iPhone Videos to Computer
- Connect your iPhone to your Mac with the USB cable.
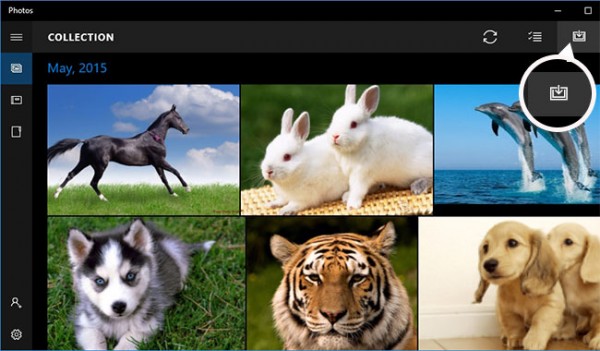
- Open the Photos application.
- In the application, click where it says “Photos”, then click where it says “preferences”.
- Check the box next to where it says “iCloud Photo Library”.
- This will sync your computer and your iPhone. Once your Mac and your iPhone are done syncing, your videos should be on your Mac.

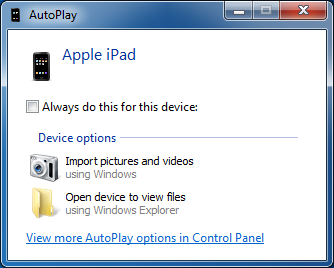
- Connect your iPhone to your PC with a USB cable.
- AutoPlay should pop up automatically. When it does, click on “Import pictures and video”.
- Click “Import settings” and then “browse” to choose a folder for the destination.
- Click “OK”, and your files will then be on your PC.

Step 2: Add Videos from Computer to iTunes
Now that you’ve transferred your videos to your computer, you can transfer these videos to iTunes as the final step.
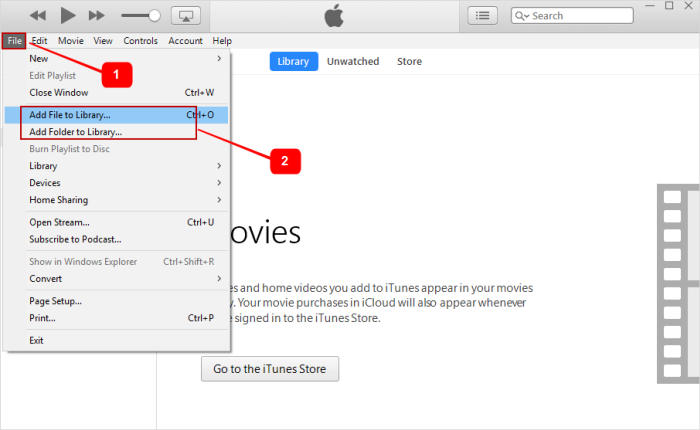
- Launch iTunes.
- Go to “File”, then “Add File to Library”.
- Browse for your video, pick which one you want, then click “Open”. Now the video should show up in your iTunes library.

This is much more complicated to transfer iPhone video to iTunes. Instead of going through all of this, you can easily just give TunesMate a free trial and do it all in one step. You save yourself a huge hassle, and you can also easily transfer your files back and forth between your iPhone and computer/iTunes.


 September 14, 2021