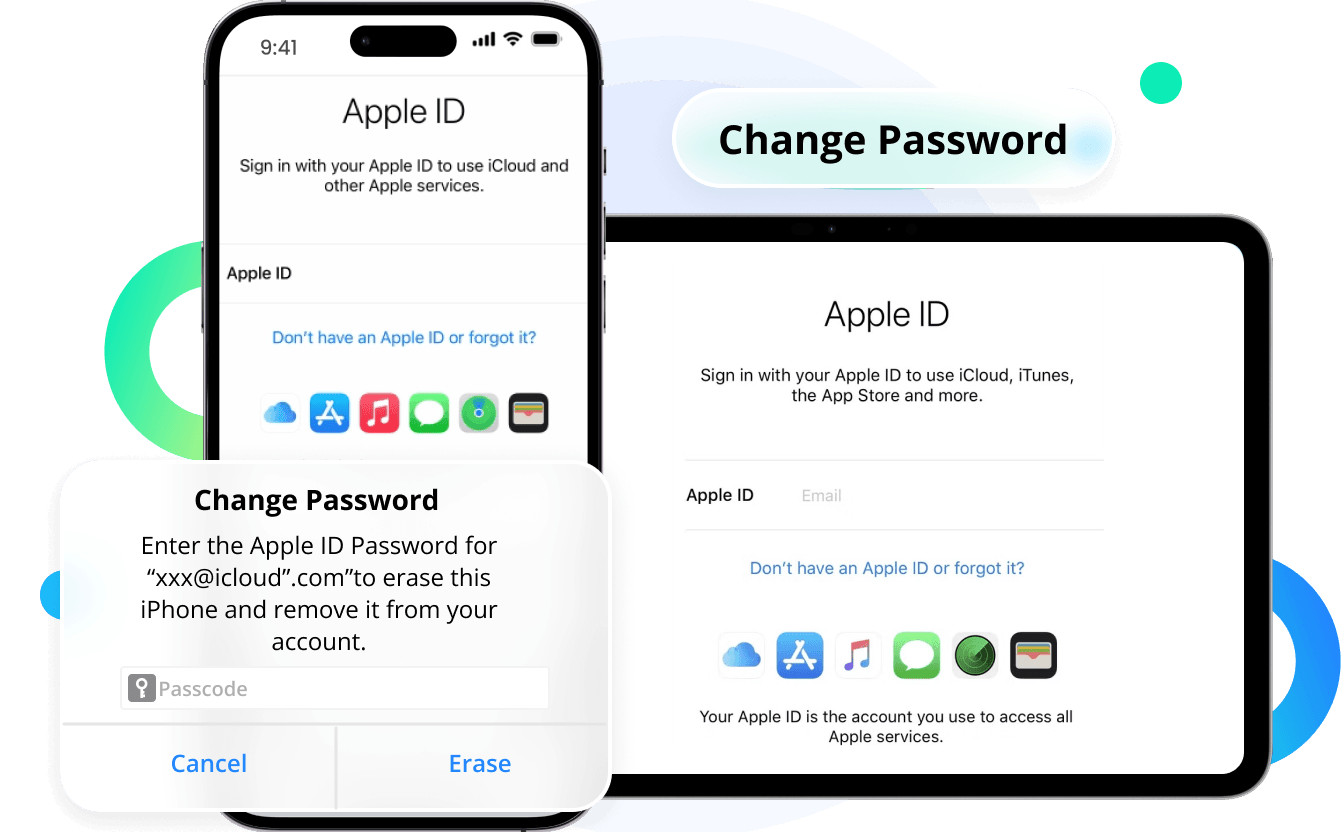


iPhone& iPad Apple ID Removal without Password
Forgot your Apple ID and it got locked or disabled? Need to unlock the Apple ID lock from a second-hand iPhone? iMyFone LockWiper enables you to remove previous Apple ID account, even though the Find My iPhone feature is enabled, and you can log into a new one, and get full access to all iCloud services and Apple ID features.
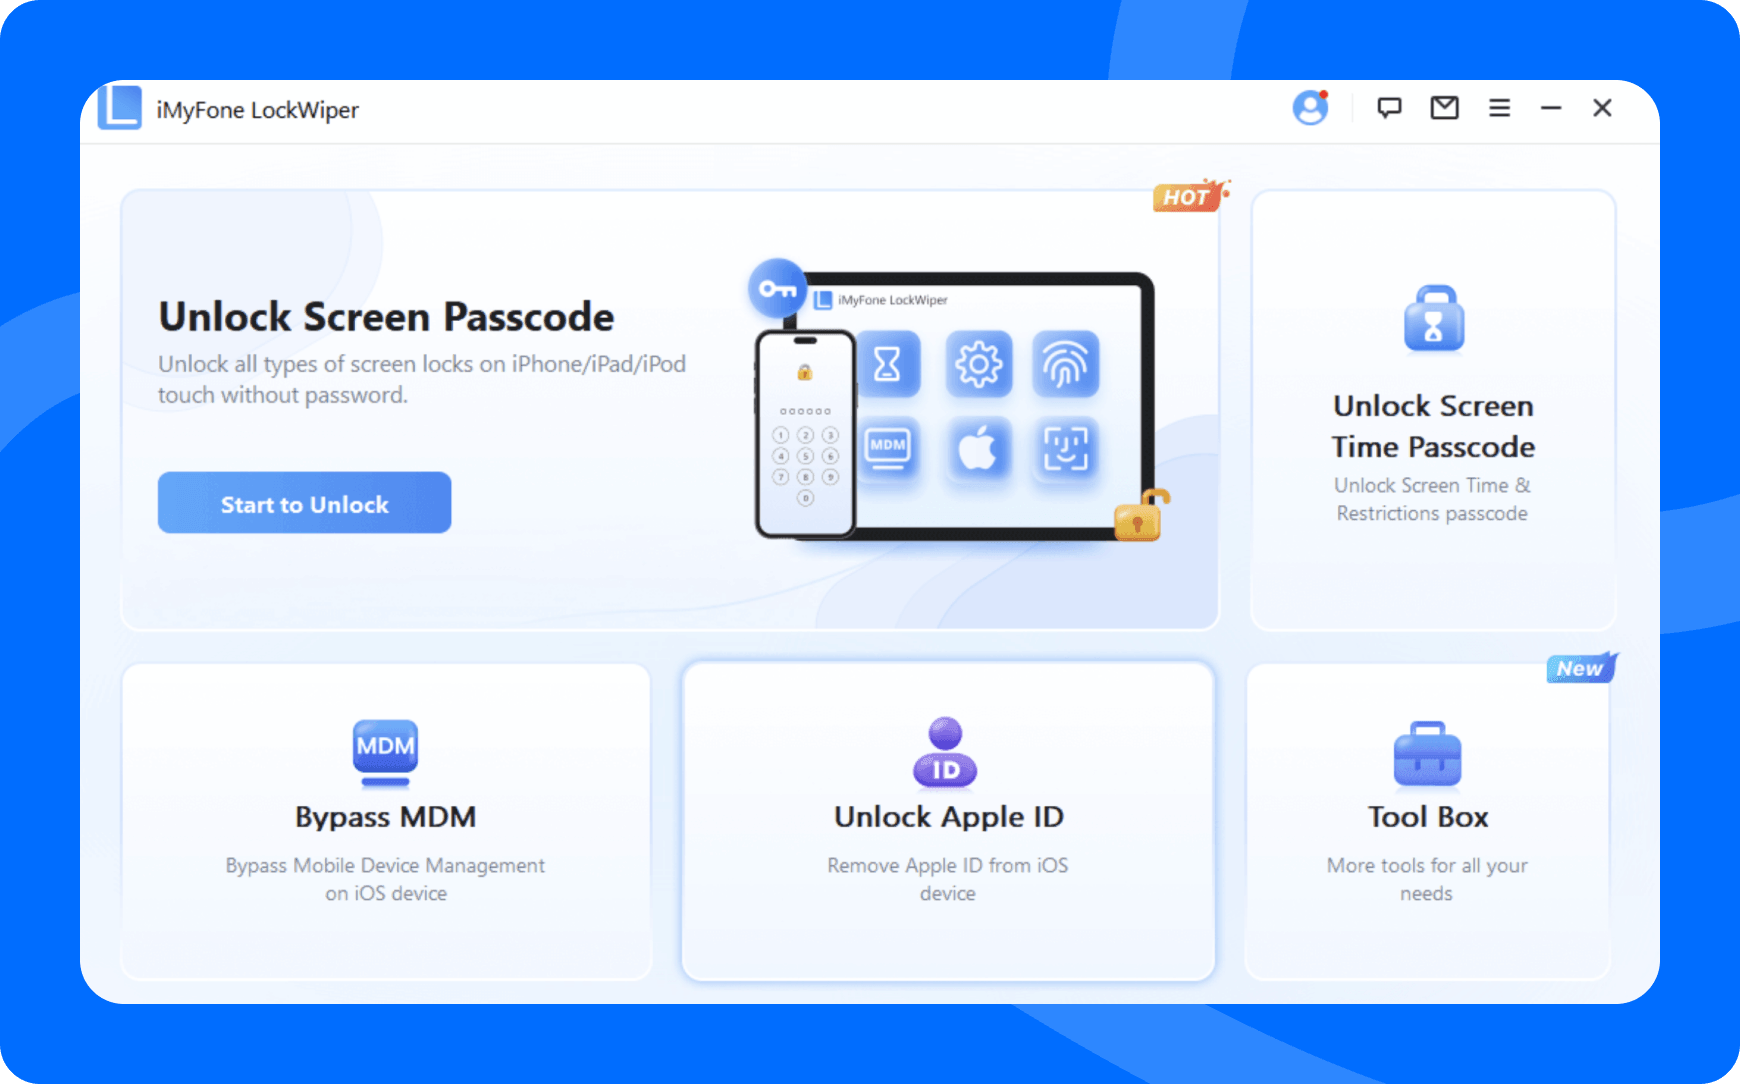
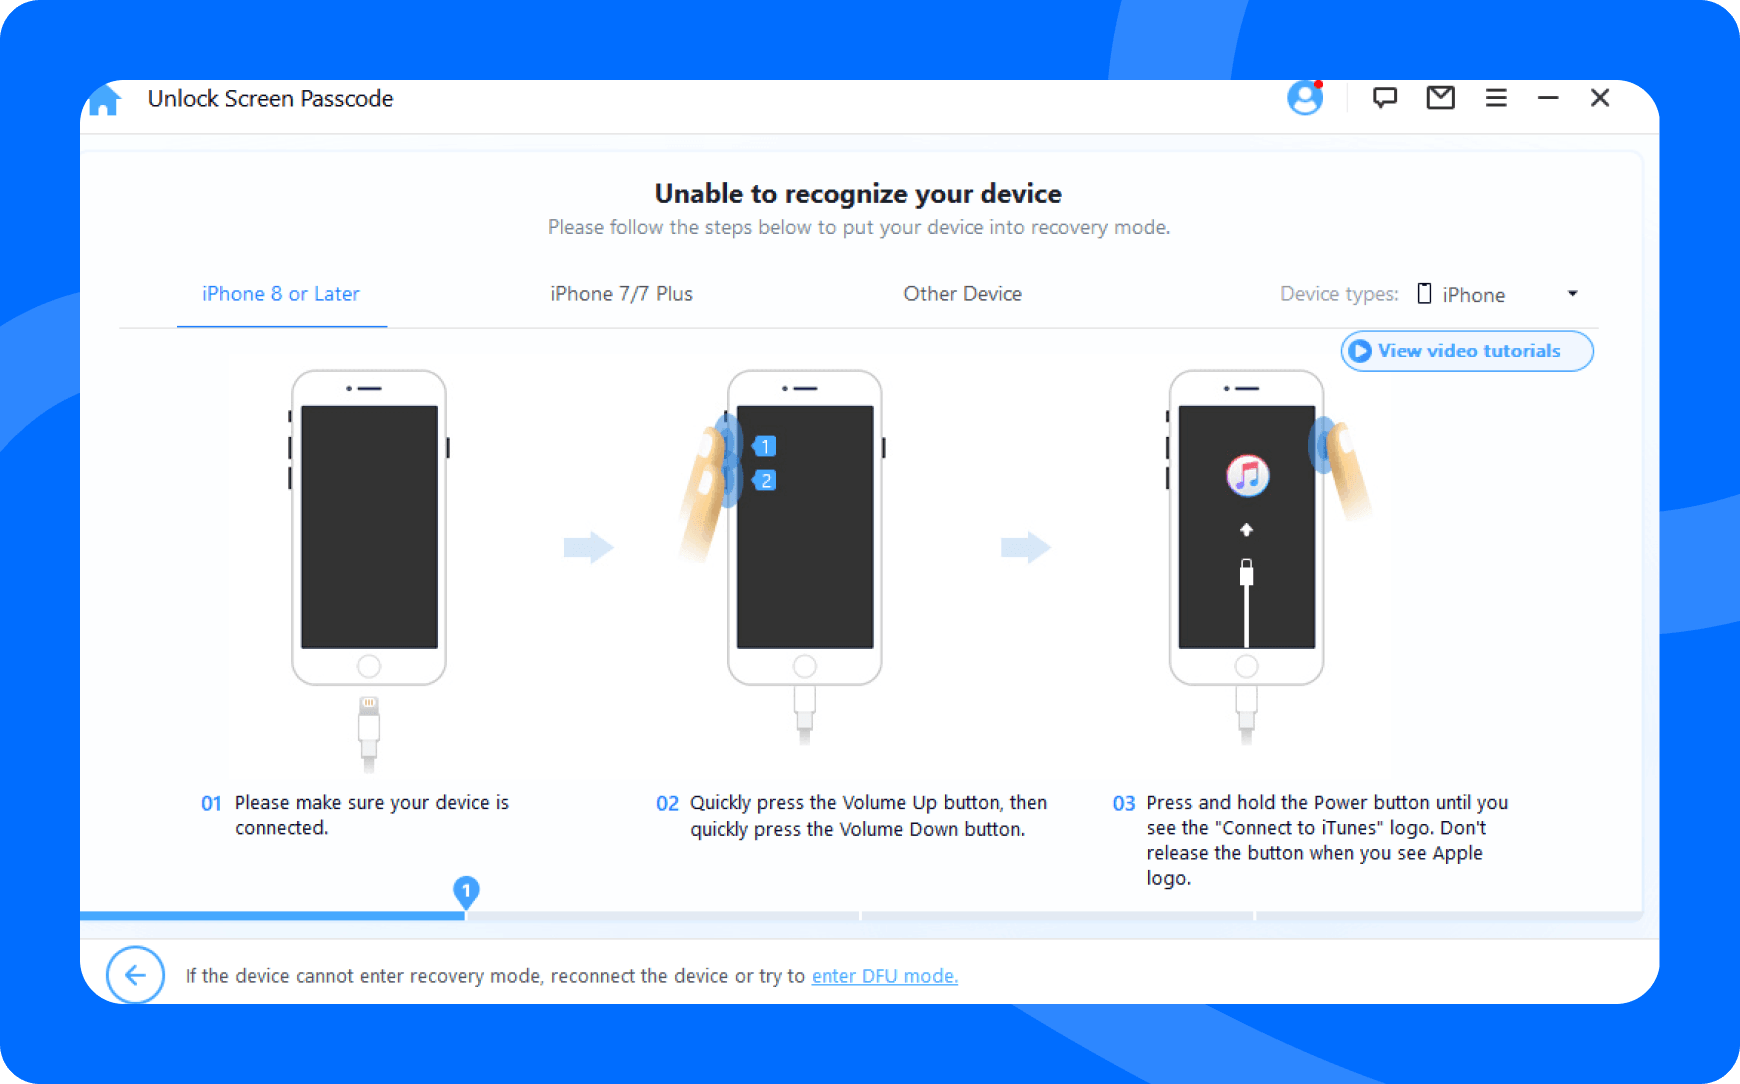
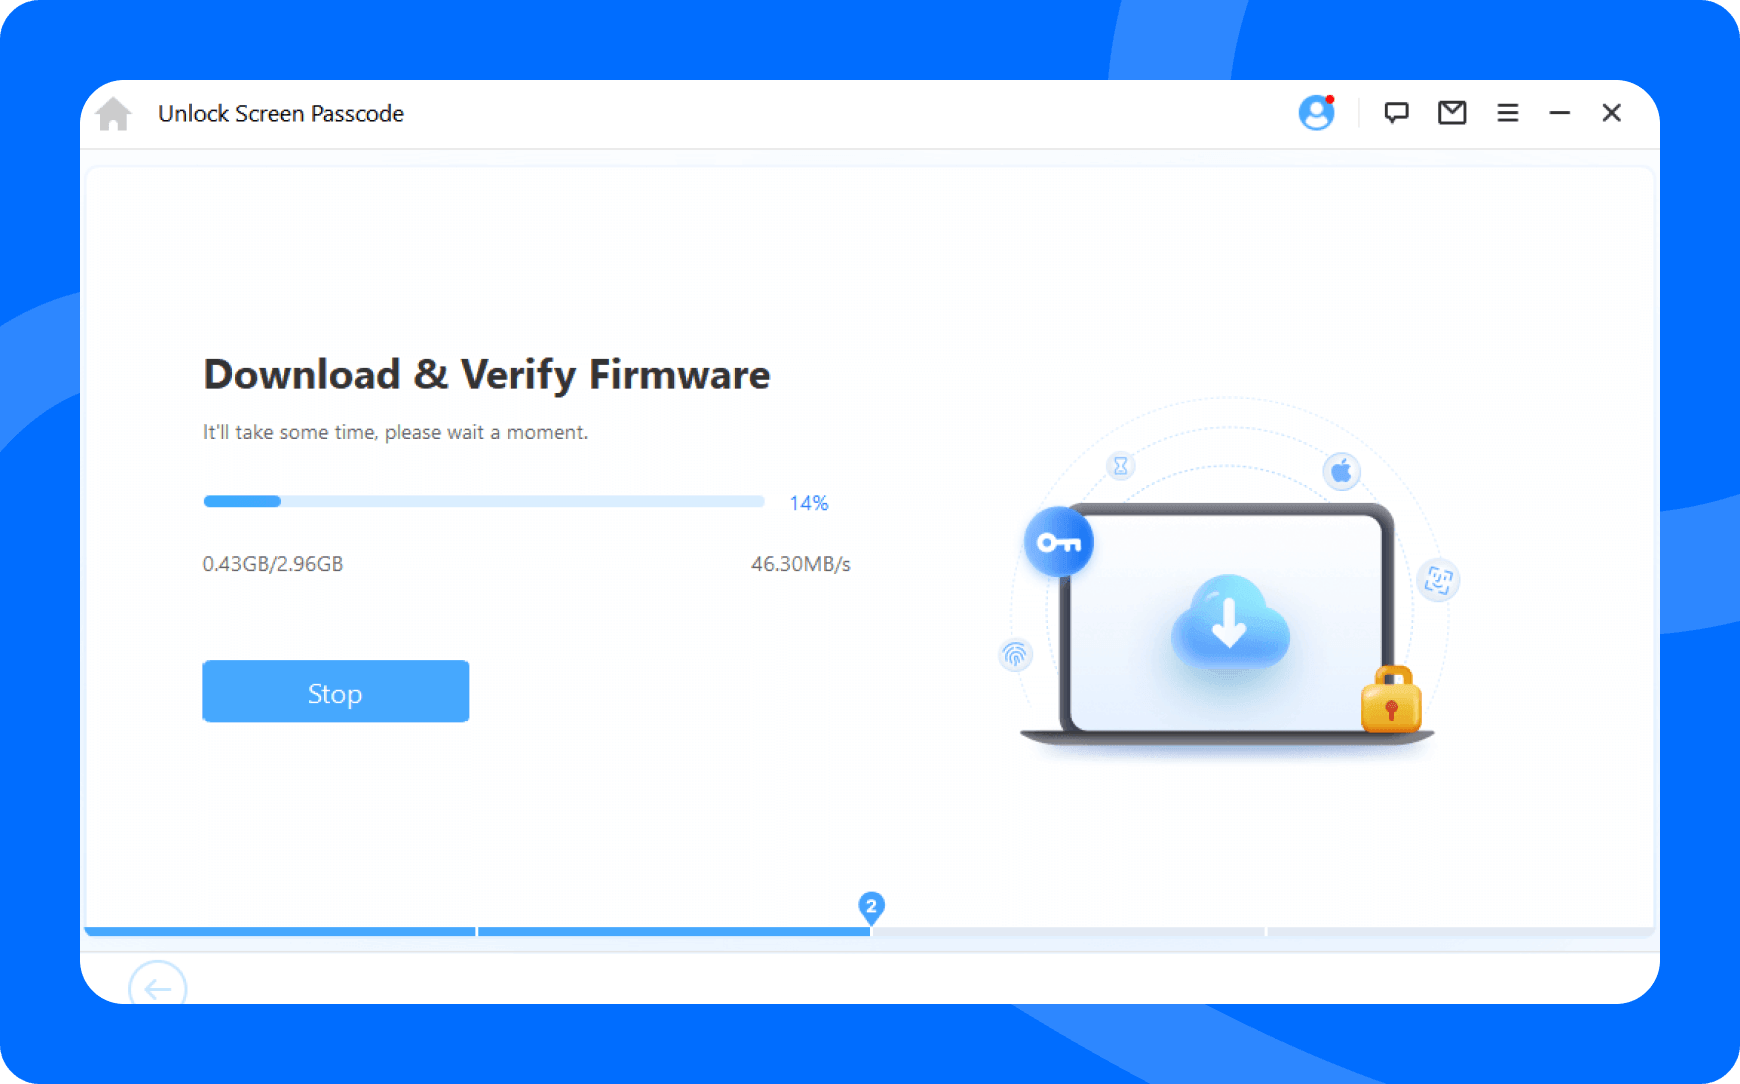
- Find My iPhone (FMI) Off: LockWiper removes the Apple ID directly for all iOS devices and versions.
- FMI On (iOS 11.4 and before): Users are required to manually erase all settings.
- FMI On (iOS 11.4 and later): LockWiper will remove Apple ID with a passcode and Two-Factor Authentication required.