iTunes is used by majority of iOS users to sync and manage iPhone media files on computer. However, this software is not perfect and hence users may experience certain bugs and errors from time to time. Once of those issues is "iTunes can't verify the identity of the server". This error prevents you from accessing iTunes Store.
- Part 1: Servers on Which This Error May Happen
- Part 2: How to Fix This Issue
Servers on Which This Error May Happen
This error may occur when you launch iTunes after updating or sometimes when you try to access iTunes Store for updating your apps. The error message specifies the server it cannot identify. There are many servers that it can try to access but can't identify.
Following are some of those:
- iTunes can't verify the identity of the server "upp.itunes.apple.com".
- iTunes can't verify the identity of the server "init.itunes.apple.com".
- iTunes can't verify the identity of the server "ax.itunes.apple.com".
- iTunes can't verify the identity of the server "se2.itunes.apple.com".
- iTunes can't verify the identity of the server "safebrowsing.client.google.com".
- iTunes can't verify the identity of the server "pd-st.itunes.apple.com".

How to Fix "iTunes can't verify the identity of the server" Issue
There are multiple solutions that you can try in order to fix this issue.
1. Fix "iTunes can't verify the identity of the server" Issue on Windows PC
Method 1. Fix it with One Click
Many people are extremely urgent to fix this iTunes issues, however, they don't know what they can do when they meet such an situation. Here we can tell you that what you need to do is simple - download iMyFone TunesFix which is a effective tool to fix all kind of iTunes errors with one click.
Key Features:
- Automatically detects iTunes issues and allows you to fix them with one click.
- All iTunes problems can be fixed via this software including install/connect/restore/backup and other issues.
- It is safe to use and does not delete your valuable iTunes data while attempting the fixes.
- It allows you to clear iTunes to free up and boost your computer.
Steps to Fix This Issue "iTunes can't verify the identity of the server" Issue
Step 1. Launch iMyFone TunesFix at your Windows PC.
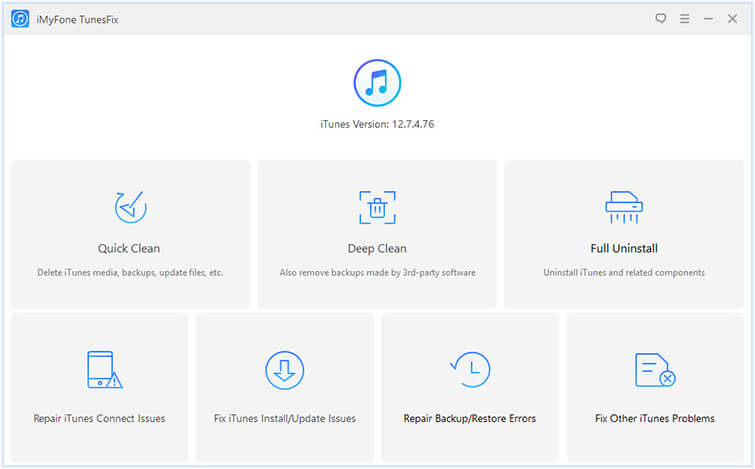
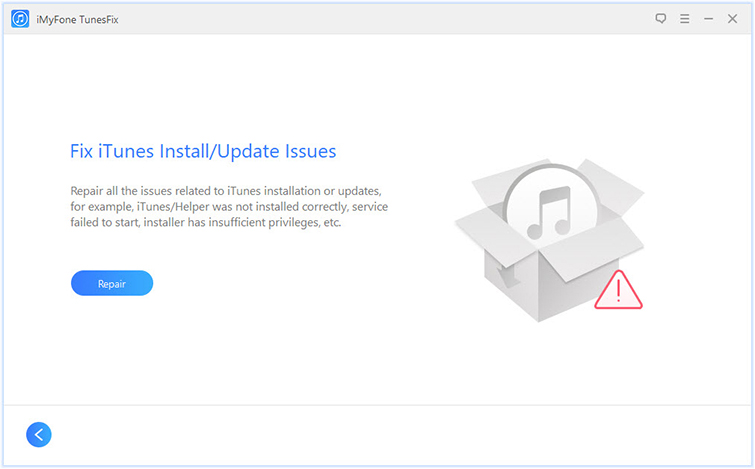
Step 2. Choose the Fix iTunes Install/Update Issues function. And then click on Repair button.
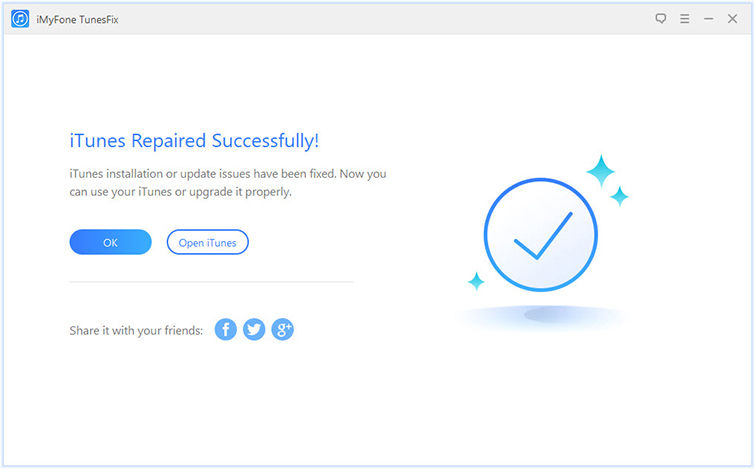
Step 3. After several minutes, the issue will be solved. Then click on Open iTunes button to use your iTunes as normal.
Method 2. Make Sure That System Time Zone Matches with Your Location
This is the most common fix for "iTunes can't verify the identity of the server" issue. The process to apply this fix is also pretty simple.
Follow these instructions:
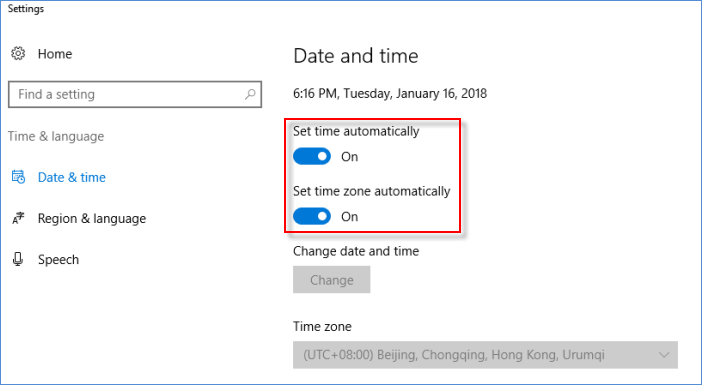
- On your computer, navigate to System Preferences > Date & Time from the menu bar.
- Now select the Time Zone tab in the preference pane and make sure that the time zone shown there matches your location.
- Also check the date and time in the Date & Time tab and correct them if they are not already.
- Find and check/tick box that says 'Set time automatically' and 'Set time zone automatically'.
2. Fix "iTunes can't verify the identify of the server" on Mac
Fix Via Keychain Access Application
This is the most technical solution to "iTunes can't verify the identity of the server" problem. While it may seem complicated, the process to fix the issue via Keychain Access application is fairly straightforward. Follow these instructions:
Step 1: From the menu bar, launch the Keychain Access application in the Finder.
Step 2: Once the application interface appears, navigate to Keychains option located in the upper left corner of the window.
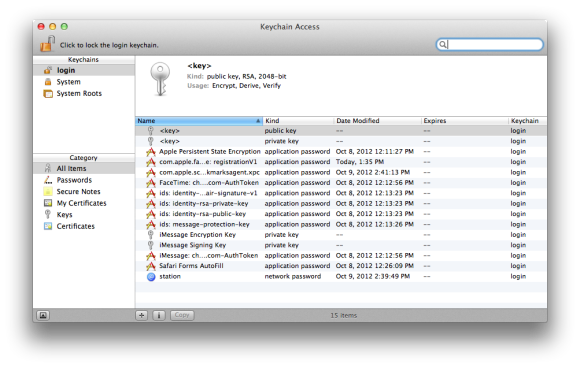
Step 3: In the list, you will see System and System Roots items. If they are not available, then add the following lines from menu bar via File > Add Keychain option:
- /Library/Keychains/System.keychain
- /System/Library/Keychains/SystemRootCertificates.keychain
Step 4: Now use the Category list option in the lower left corner and choose Certificates. Check the list of certificates and see if any of them has a red "X" in the icon or a white-and-blue plus sign. Double-click the ones that have such indications. An inspection window will open.
Step 5: Click Trust option to disclose the trust settings for the certificate.
Step 6: Now select 'When using this certificate: Use System Defaults' by opening the same inspection window again.
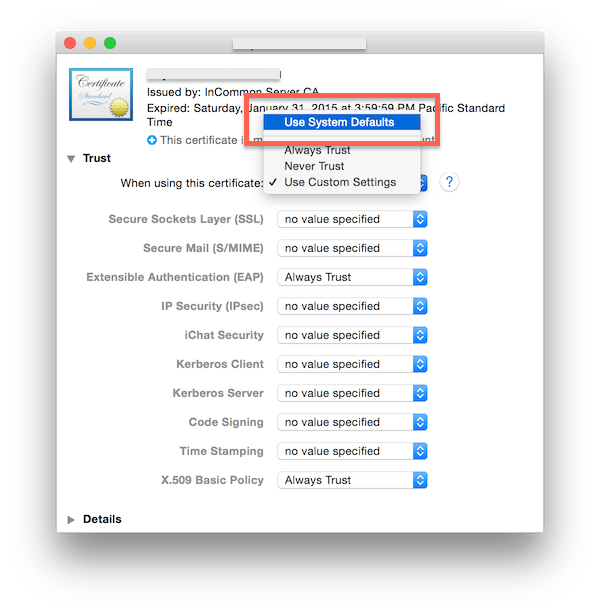
Step 7: Save the configuration in the same way as before.
Step 8: Restart your computer.
Fix "iTunes can't verify the identity of the server" Issue on Mac/PC
Clear iTunes Cache, Junk, Cookies and Logs
Errors like "iTunes can't verify the identity of the server" can also occur due to a corrupted iTunes Store cache. Therefore, it would be a good idea to clear the iTunes cache/junk/cookies/logs to fix the problem. You will need a tool to help you with this, here recommend iMyFone TunesFix:
- Download iMyFone TunesFix on your computer.
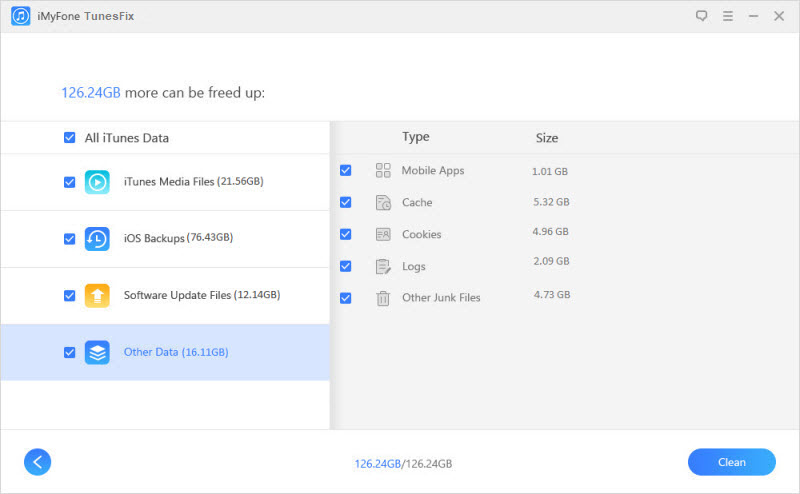
- Launch it and click on Quick Clean button, it will scan all the data on your iTunes including the cache & junk files.
- Select Other Data selection, you will see the iTunes Cache, Junk, Cookies and Logs.
- Check them and click on Clean button. Then your iTunes will work normally.
Launch iTunes in Safe Mode
Launch iTunes in Safe Mode and see if the problem still occurs. If everything works fine in Safe Mode, then it is likely that the "iTunes can't verify the identity of the server" issue is being caused by a plugin or third-party script. Fixing the problem will be easy after it is confirmed that the error does not occur in Safe Mode. Follow these instructions to launch iTunes in Safe Mode:
- Press and hold down the CTRL and Shift keys on your keyboard.
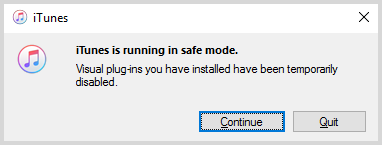
- Now launch iTunes by double-clicking its icon from desktop or from Start Menu. iTunes will display a message telling you that it is running in Safe Mode.
- Click on Continue button and iTunes will start in Safe Mode.


 June 28, 2021


